3D part design #156 : Step by step guide to converting an .stl file to a .step file with FreeCAD.

Being based on a CSG kernel OpenSCAD doesn't save .step files which are sometimes needed for exchanging files with other people and various other reasons, this isn't a limitation of OpenSCAD it is just not practical to re-write an entire kernel and it's not necessary because there are tools like Freecad that can convert an .stl file generated with OpenSCAD to a .step file with a macro in just a few seconds.
Here is a step by step guide on how to do this:
I am using the latest development build of OpenSCAD and FreeCAD 1.1.1



Step 1 > After FreeCAD is loaded make sure you are in the "Part" workbench
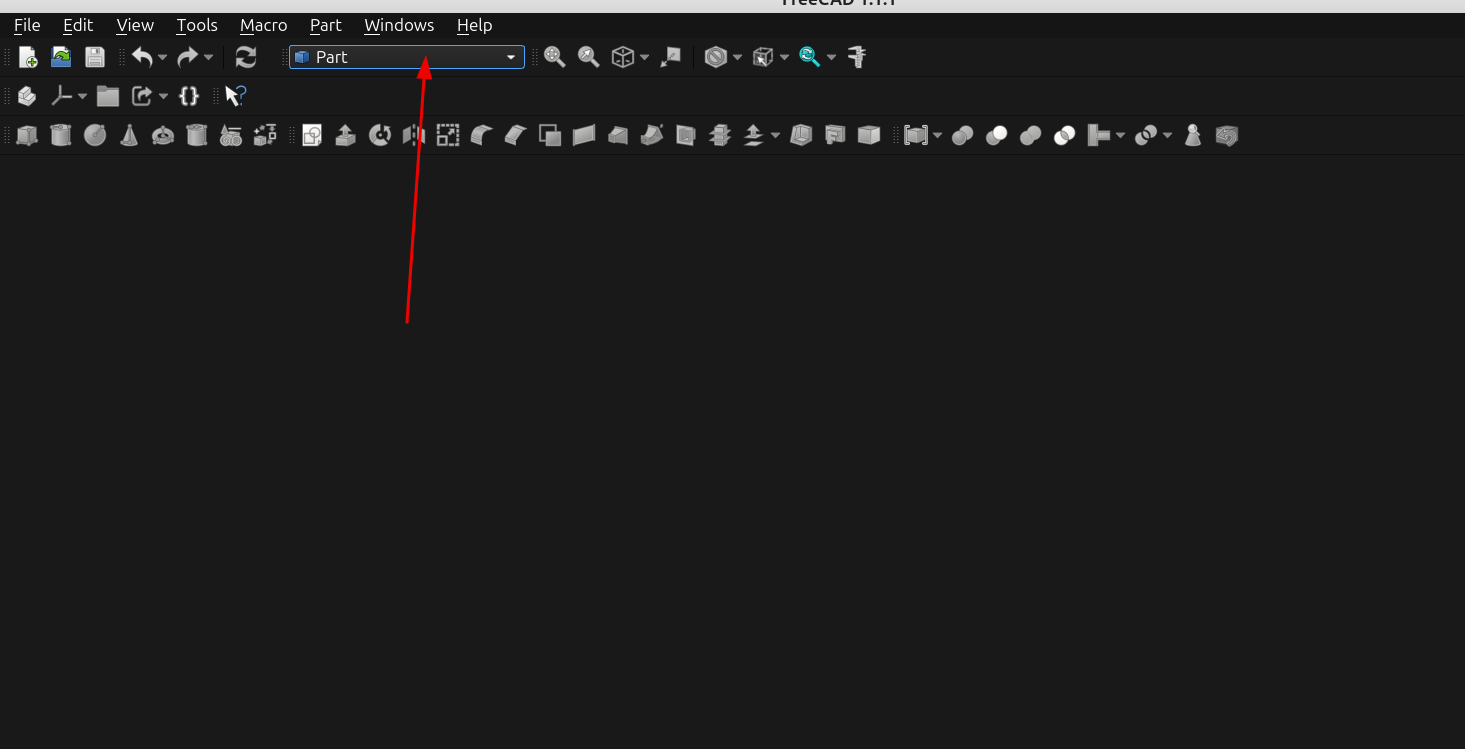
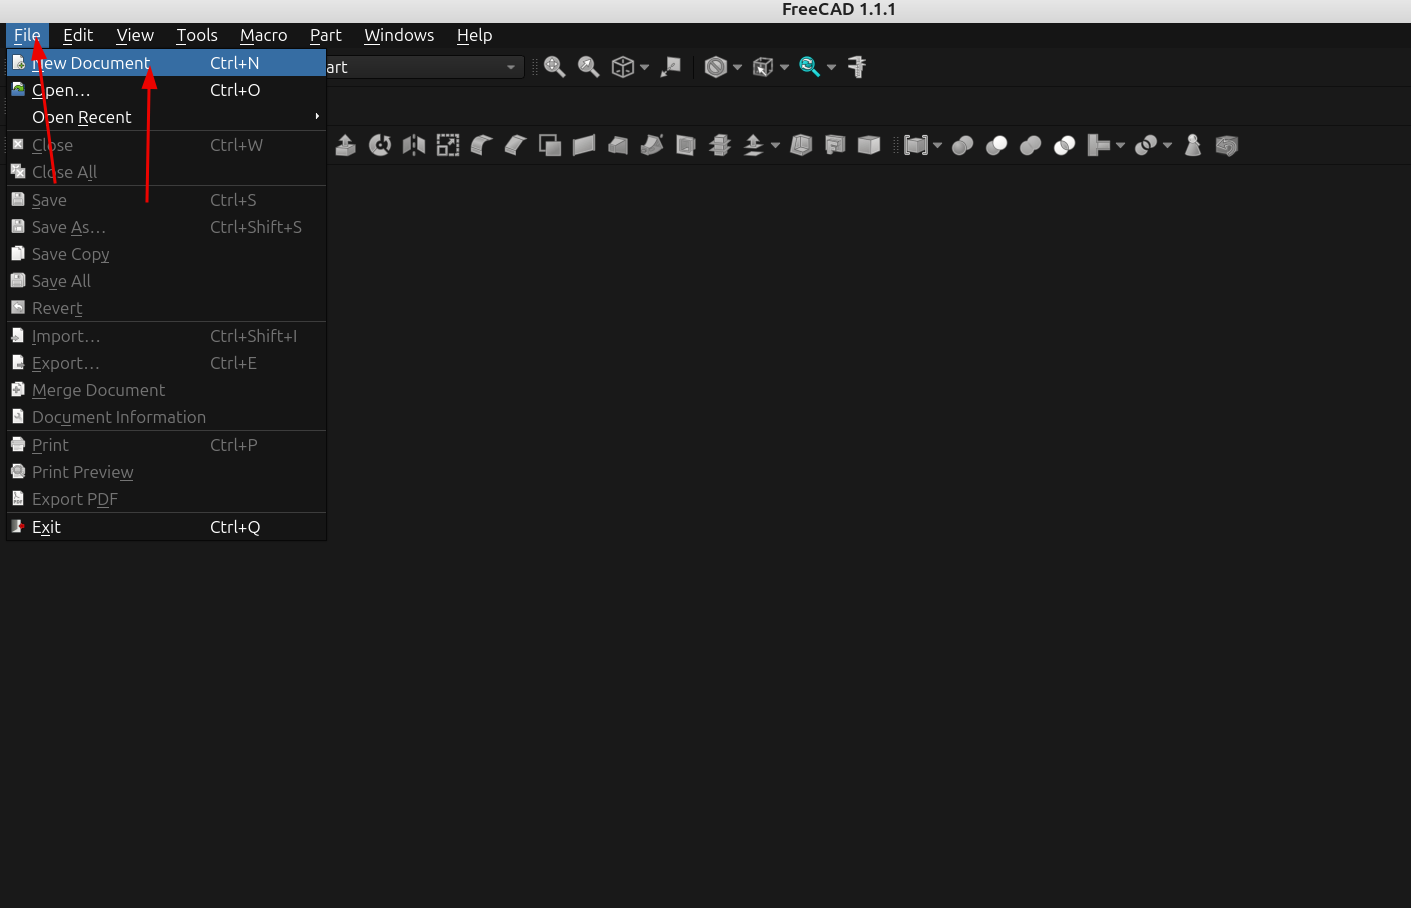
Step 2 > Go to File> Create new document:
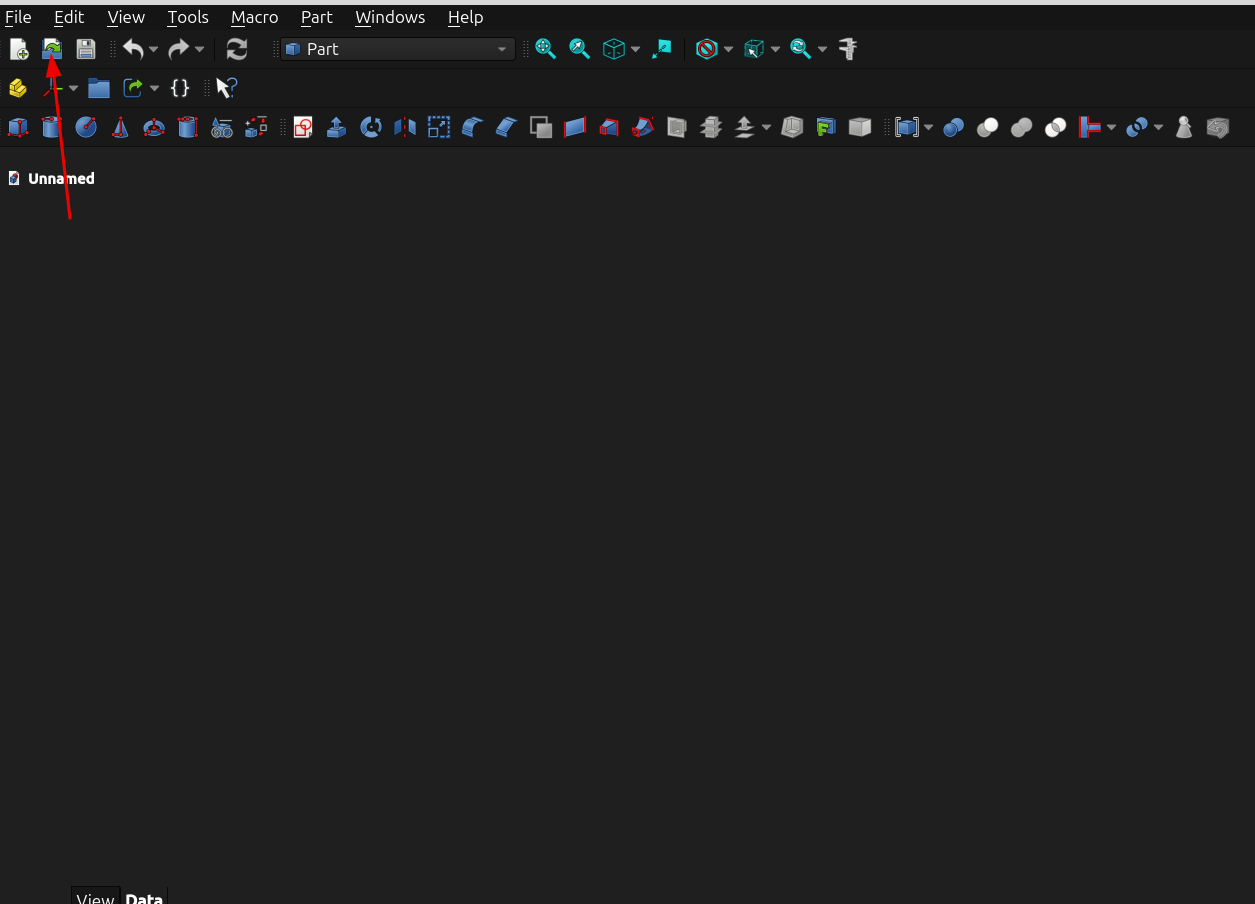
Step 3 > Click on the Open document icon and import the .stl file
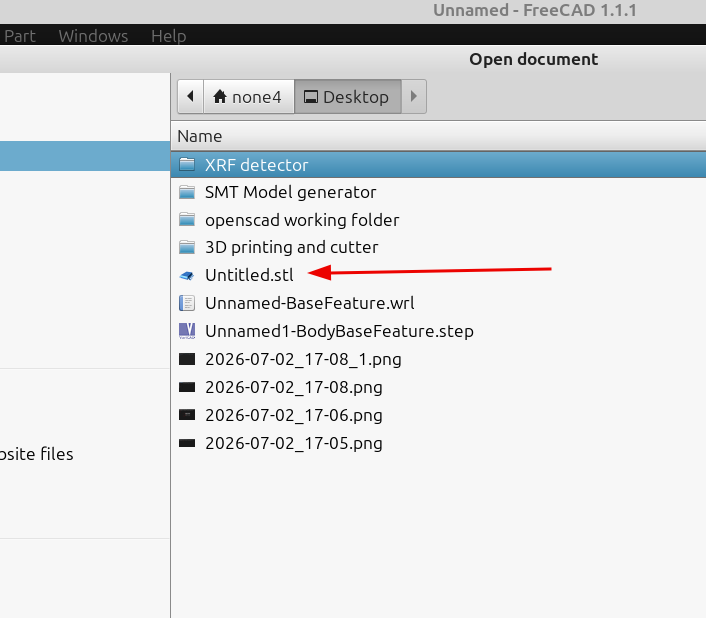
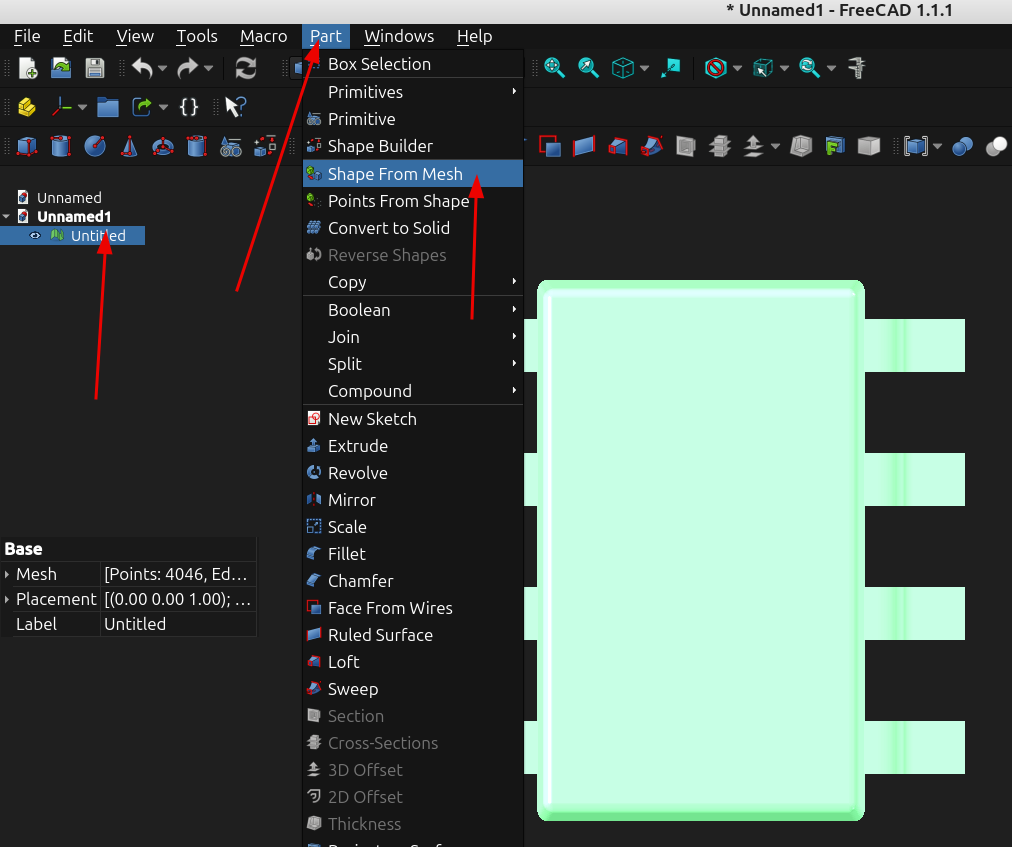
Step 4 > After the file loads select the object in the tree on the left hand side and it will highlight blue then go to Part> Shape from Mesh to convert it to a shape.
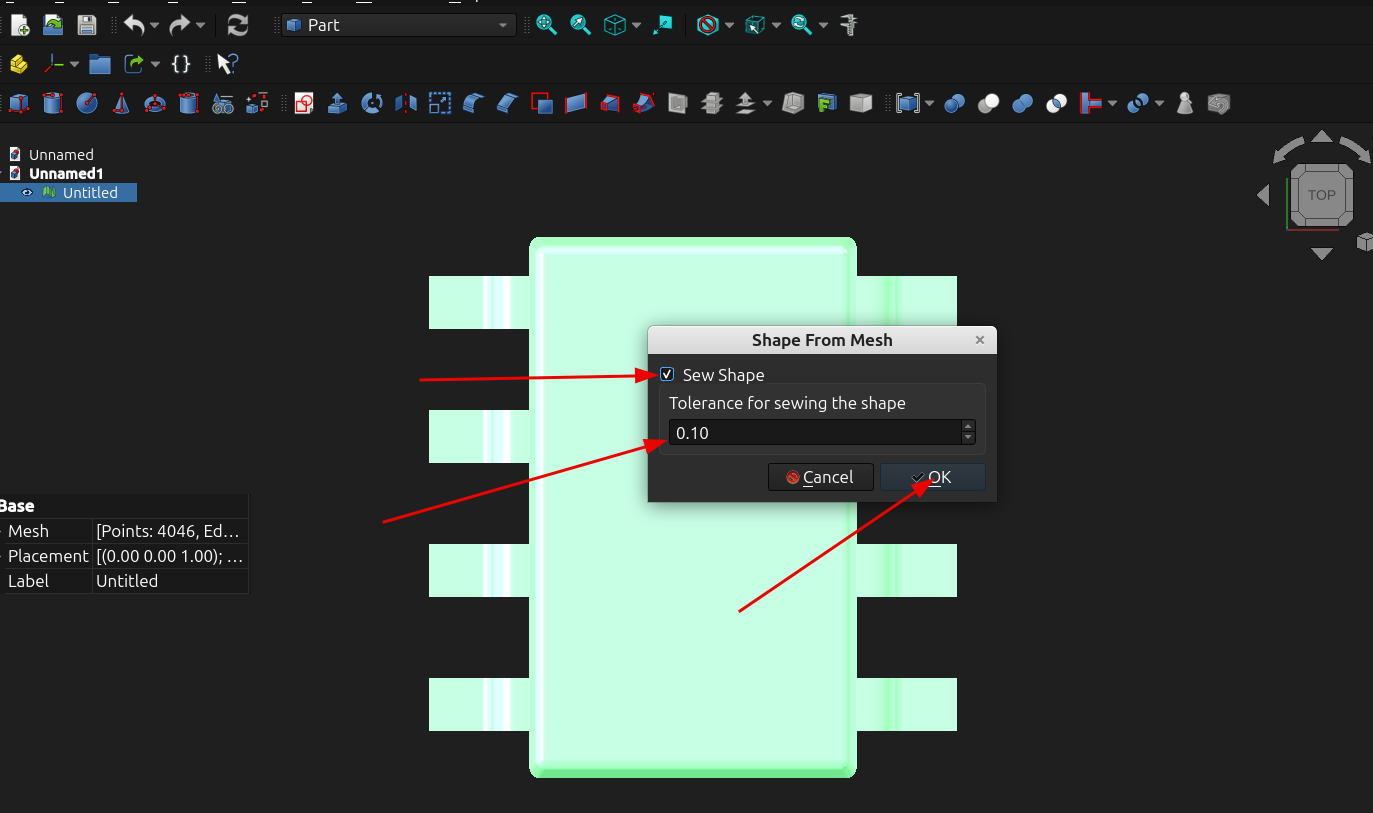
Step 5 > In the dialog that pops up click "sew shape" , set the tolerance to .10 and click ok.
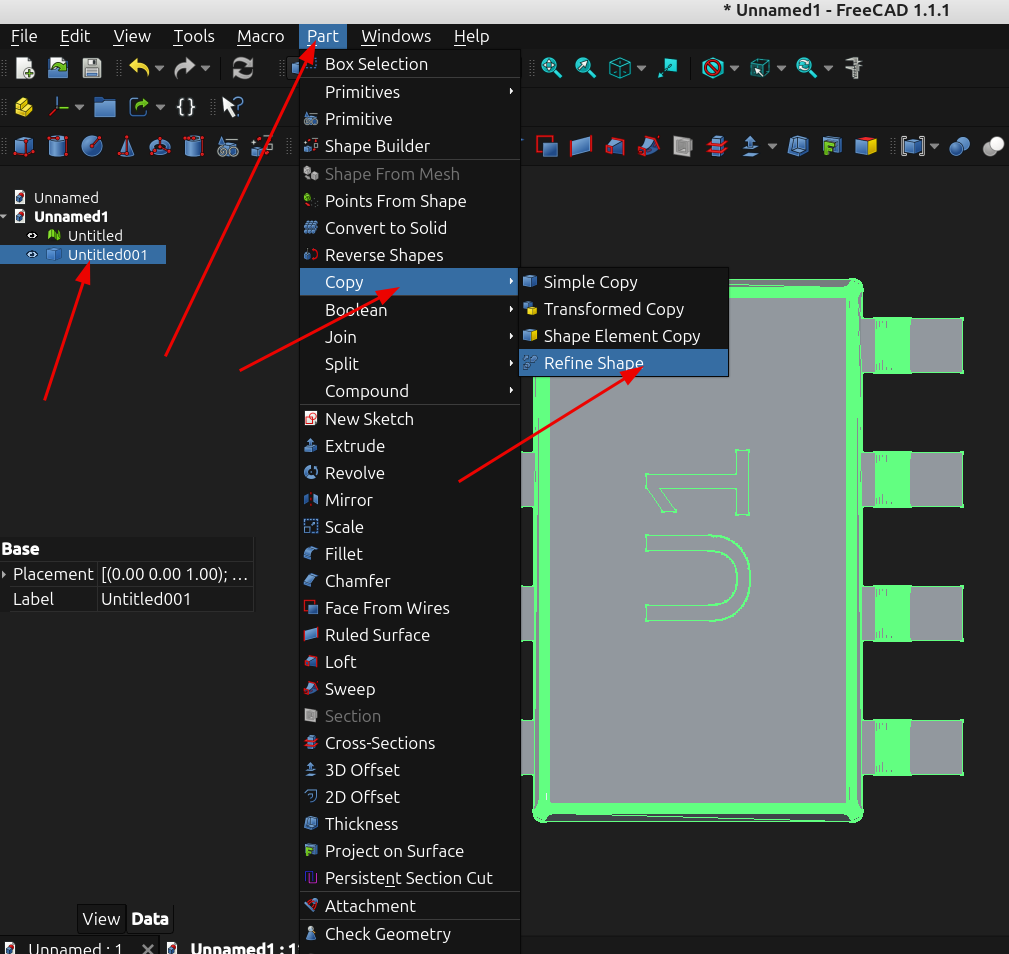
Step 6 >A new object will be created in the tree, make sure it is selected then go to Part>Copy>Refine Shape
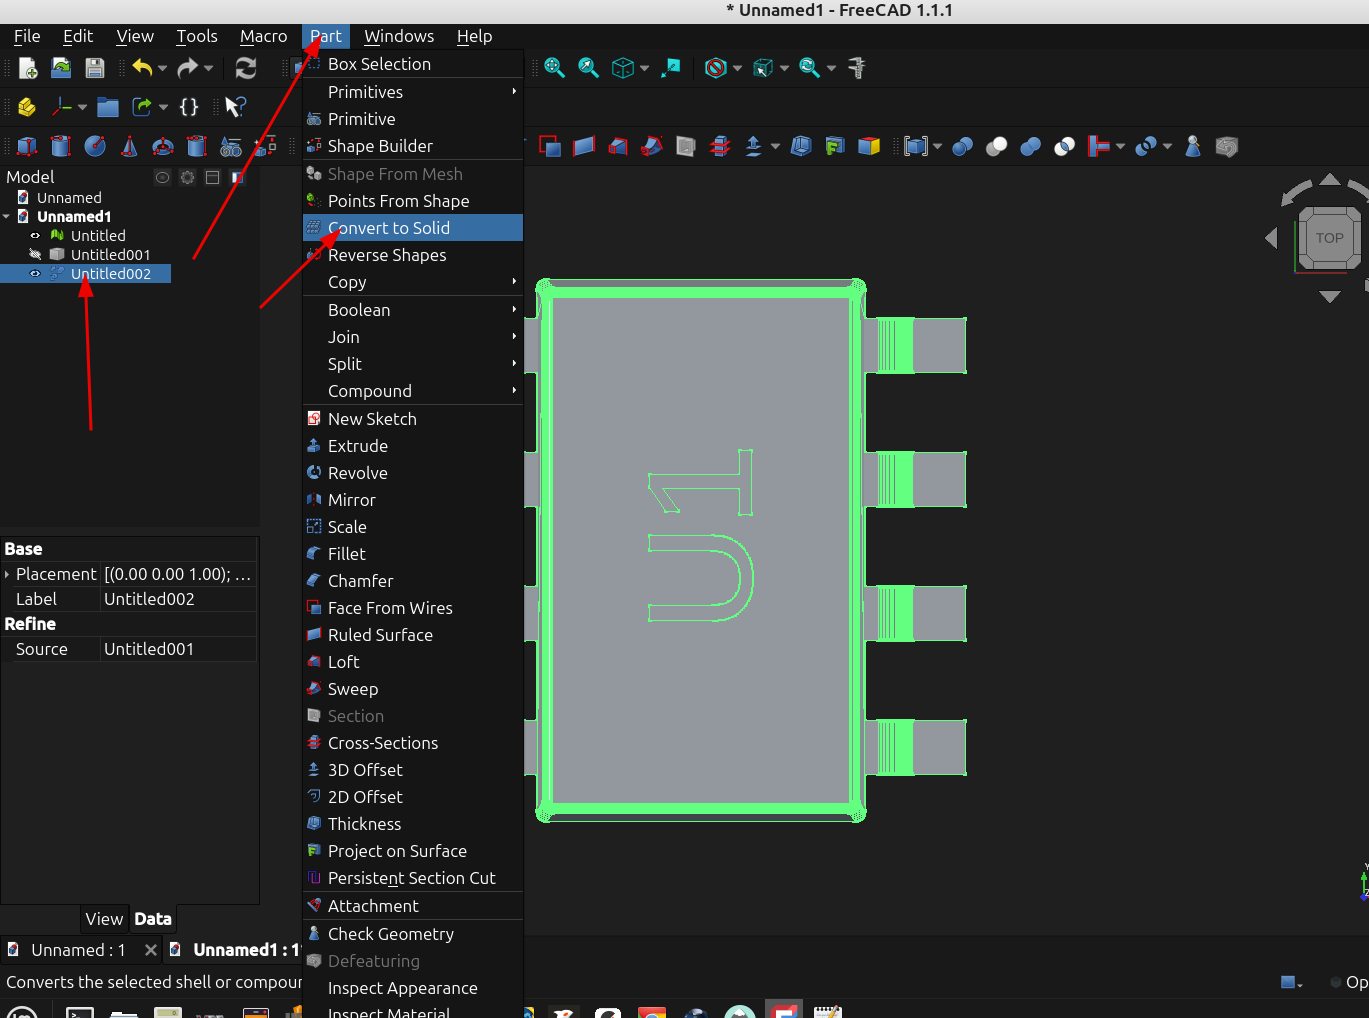
Step 7 > Another new object will be created in the tree, select it and go to Part>Convert to Solid
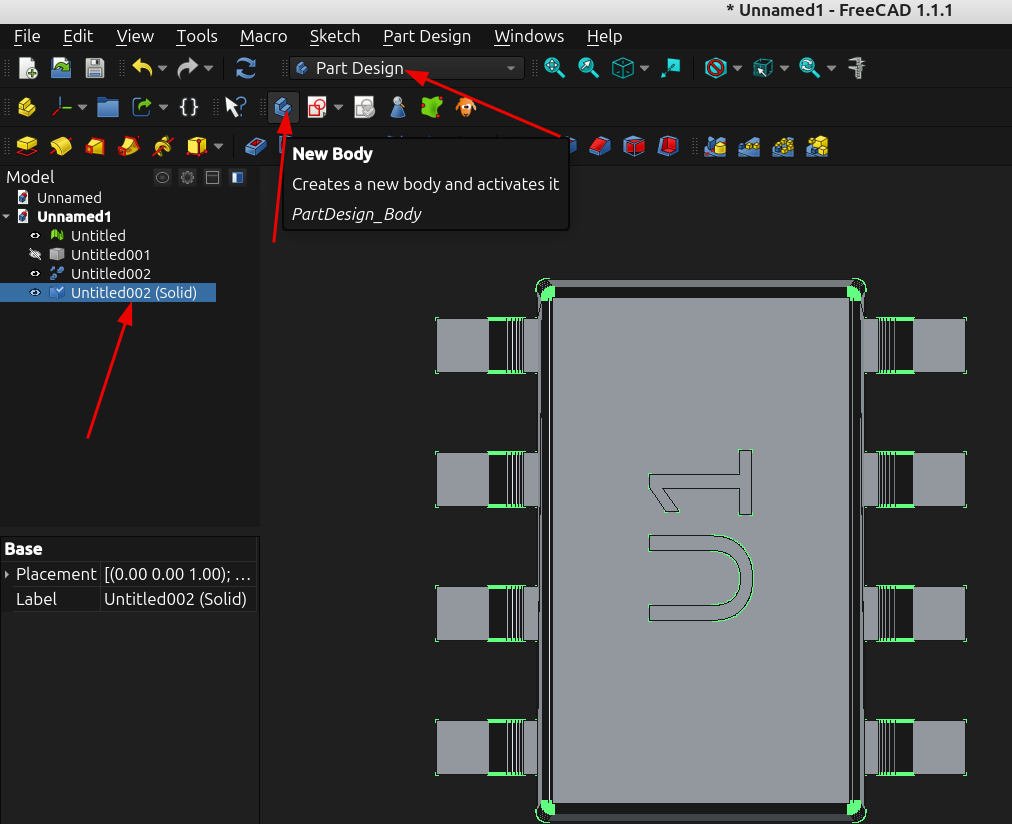
Step 8 >Another new object will be created in the tree, select it, change the work bench to the "Part Design" workbench and click on the new body Icon ( the blue steps icon):
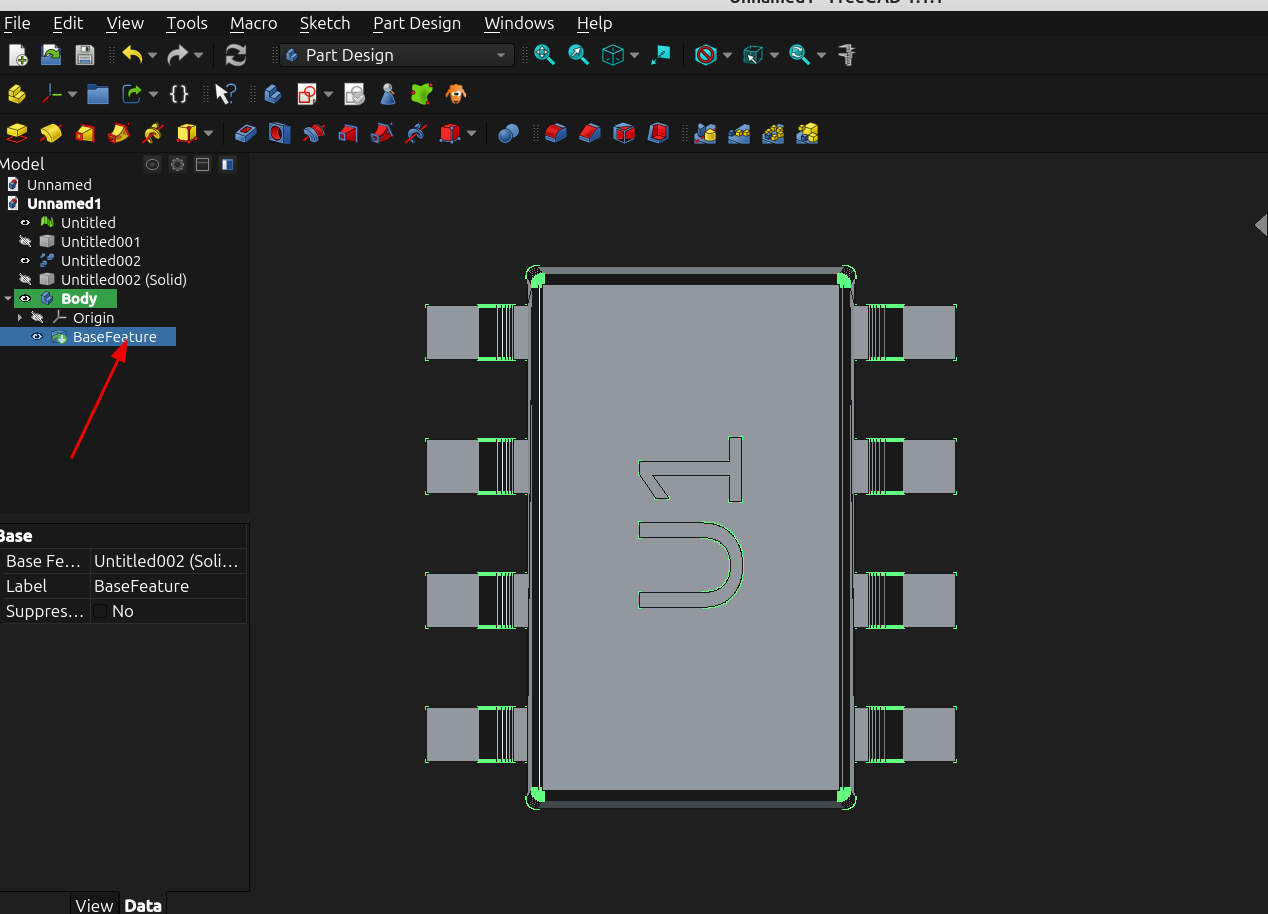
Step 9 > a new object will be created in the tree, select "BaseFeature":
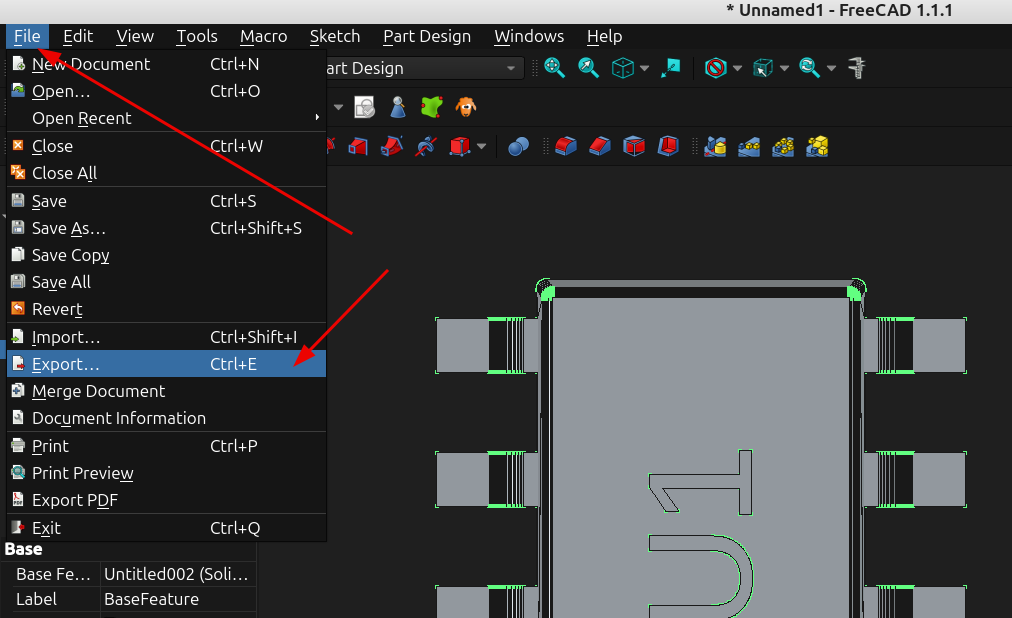
Step 10 > Then go to File>Export:
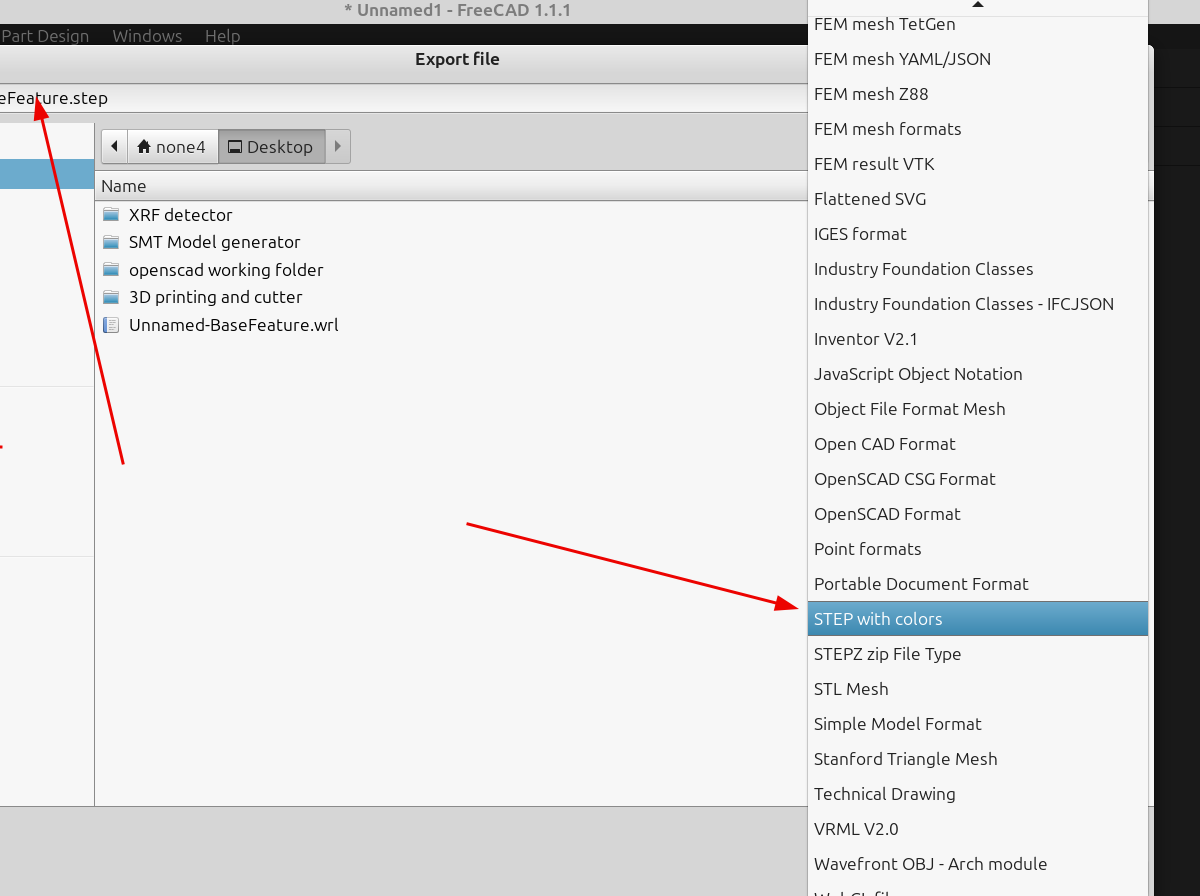
Step 11> Enter the file name and select "Step with colors" as the file type:
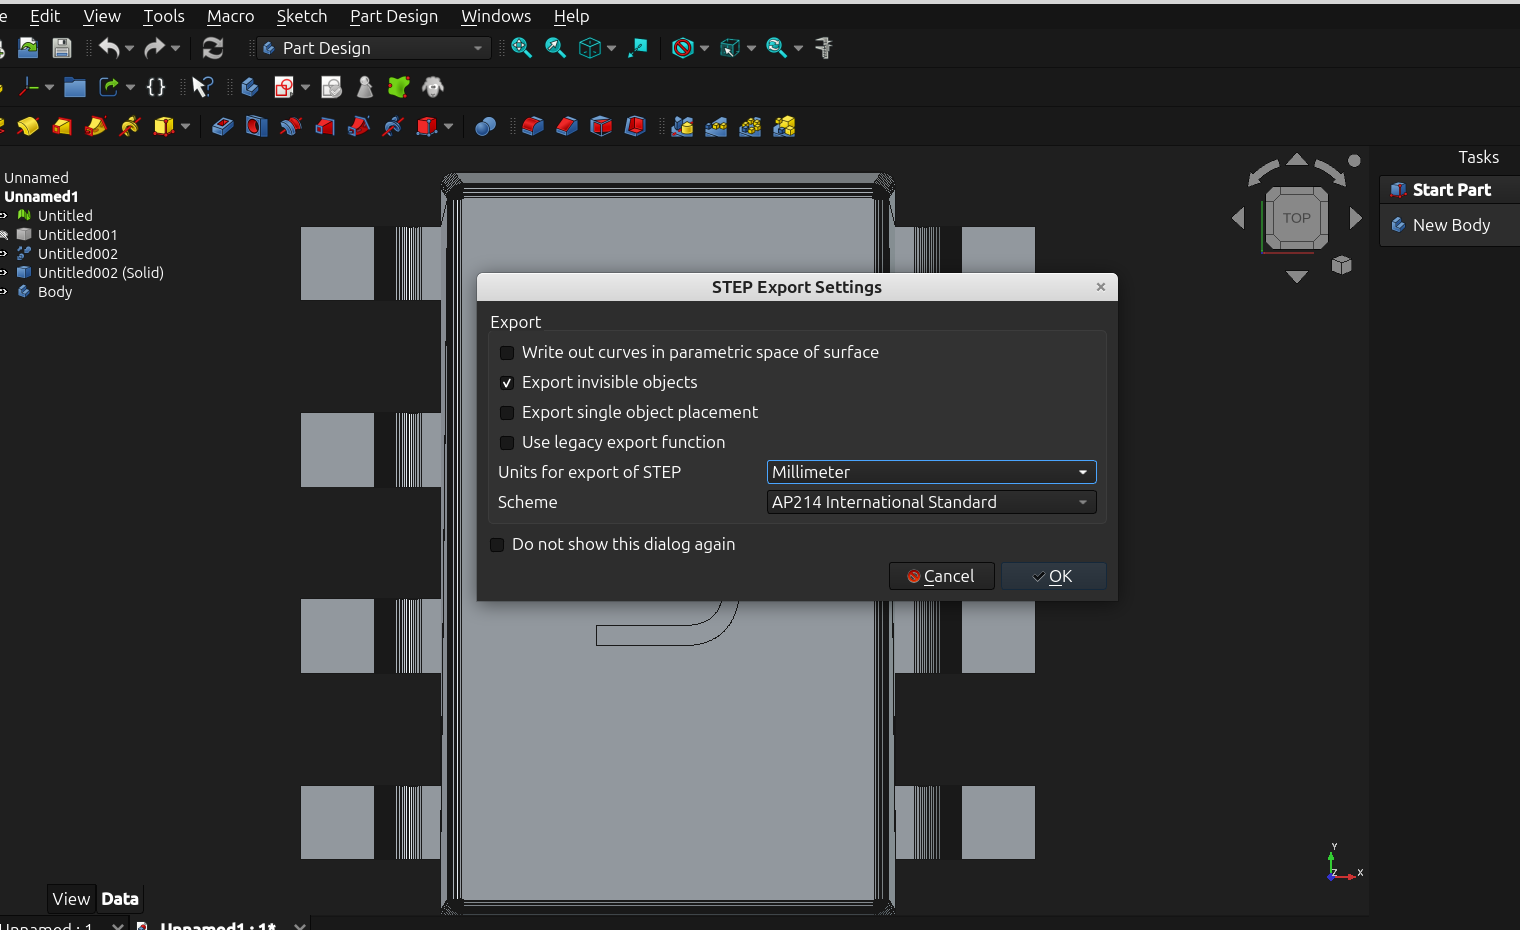
Step 12> A dialog will pop up allowing you to select the .step units and scheme:
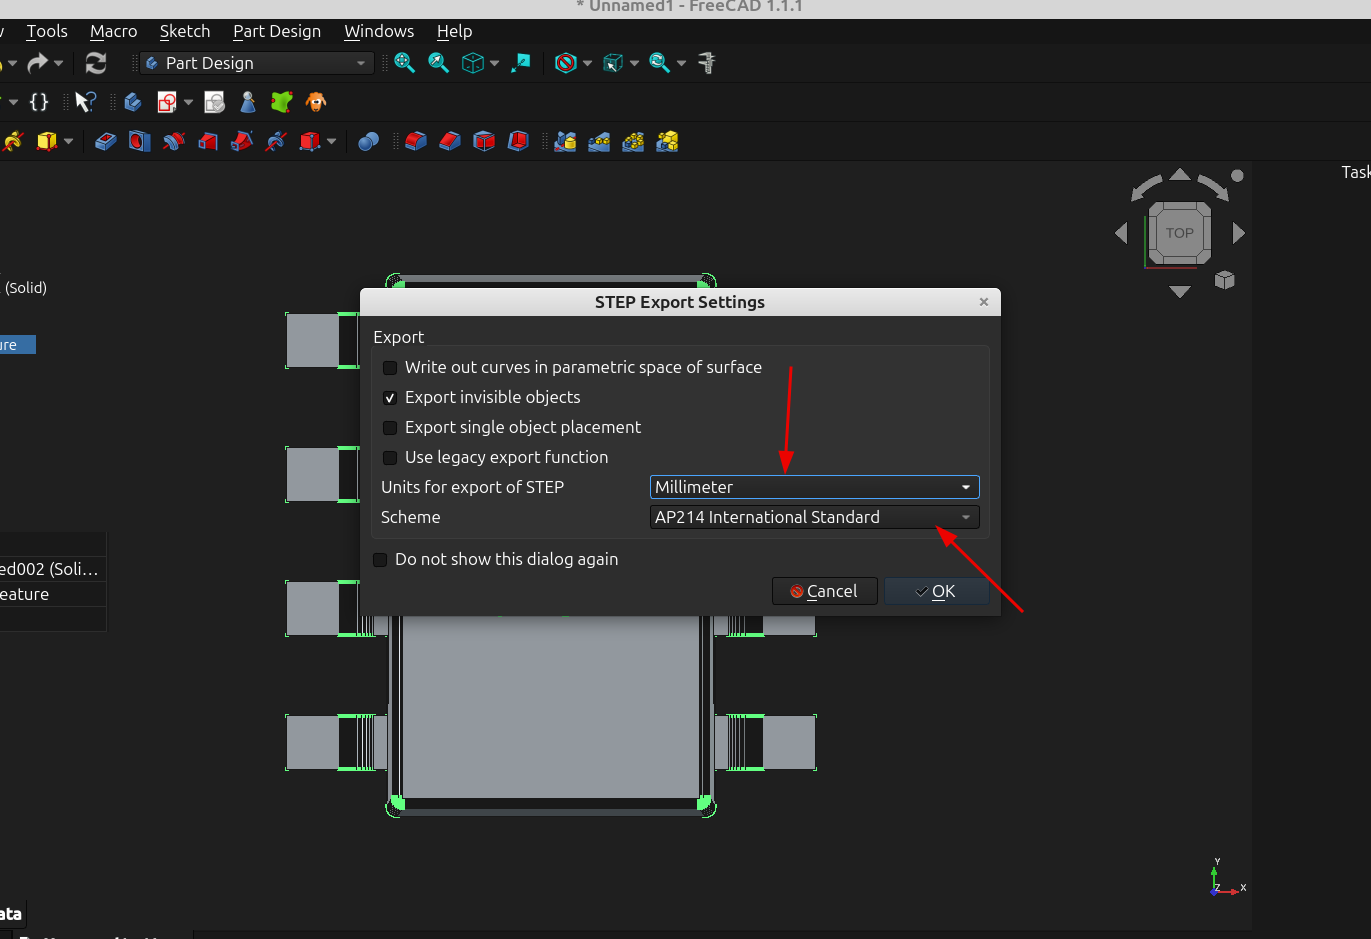
The file will be saved. I always put the files on my desktop in a working folder so it's easy to find, then I reload it into free cad to make sure everything looks good.
This might seem like a lot of work but after you do it a couple of times it's pretty easy to convert a file. Luckily FreeCAD has the ability to record macros which will allow you to record the steps and then just run a macro to automate the process the next time.
Note: you have to name the stl file with the same name each time and open it from the same location when you run the macro, I named mine "untitled.stl" and keep it on the desktop so it's easy to find. It usually takes about 6 seconds to run the macro for me.
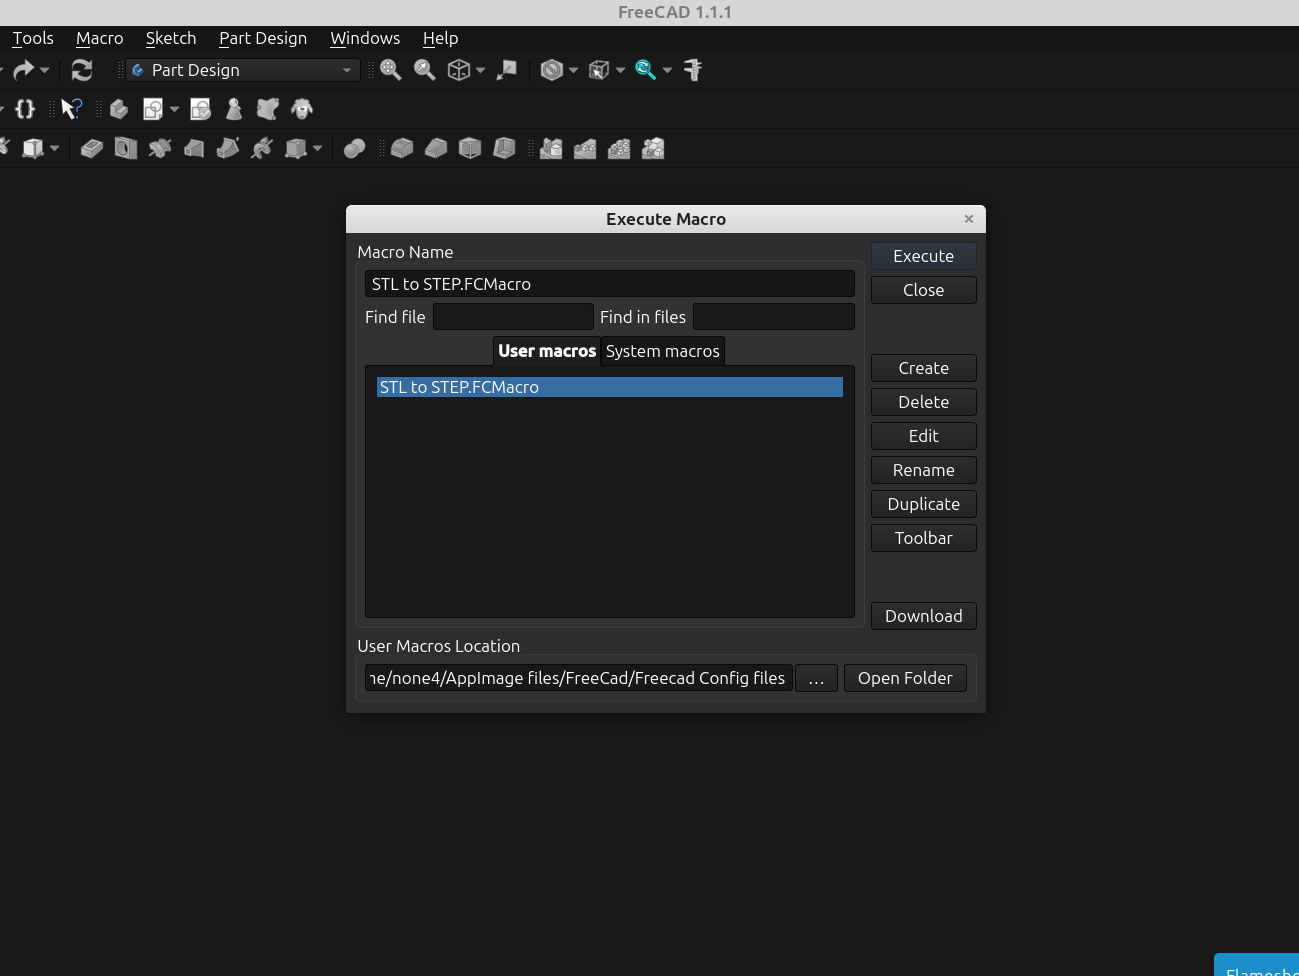
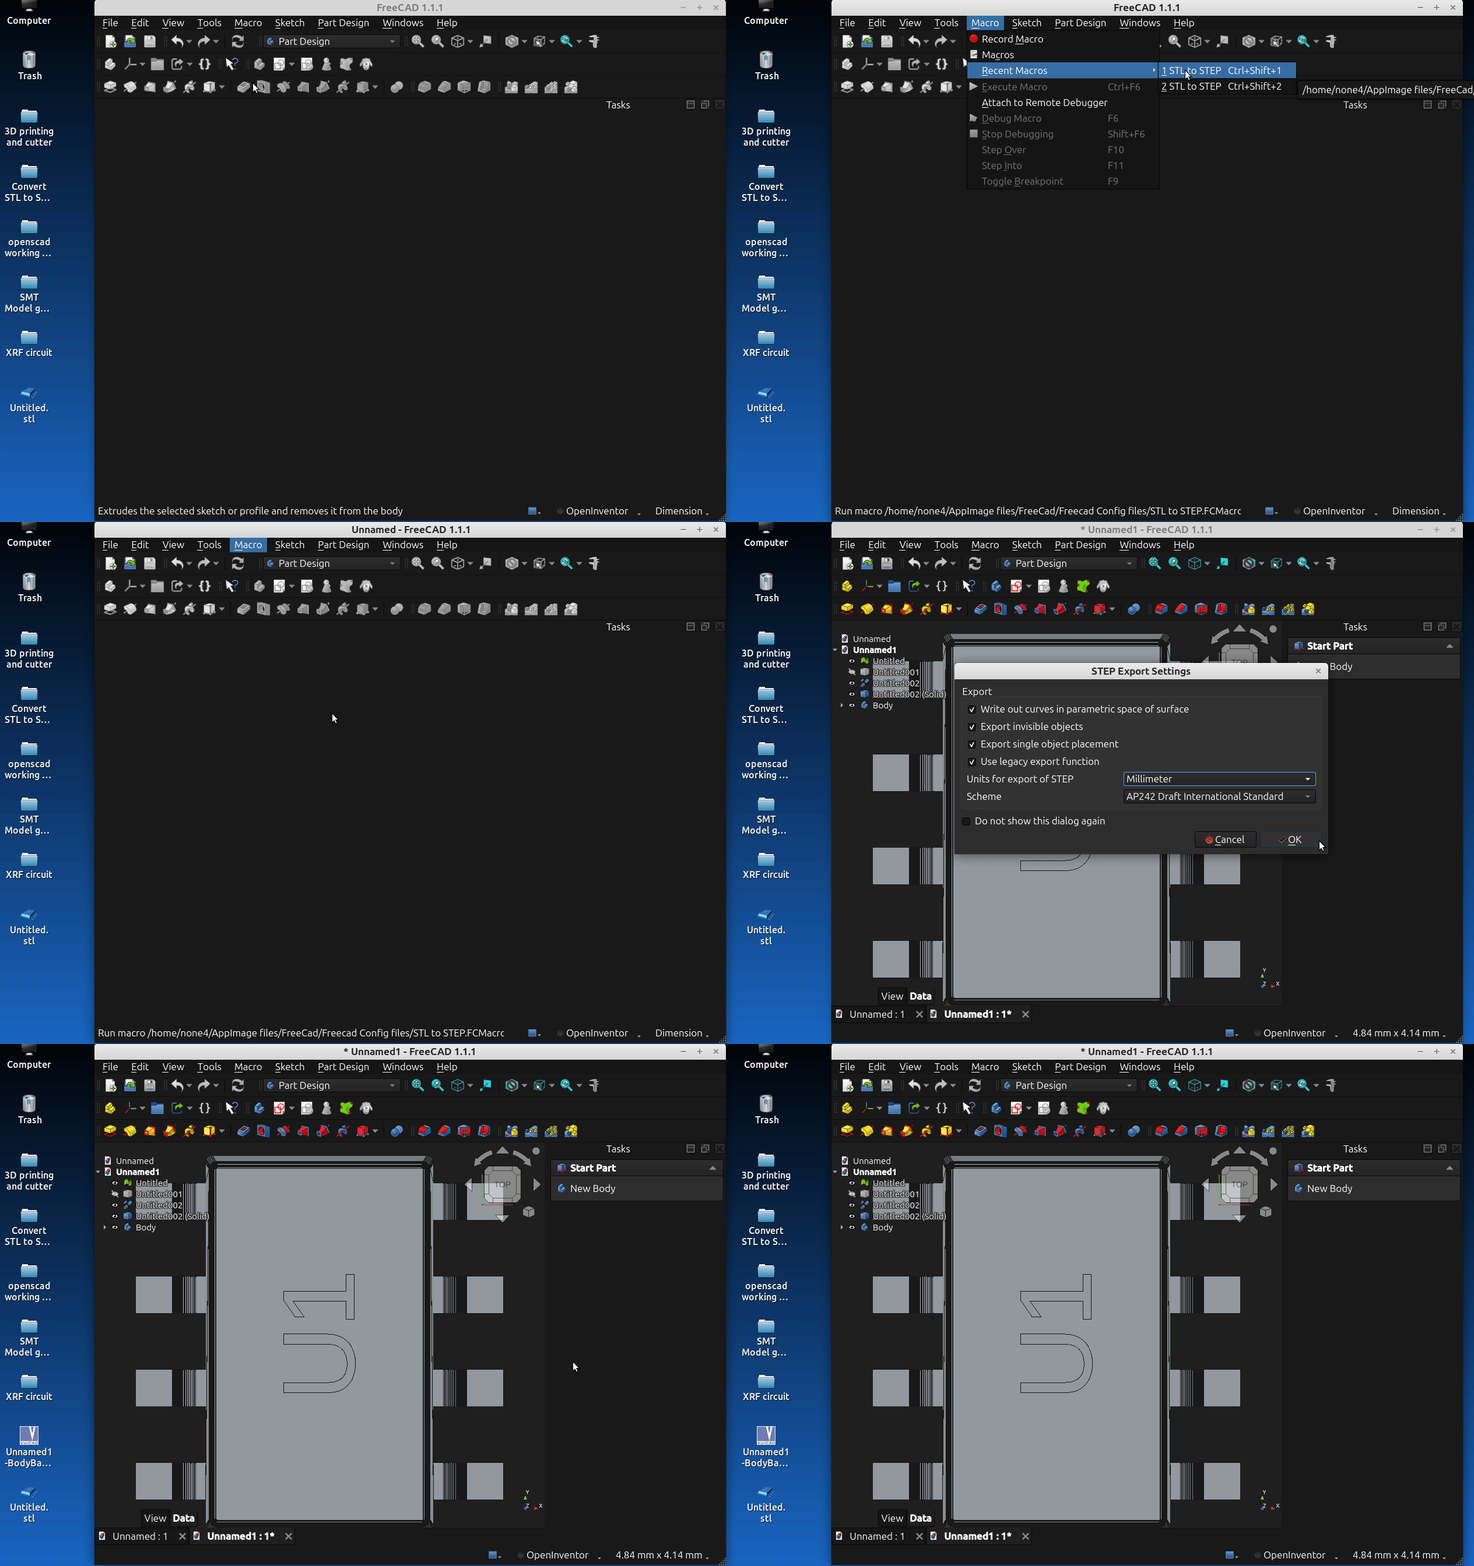
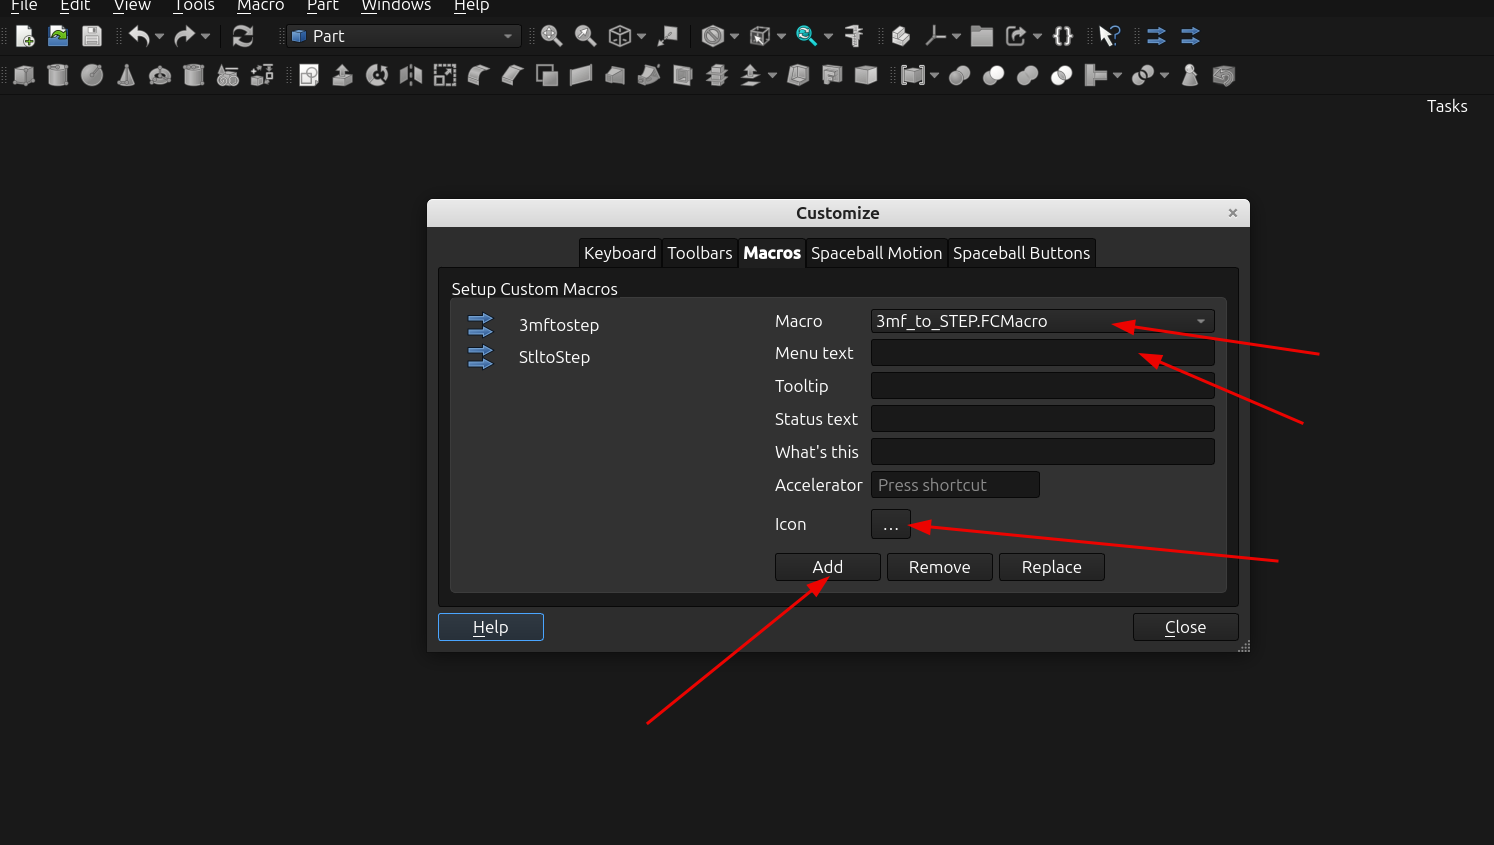
Additionally you can add an icon on a new tool bar to make it even easier, just go to Tools>Customize:
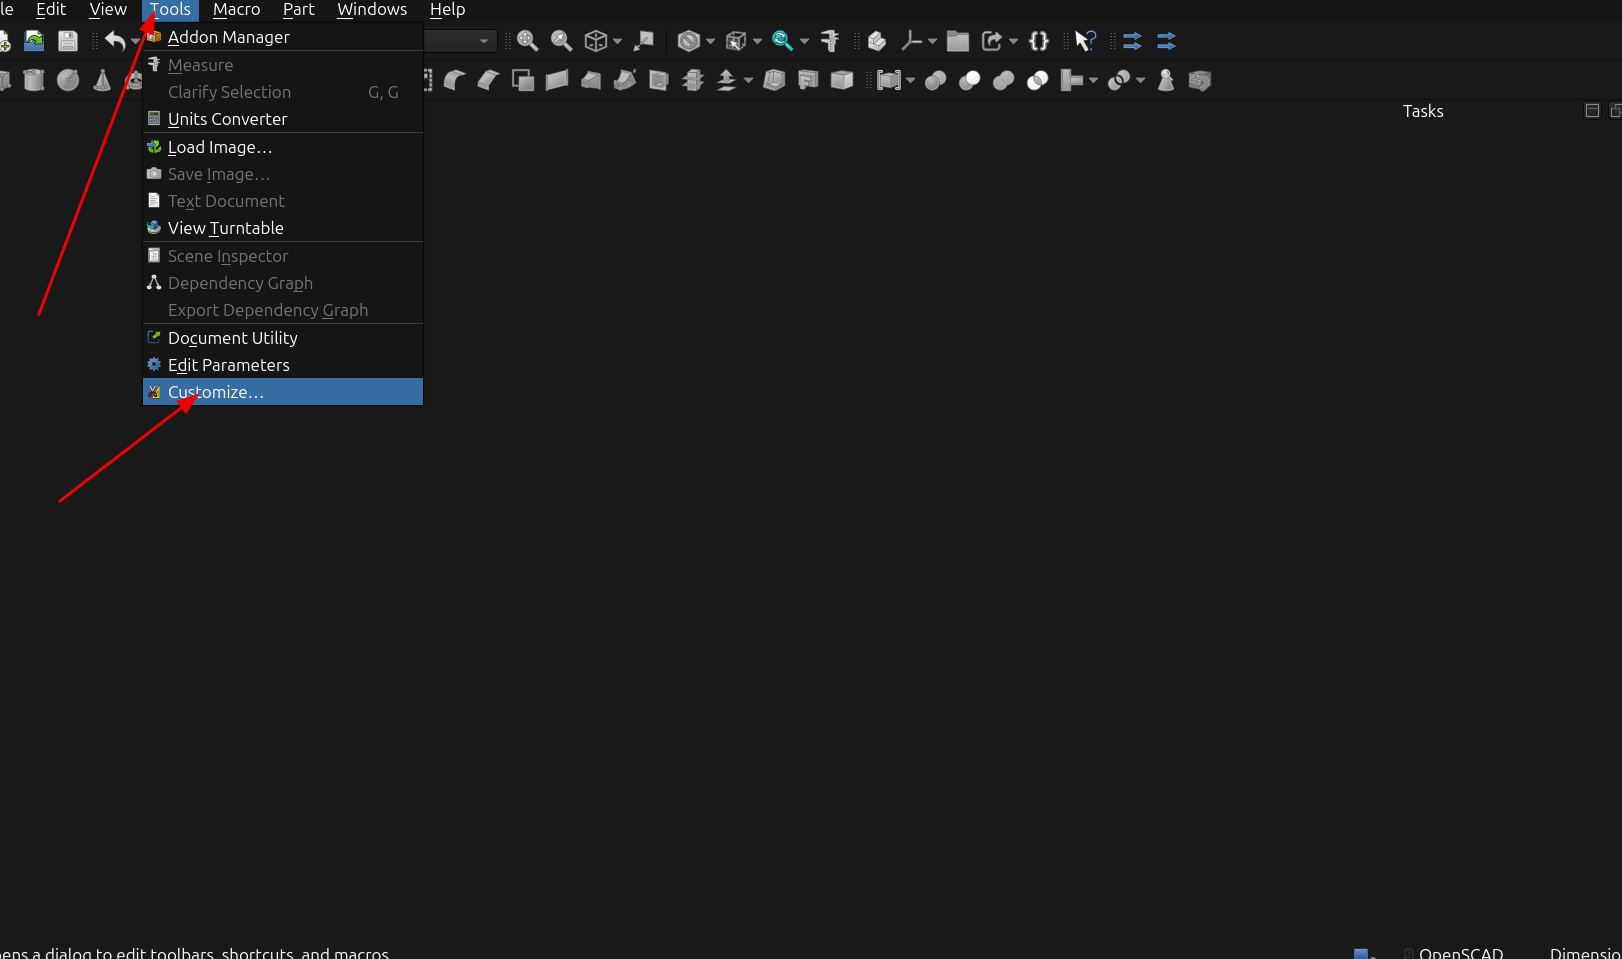
Select the Macros tab, select the macro you want to add then enter the menu text and choose an icon then click add:
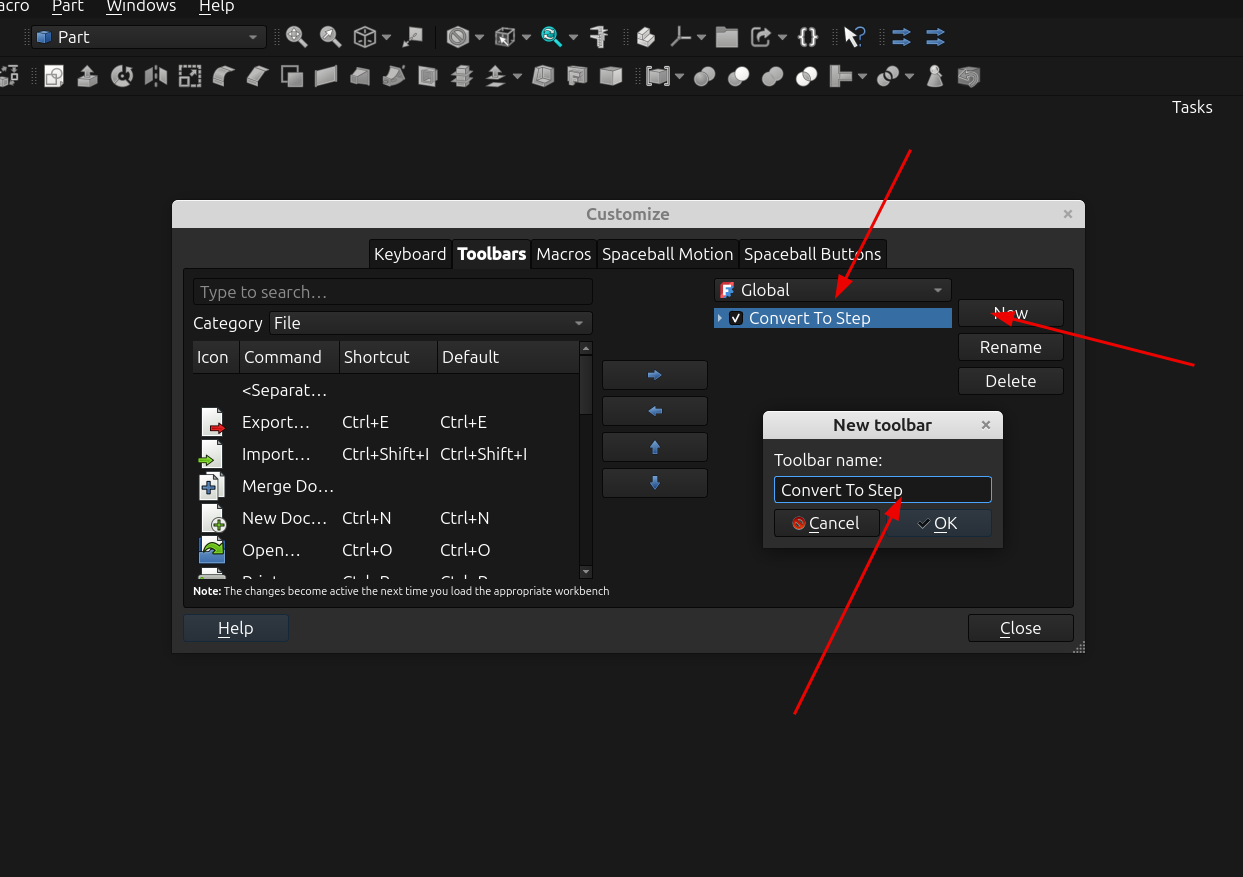
Then select the tool bars tab, select the "global" menu click new and assign a new tool bar name:
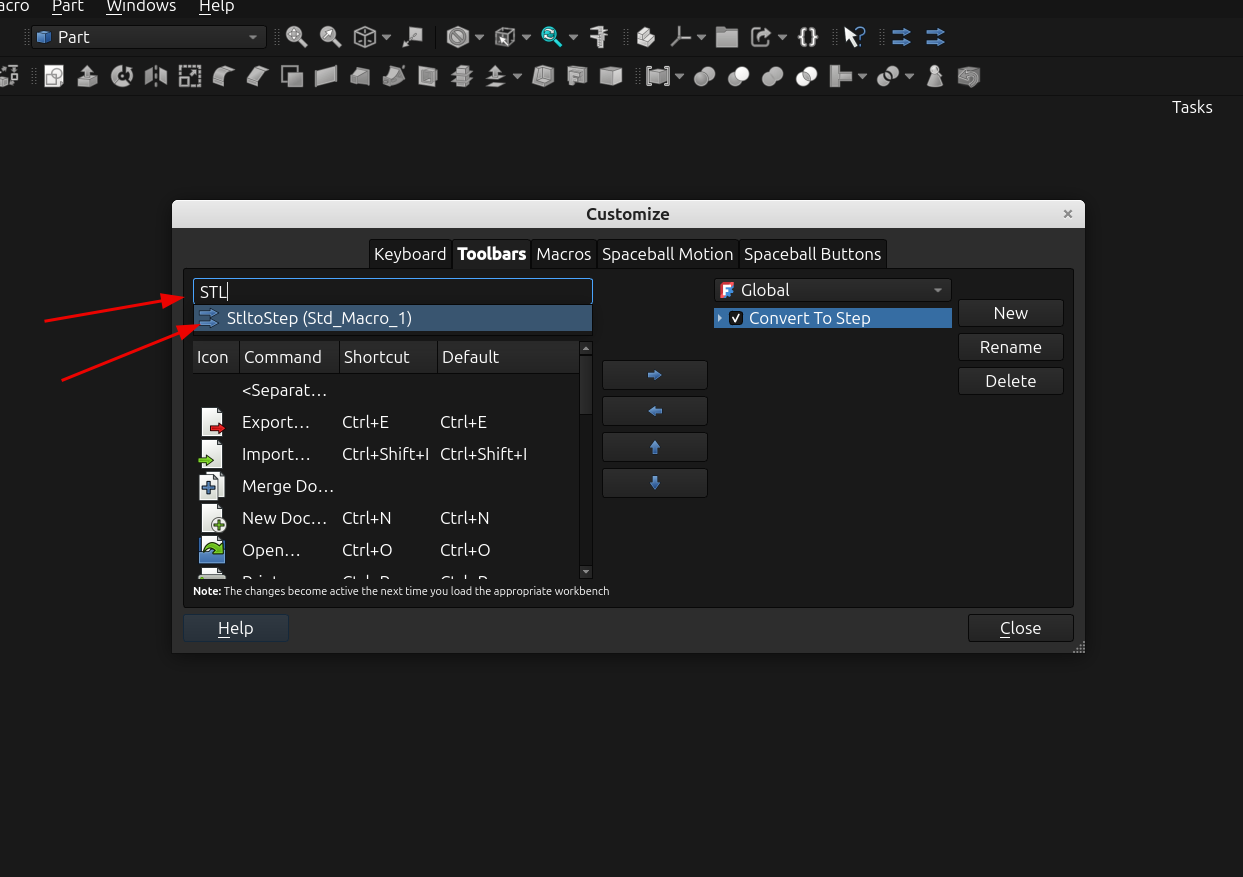
In the search box type in the macro name so it is easy to find:
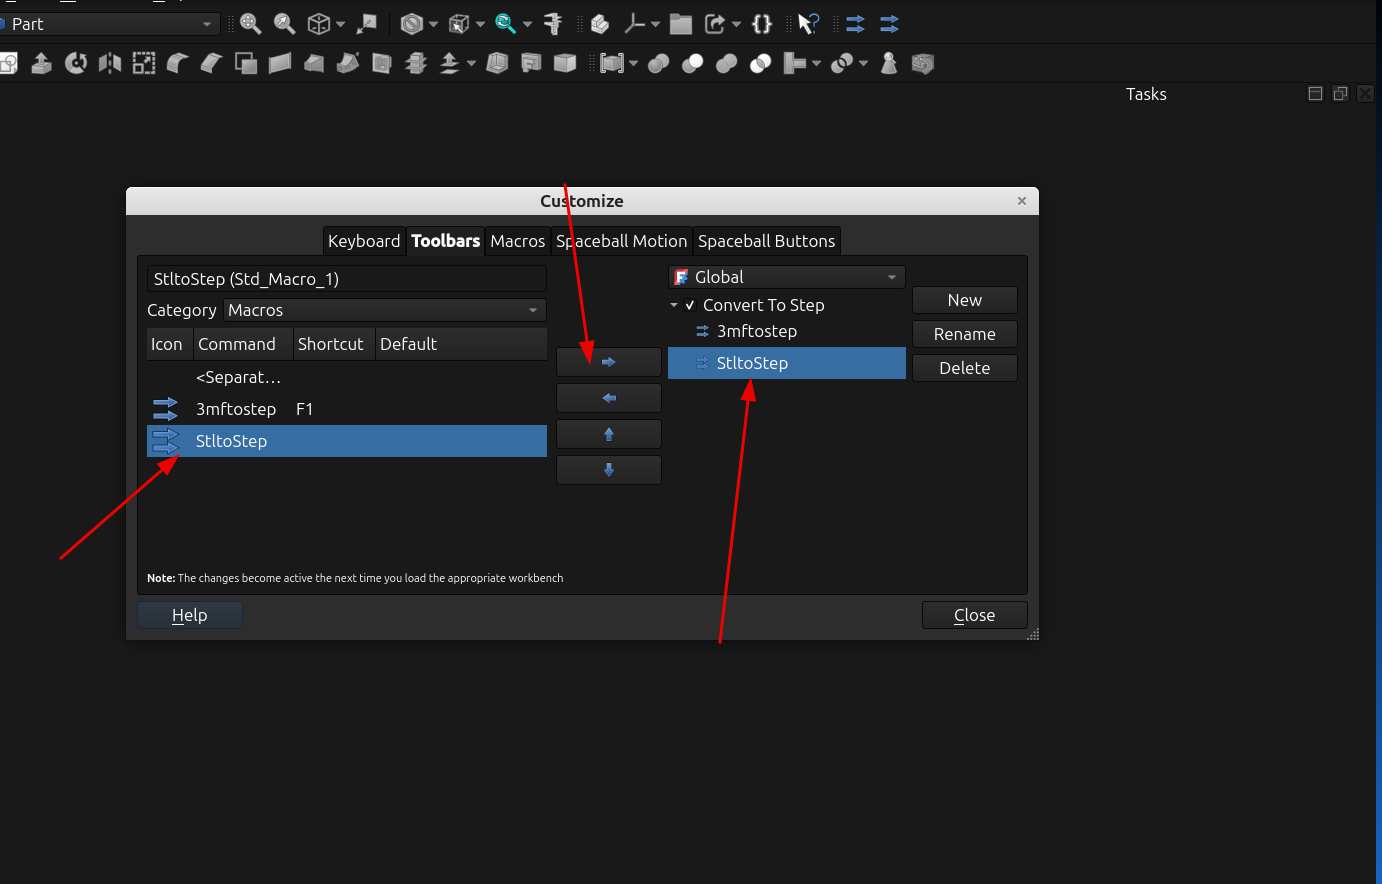
Click the move to menu arrow and the macro will be assigned to the convert to step menu, assigning it to the global menu means it will show up on every workbench
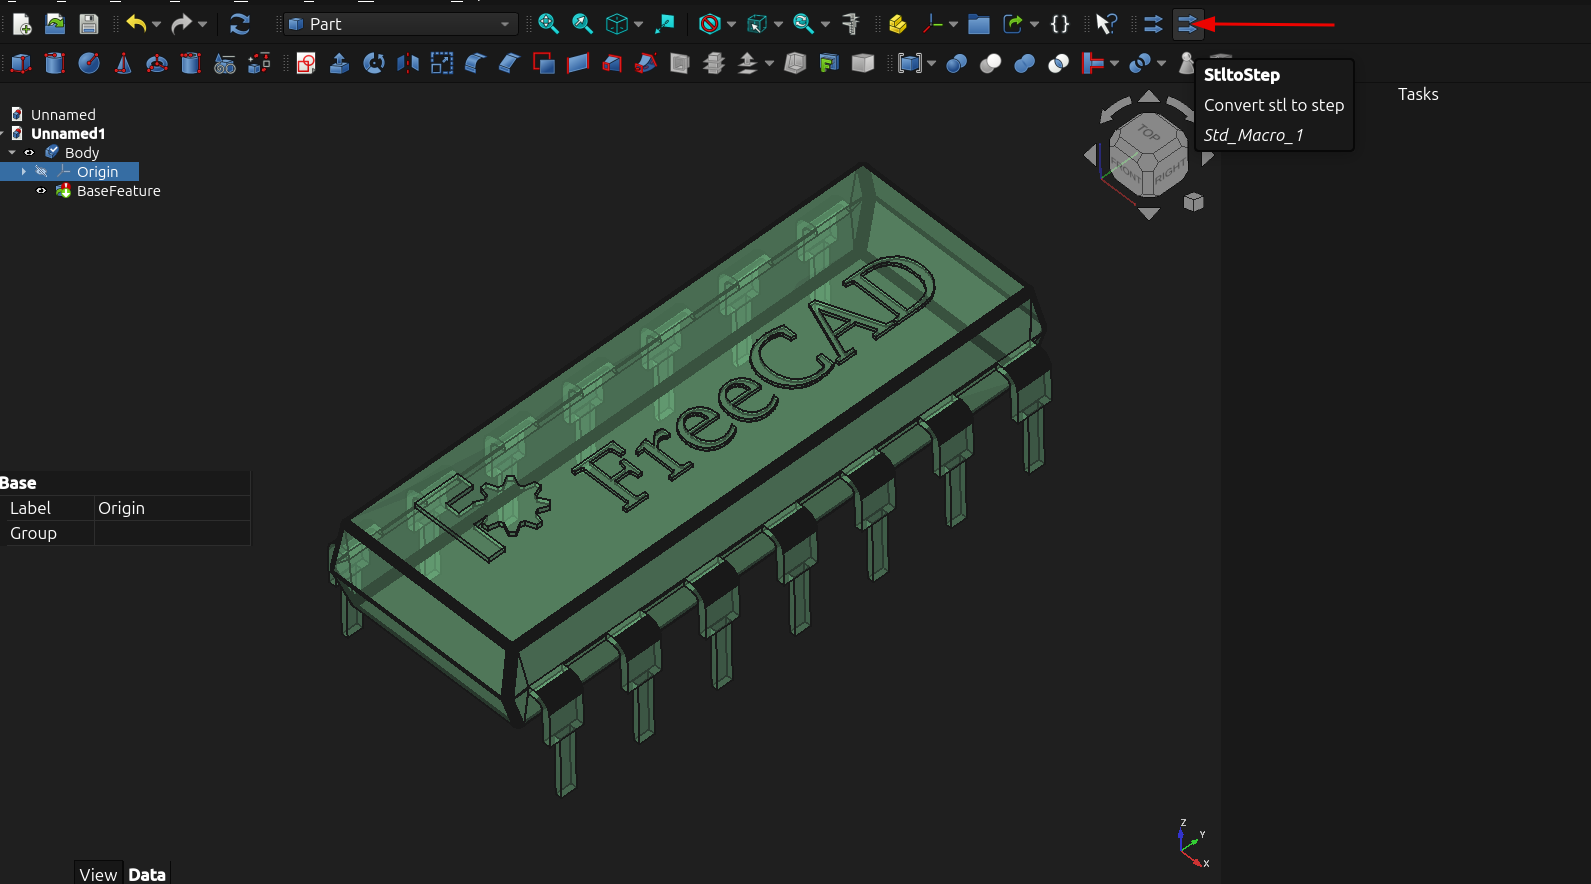
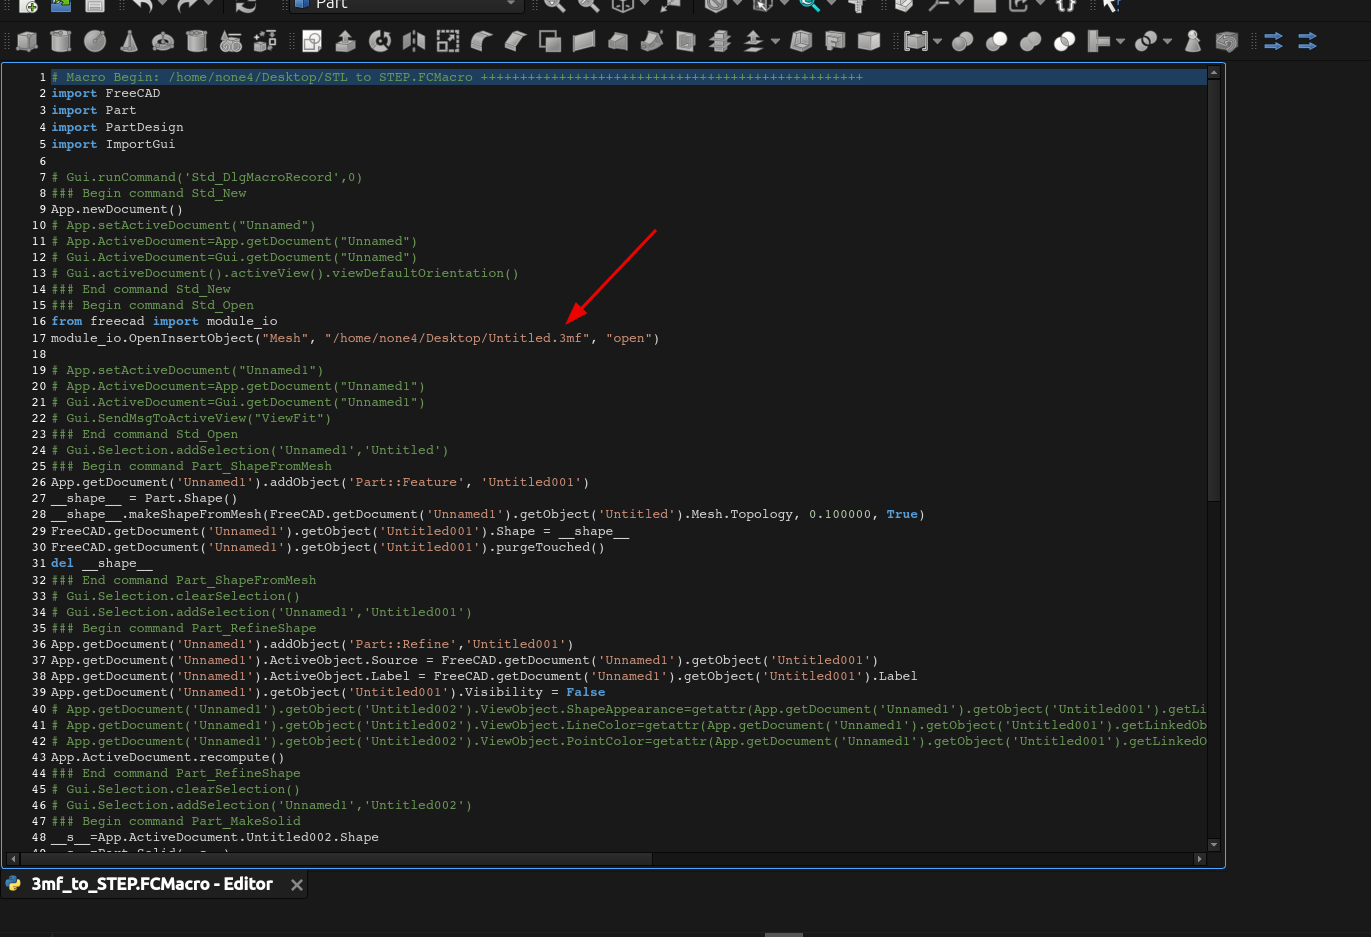
And now all you have to do is click the icon and it will automatically convert an stl file to a step file. I set up one to convert a .3mf file type also by just going into the macro editor and changing the file import name to a .3mf extension and saving it to a new macro.
If you click on the button and nothing happens it's probably because the file you tried to convert didn't have the EXACT same file name and extension as the one you used when you set up the macro, it's pretty easy to forget.