
Post # 161: A beginners guide to using Freecad

When you first start using Freecad it seems pretty difficult to figure things out, luckily there is a specific workflow that will help you get started and understand things better. There are a lot of excellent videos online but some of these skip an essential step because the creators are familiar with the software and just assume something simple would be obvious or speed through things so fast you can't pause the video enough times to replicate the steps.
I am going to make a series of posts about different things that have helped me to get up to speed, these won't cover every aspect of the software and may not work for you but at least you will know where to start and it might shed some light on some of the useful things that are hidden.
Keep in mind I'm not a Freecad expert so some of this information will be prone to errors and there are always better ways to do things.
At first when you start the program you are either greeted with the startup screen or a blank screen, I will show you how I start a new design completely from scratch.
I am using an Appimage of the latest version of Freecad in Linux mint 22 :

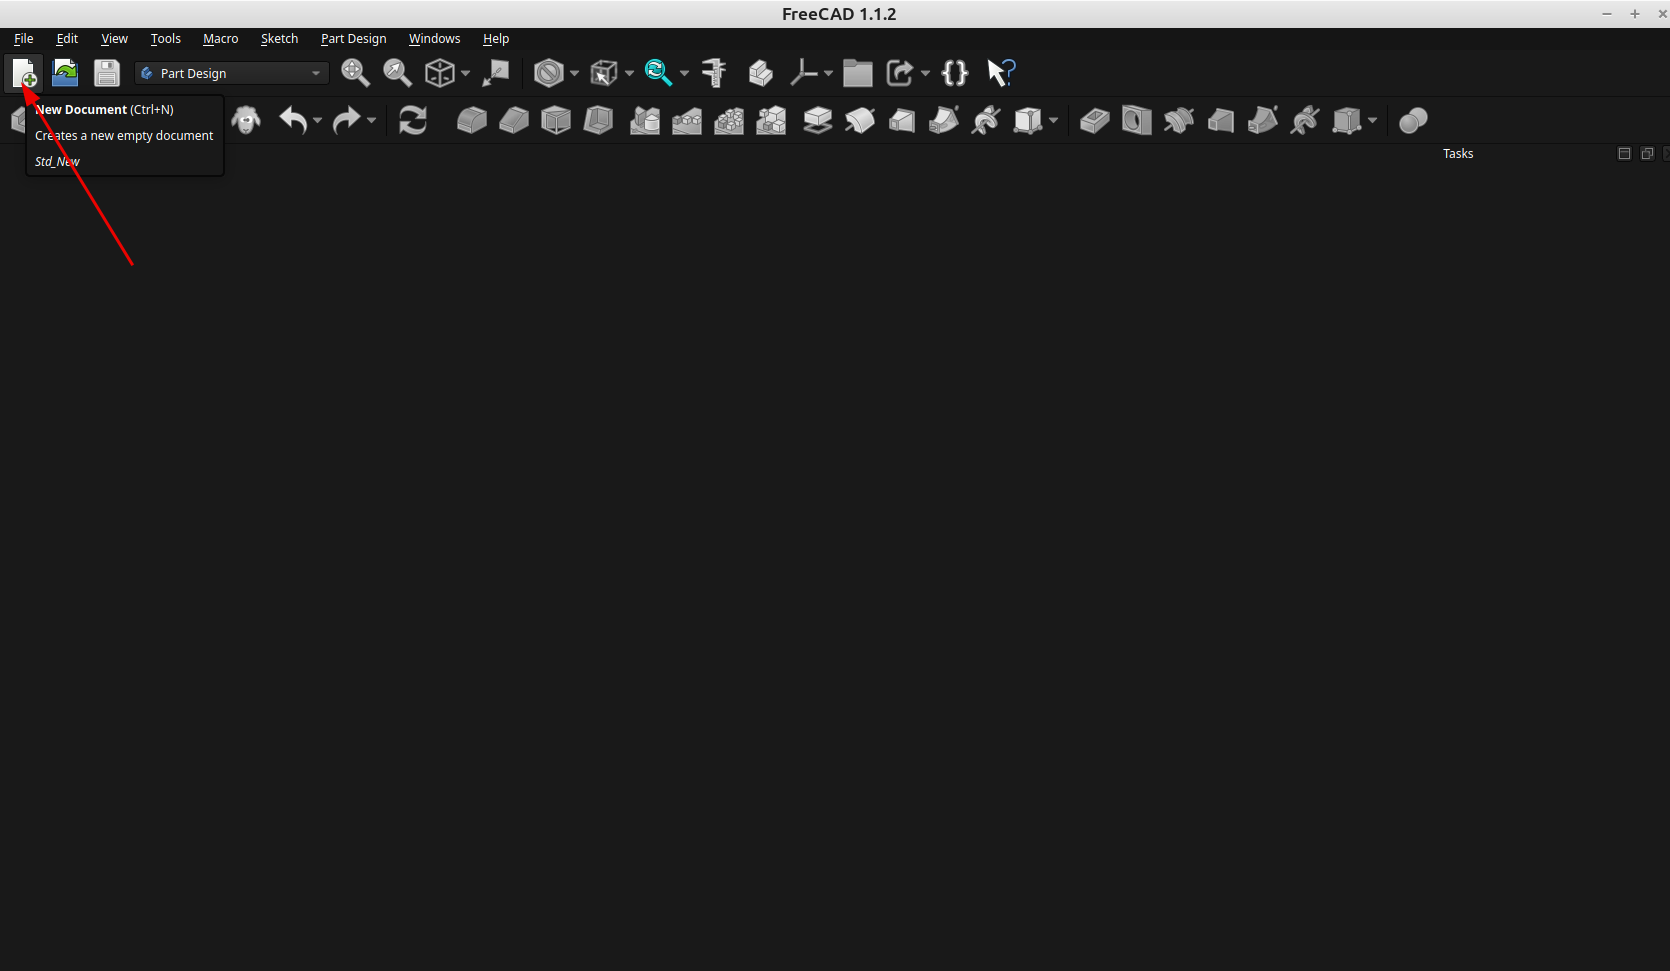
Create a new document:
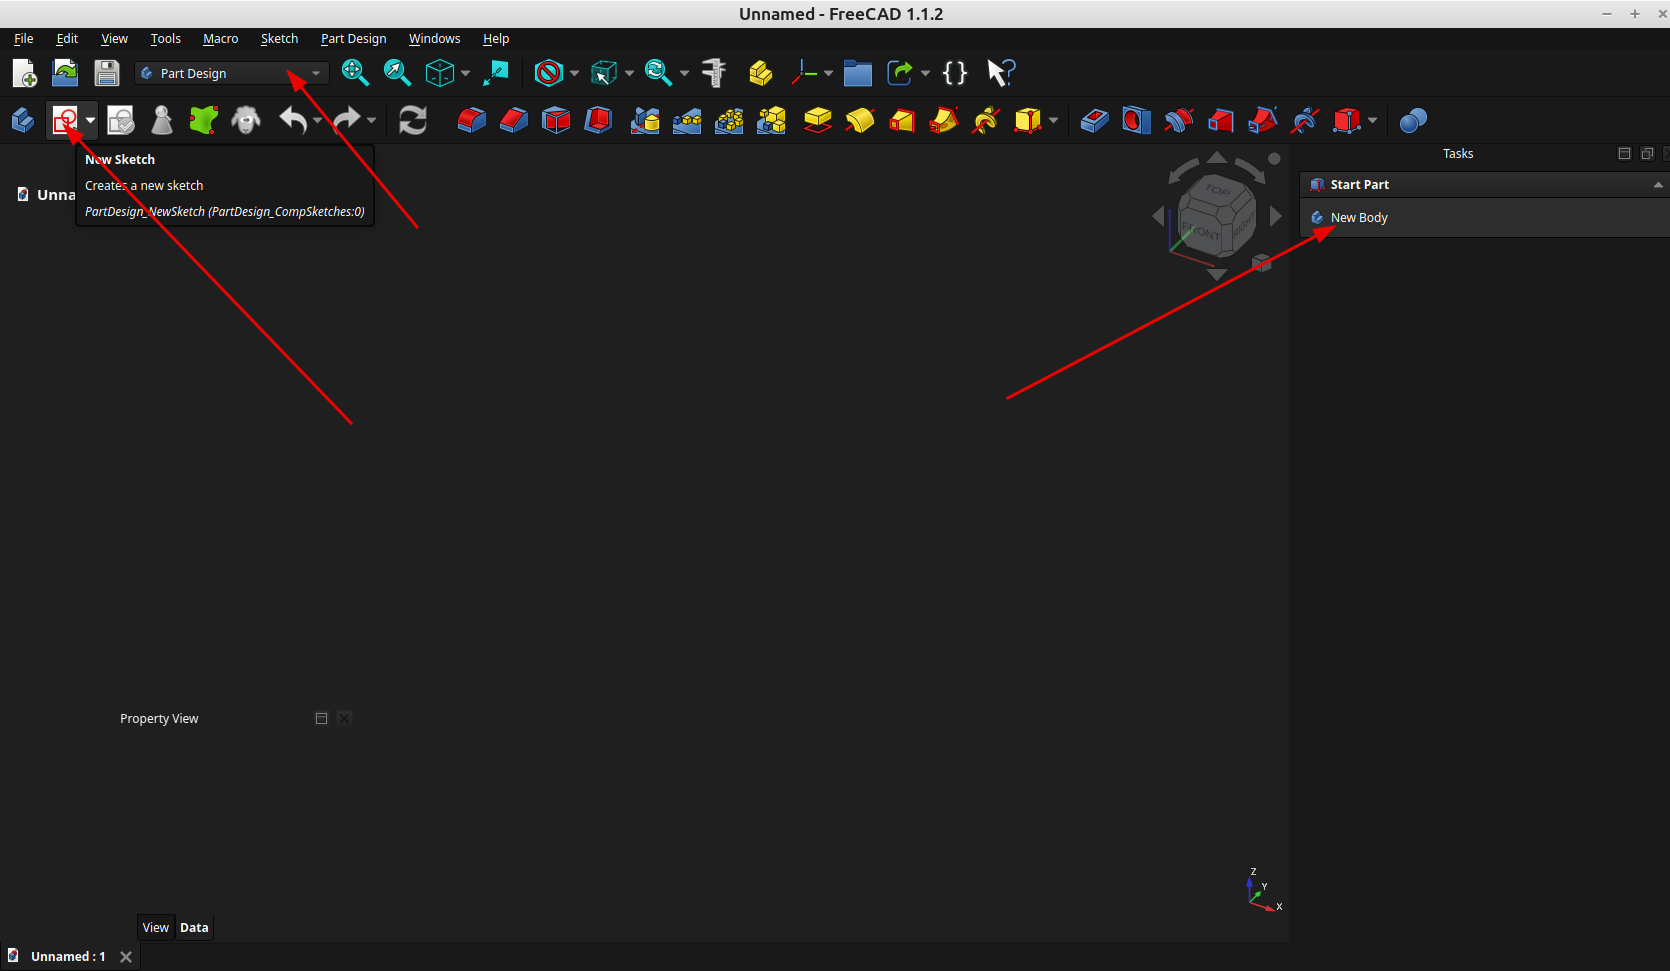
Make sure you are in the part design workbench, create a new body, then create a new sketch:
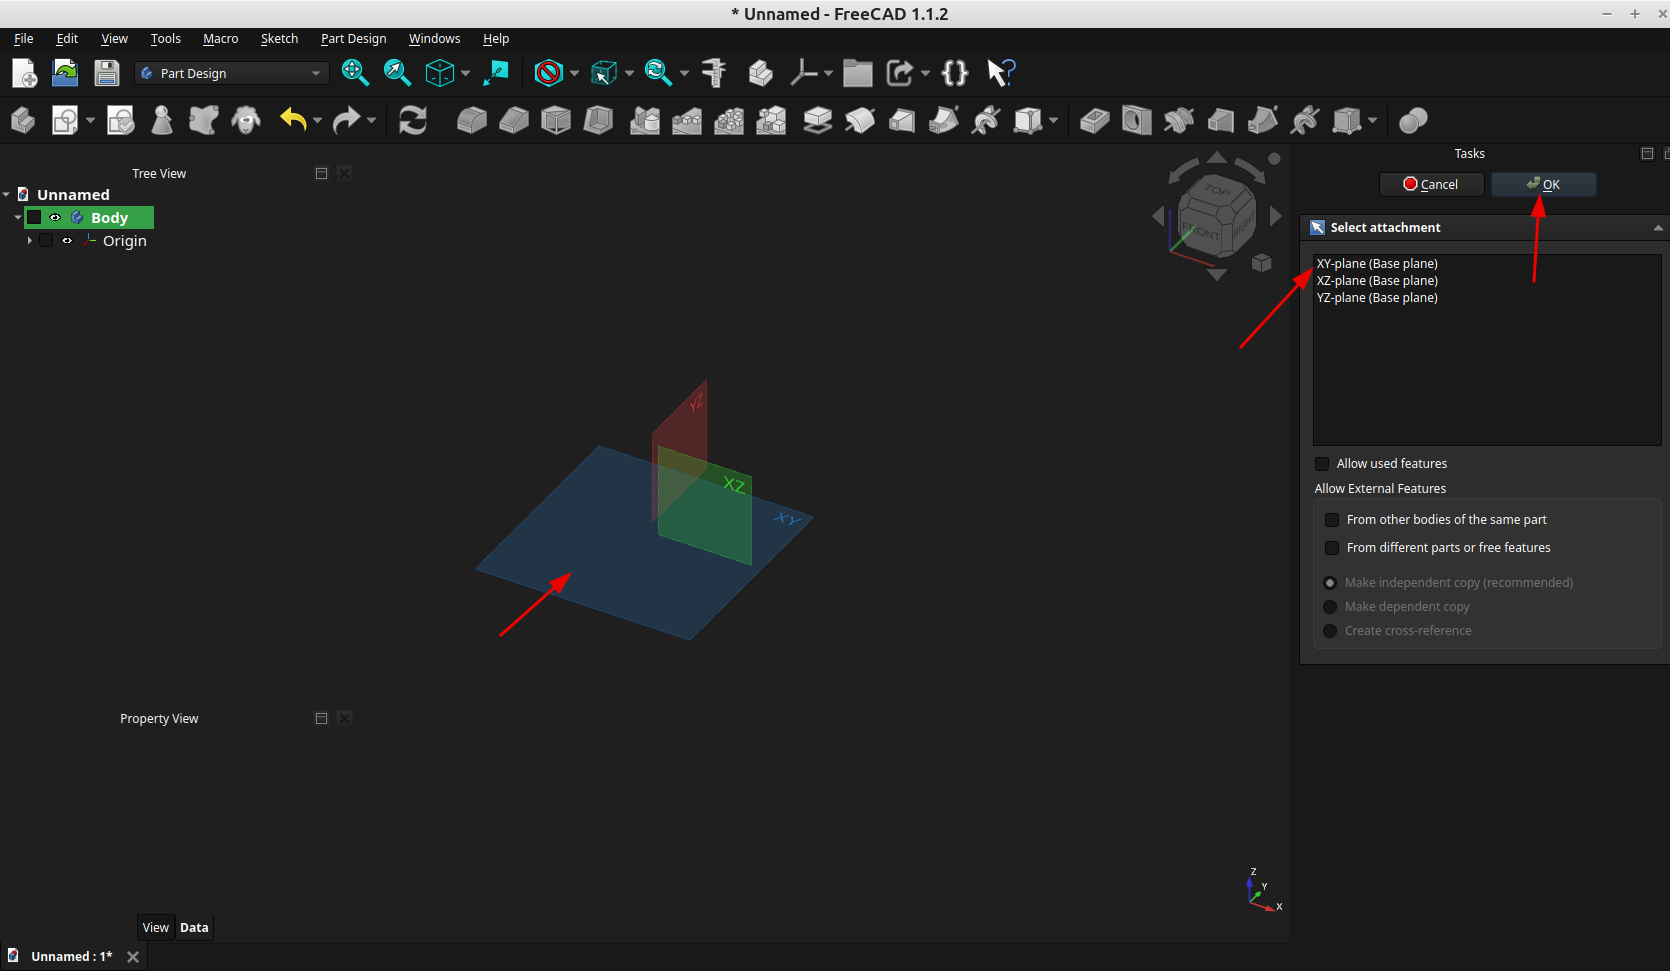
A dialog will pop up asking you which plane you would like to create the sketch on, I usually use the X,Y plane. You can click on the "origin" in the 3d view to select it or select it with the task menu and click ok:
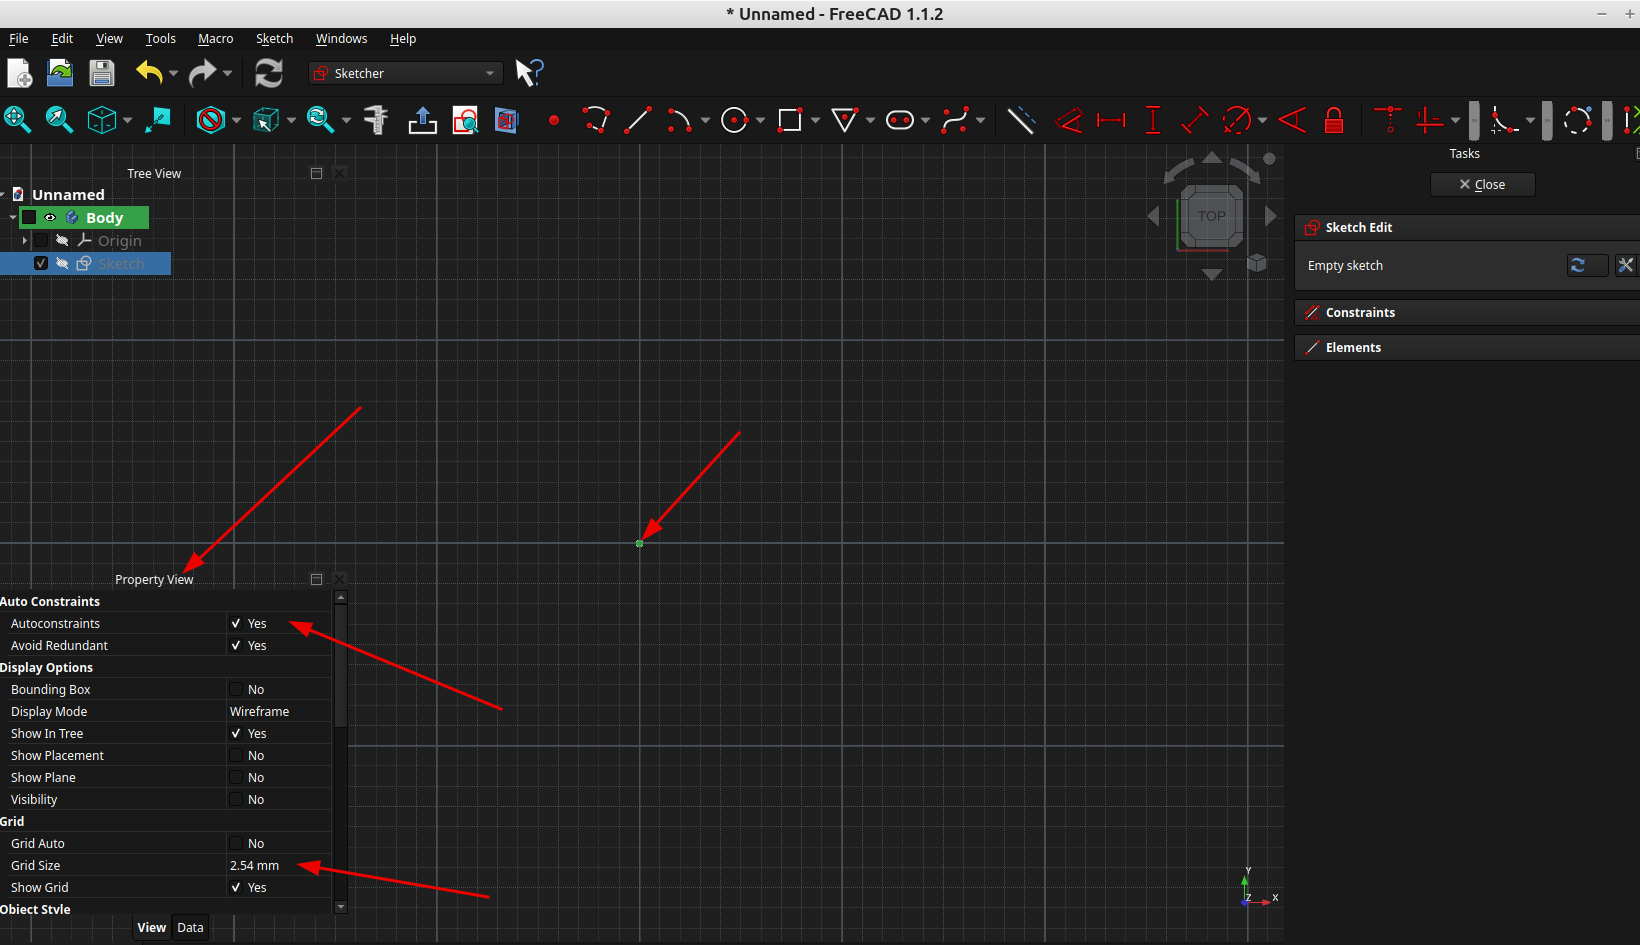
You will now be in sketch mode so you can draw shapes, if you click on the little dot in the center or the line in the center of the X or Y axis it will show or hide the properties dialog. I always turn on auto constraints, set my grid to 2.54 mm and change the grid line colors so it's easier to see:
For this example I am going to make a simple circle, I select it from the tool bar, click in the grid where I want the center to be, size it and hit enter on the keyboard twice, this creates the circle and automatically constrains it < if you are new to cad don't worry about terms like "constrain" at this point, it will be covered more in depth in a future post :
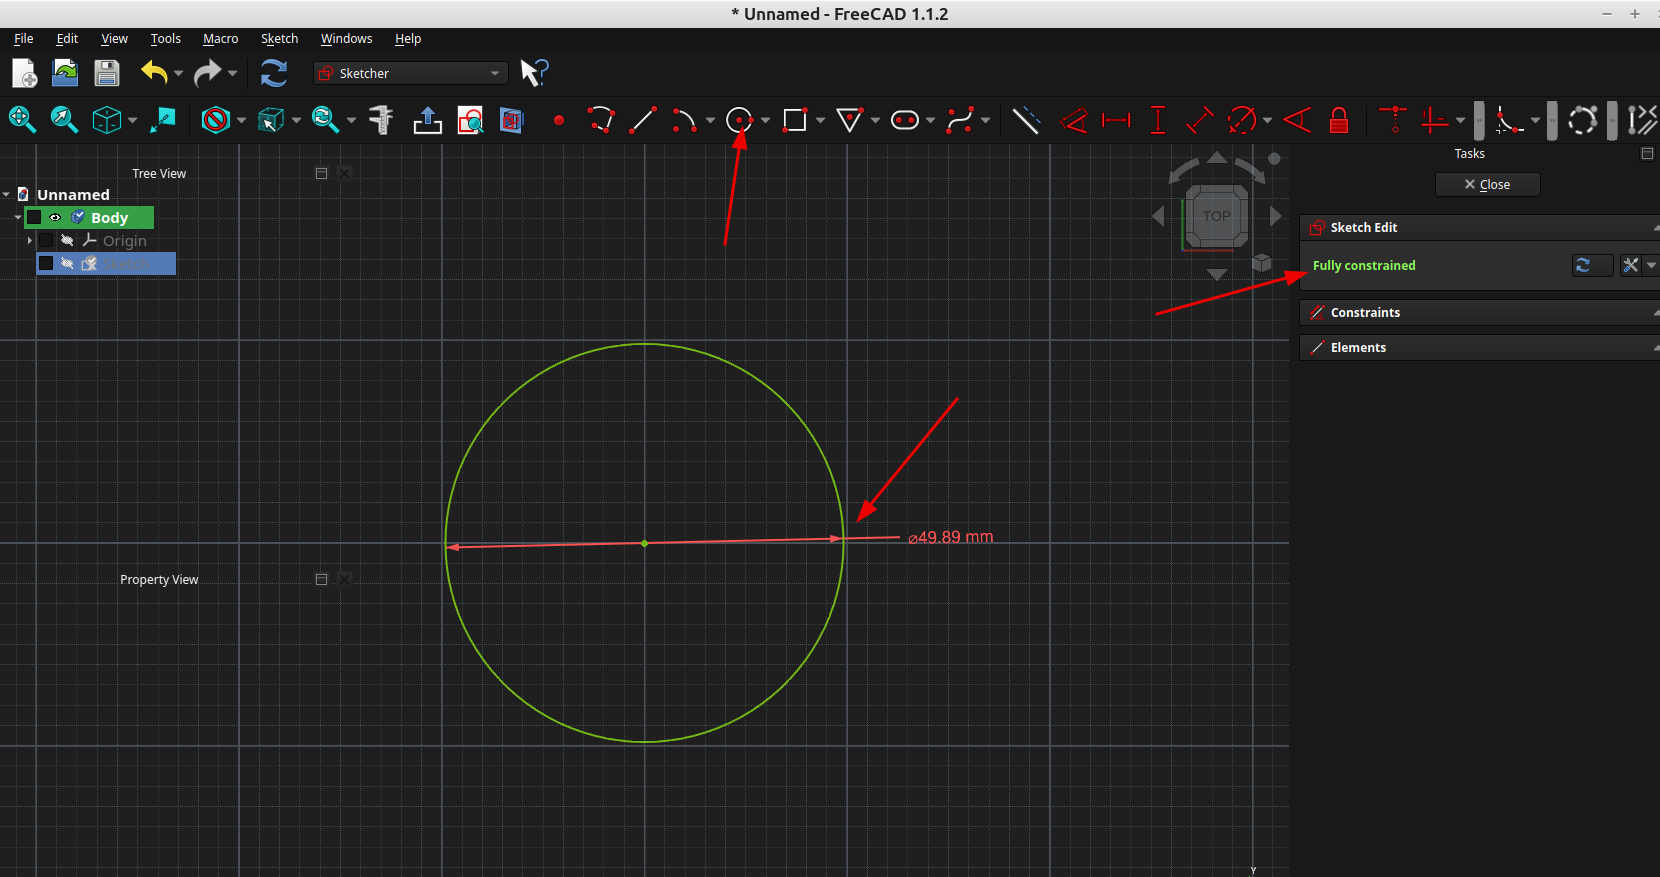
once you click close on the task menu you will automatically be put into the part design workbench where you can make the circle into a 3d object using pad:
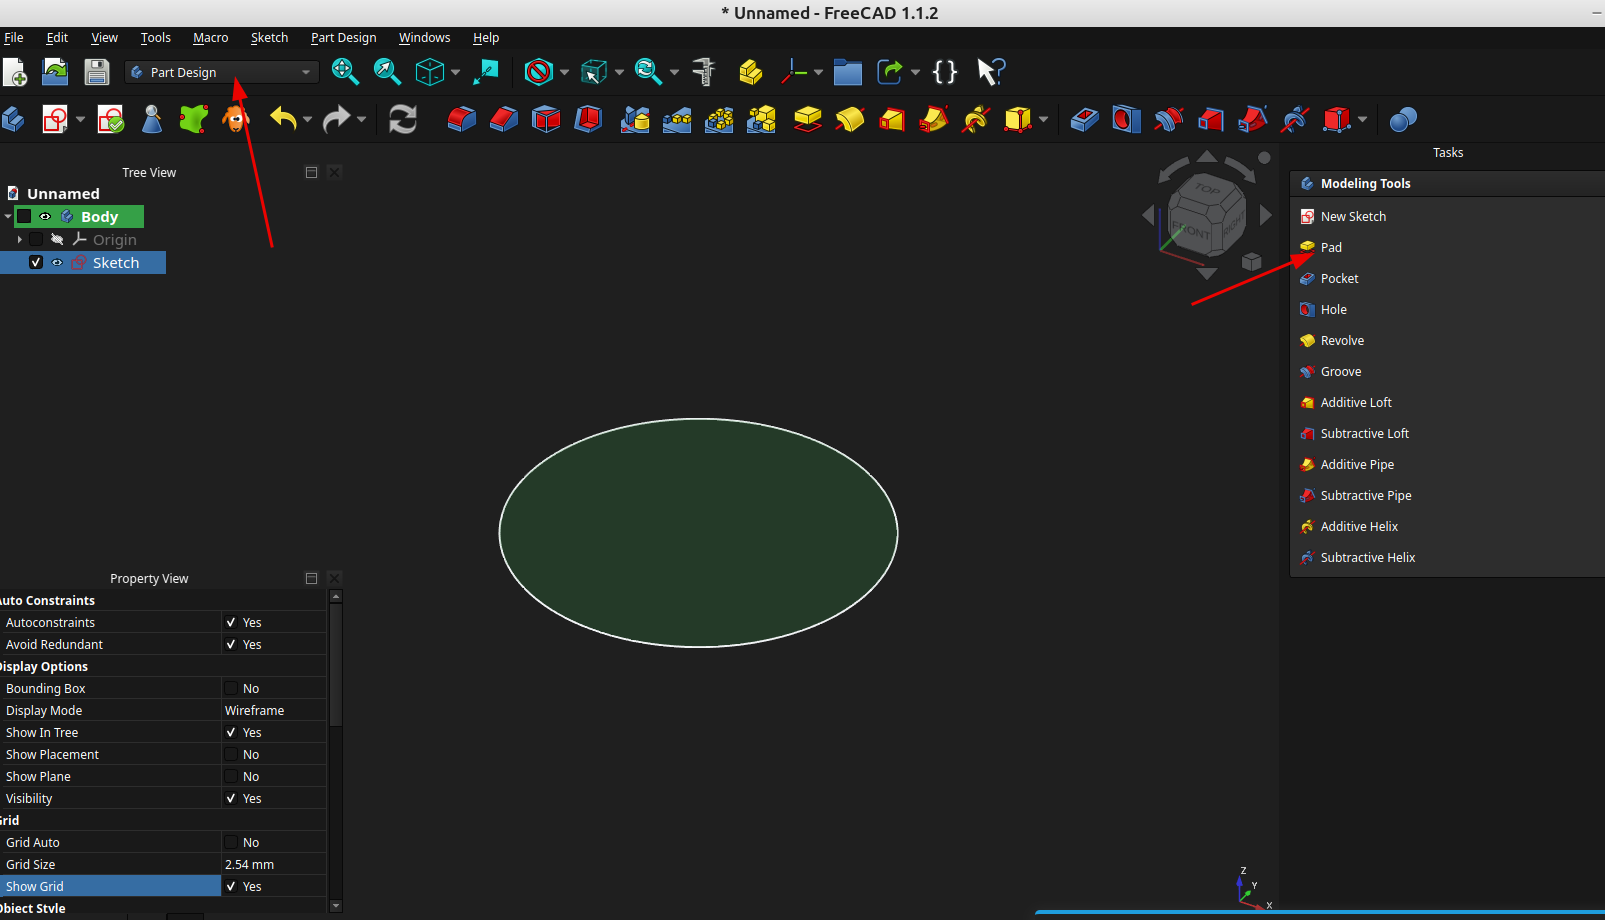
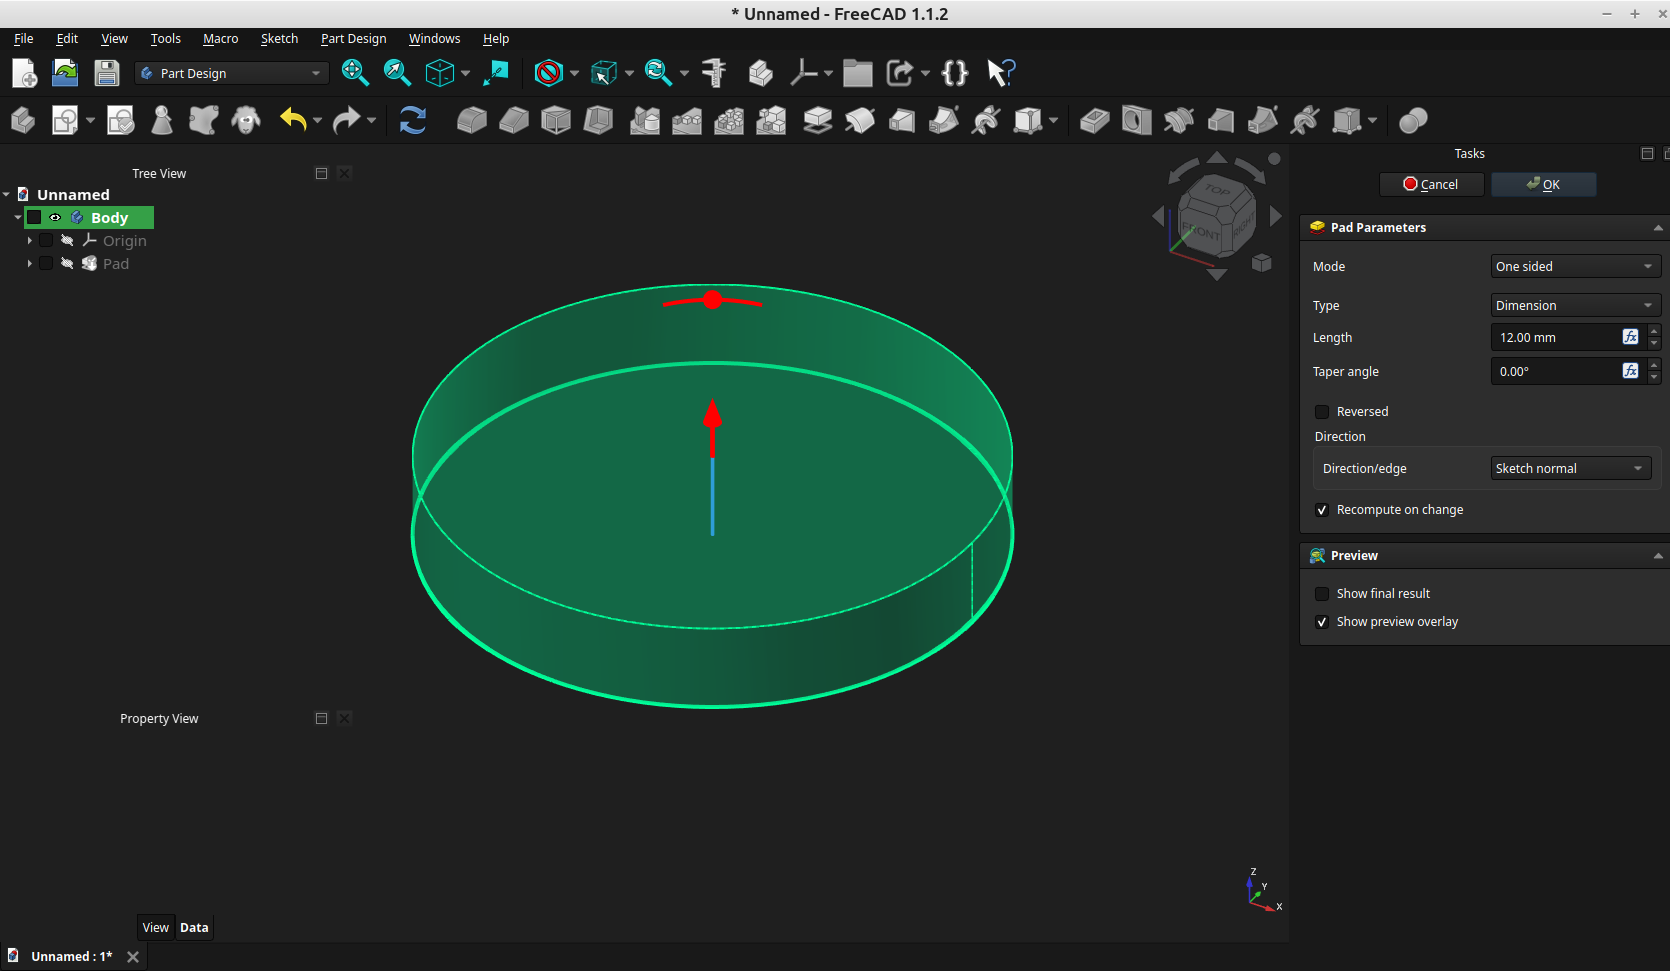
now you can change the 3d properties of the pad you just made:
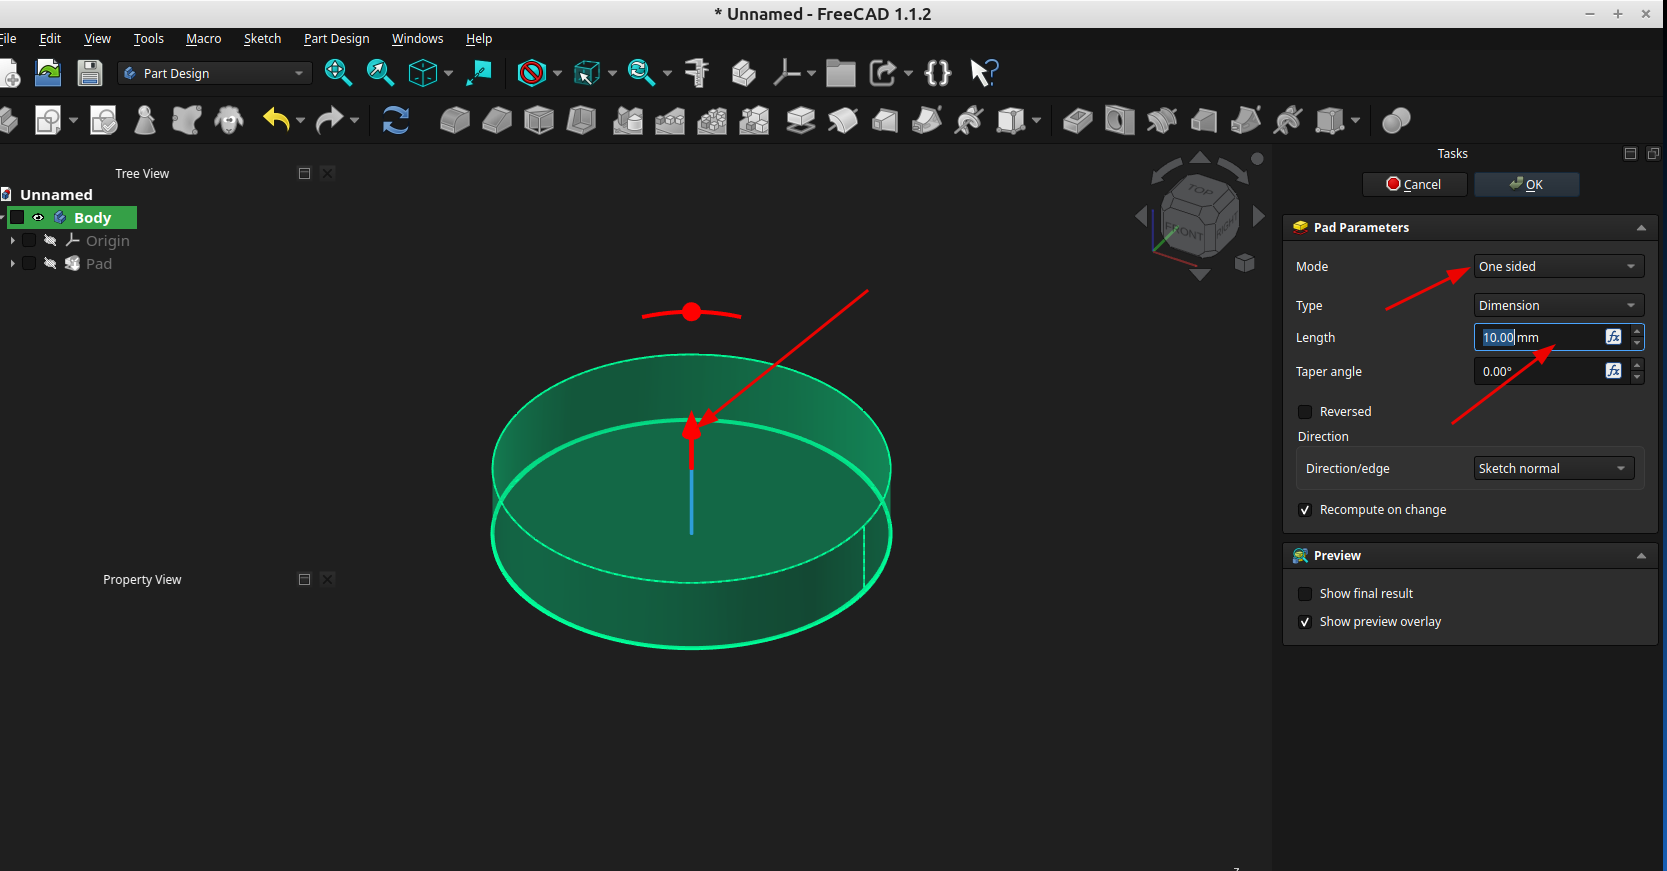
just select ok and it will save the changes, now this is where using the tree comes in handy
Click once on "pad" in the tree so it is selected and press the space bar on your keyboard, pressing the space bar will show or hide the selected item in the tree
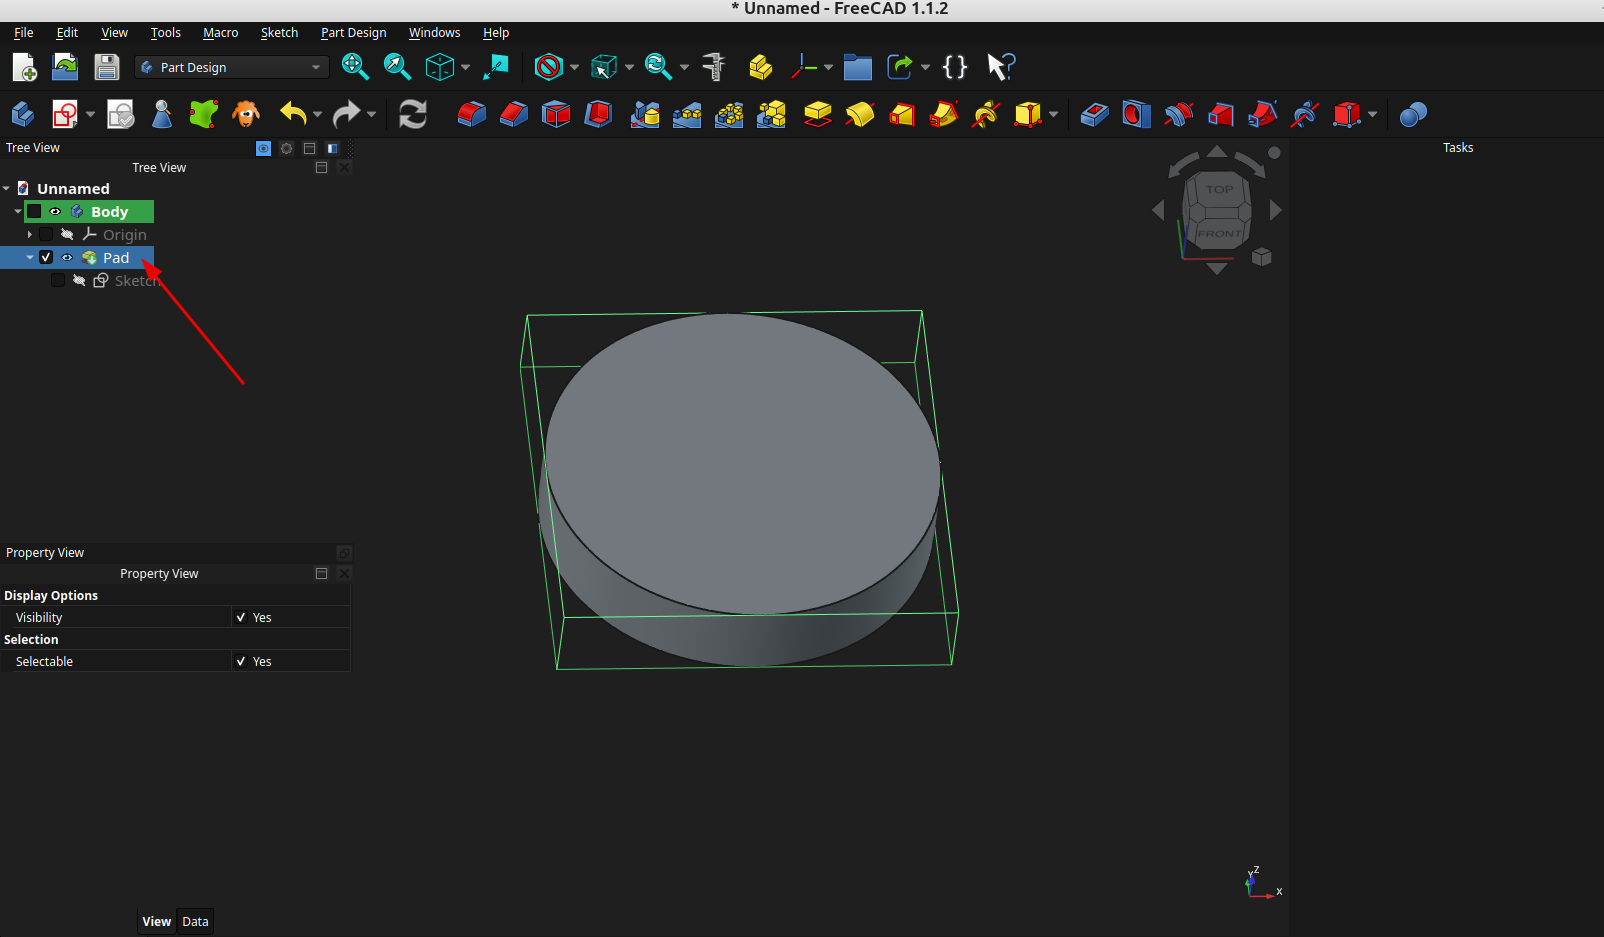
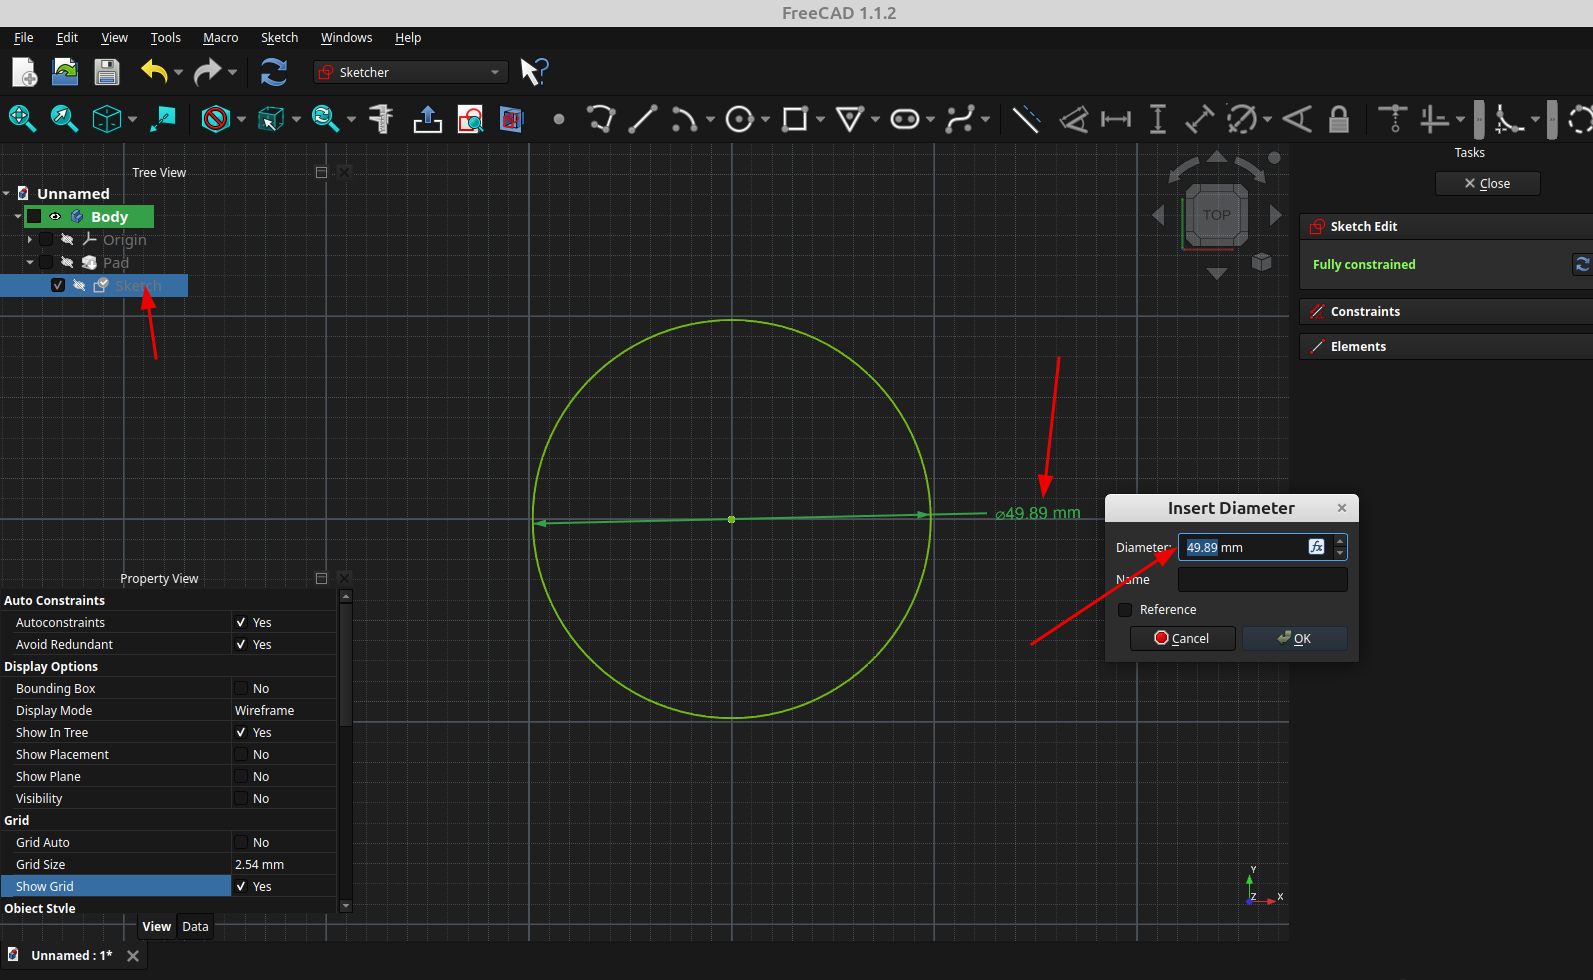
you will notice the "sketch" used to make the pad is directly under it, double click on it and it will take you to the sketcher so you can change things if necessary, here I double clicked on it in the tree then double clicked on the dimension and changed it
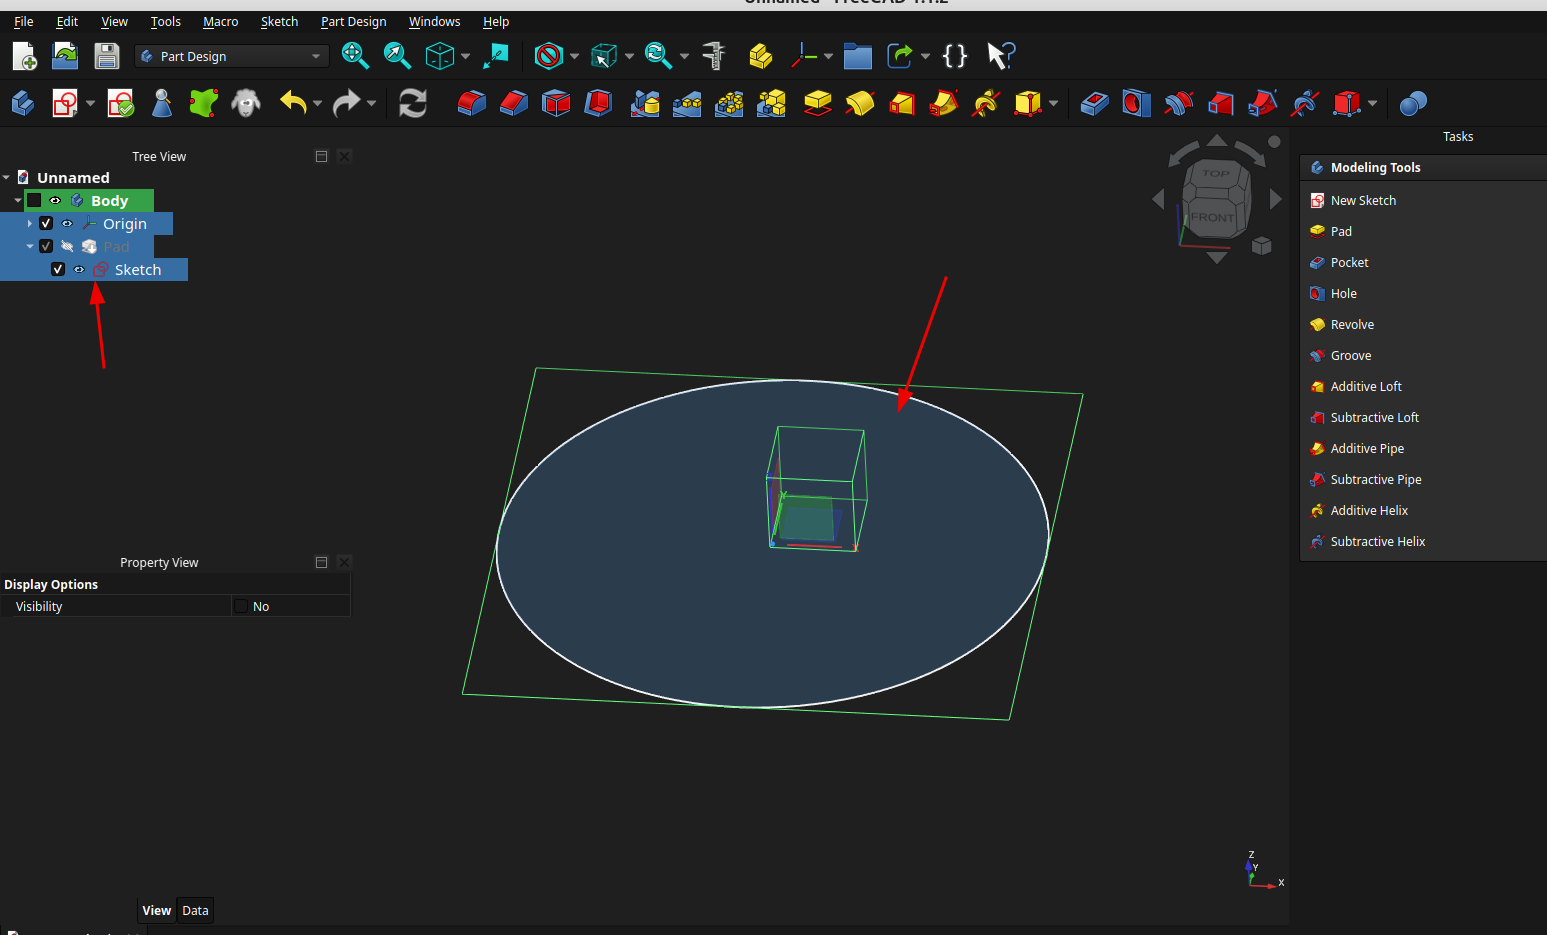
By holding down "control" on the keyboard you can select multiple items in the tree then use the space bar to show or hide them:
Here I selected the pad in the tree, used the space bar to make it visible, hovered my mouse over a line in the pad, held down control and selected it (highlighted green) then selected fillet:
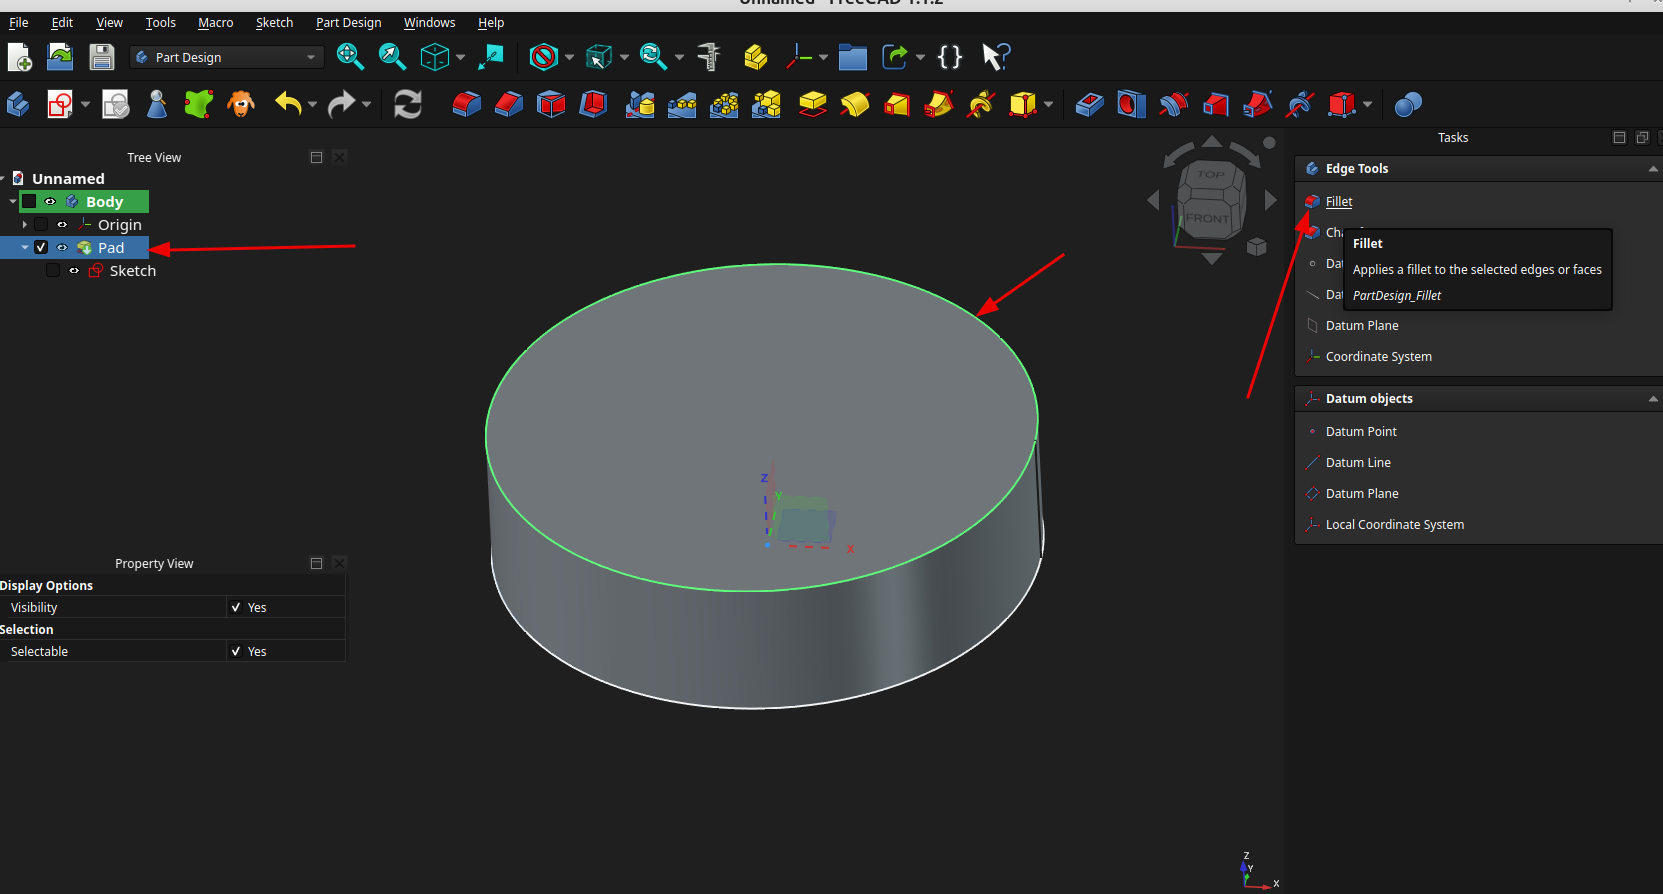
then I changed the fillet parameters:
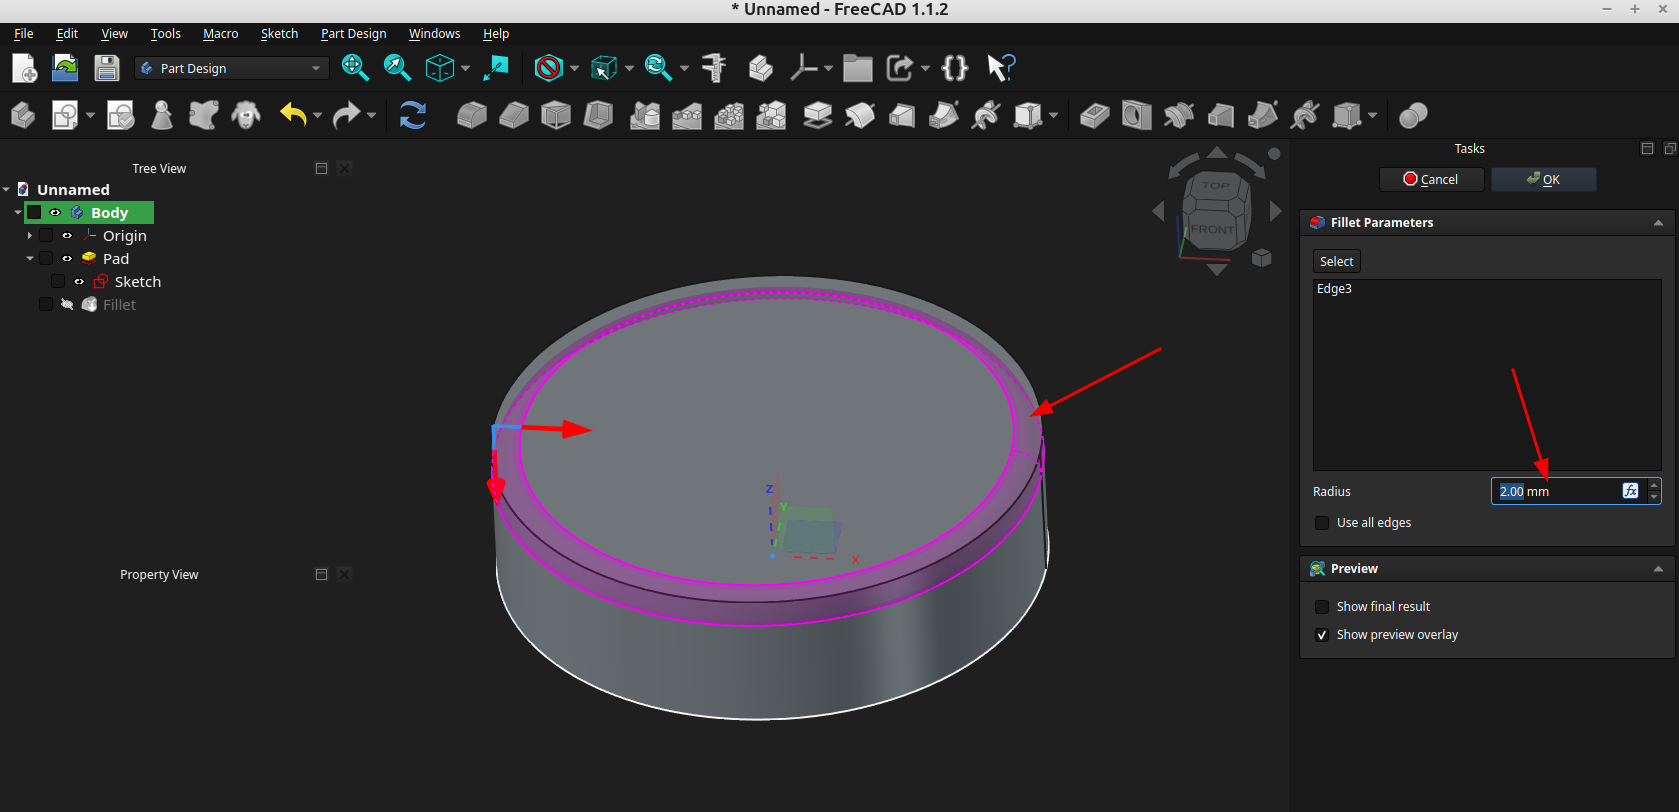
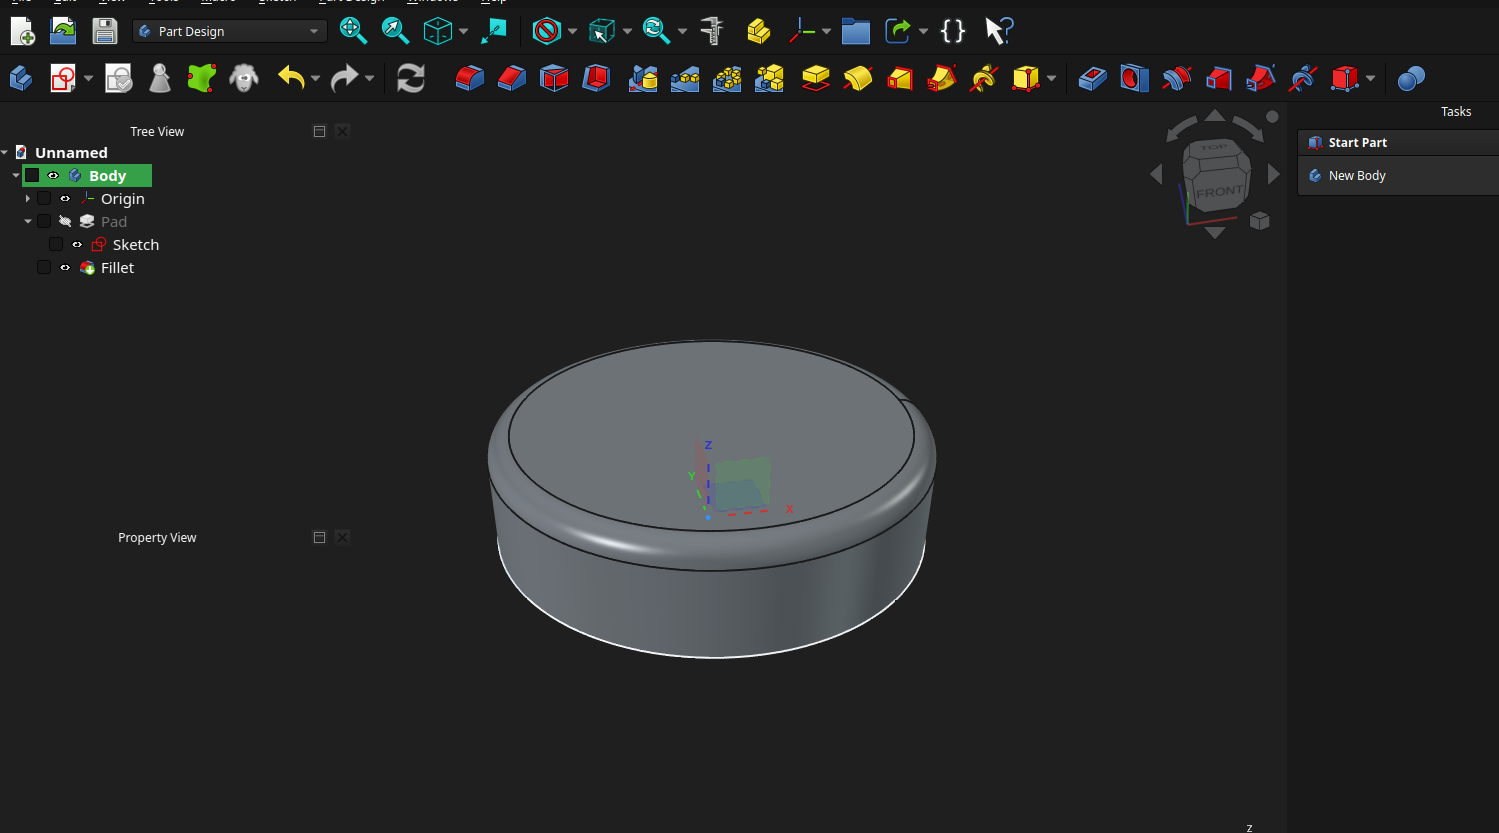
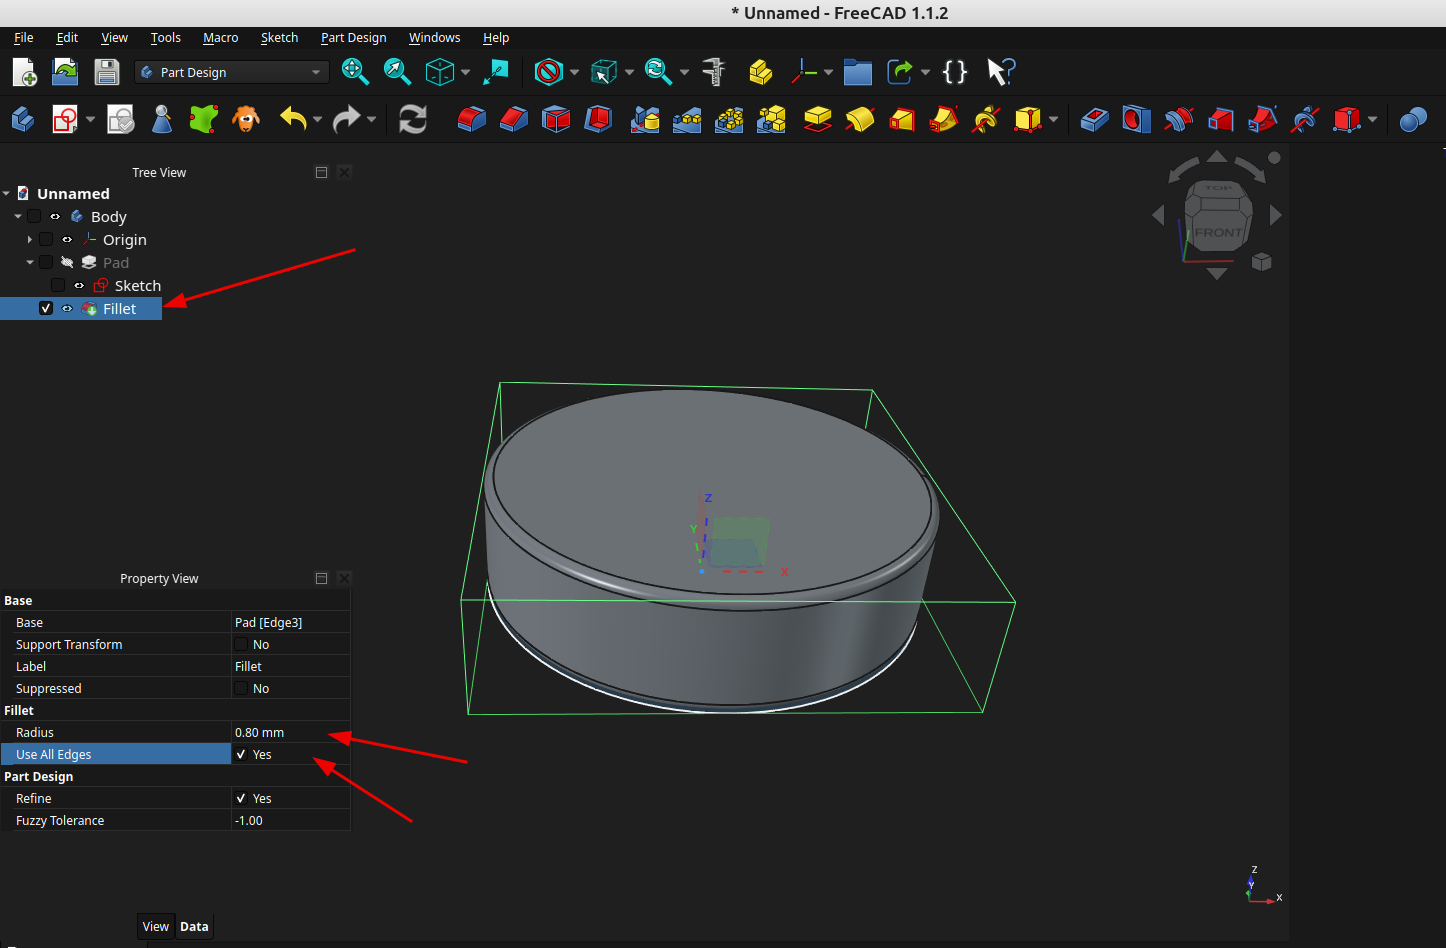
to change the fillet I selected it in the tree, then used the property view to change it's properties:
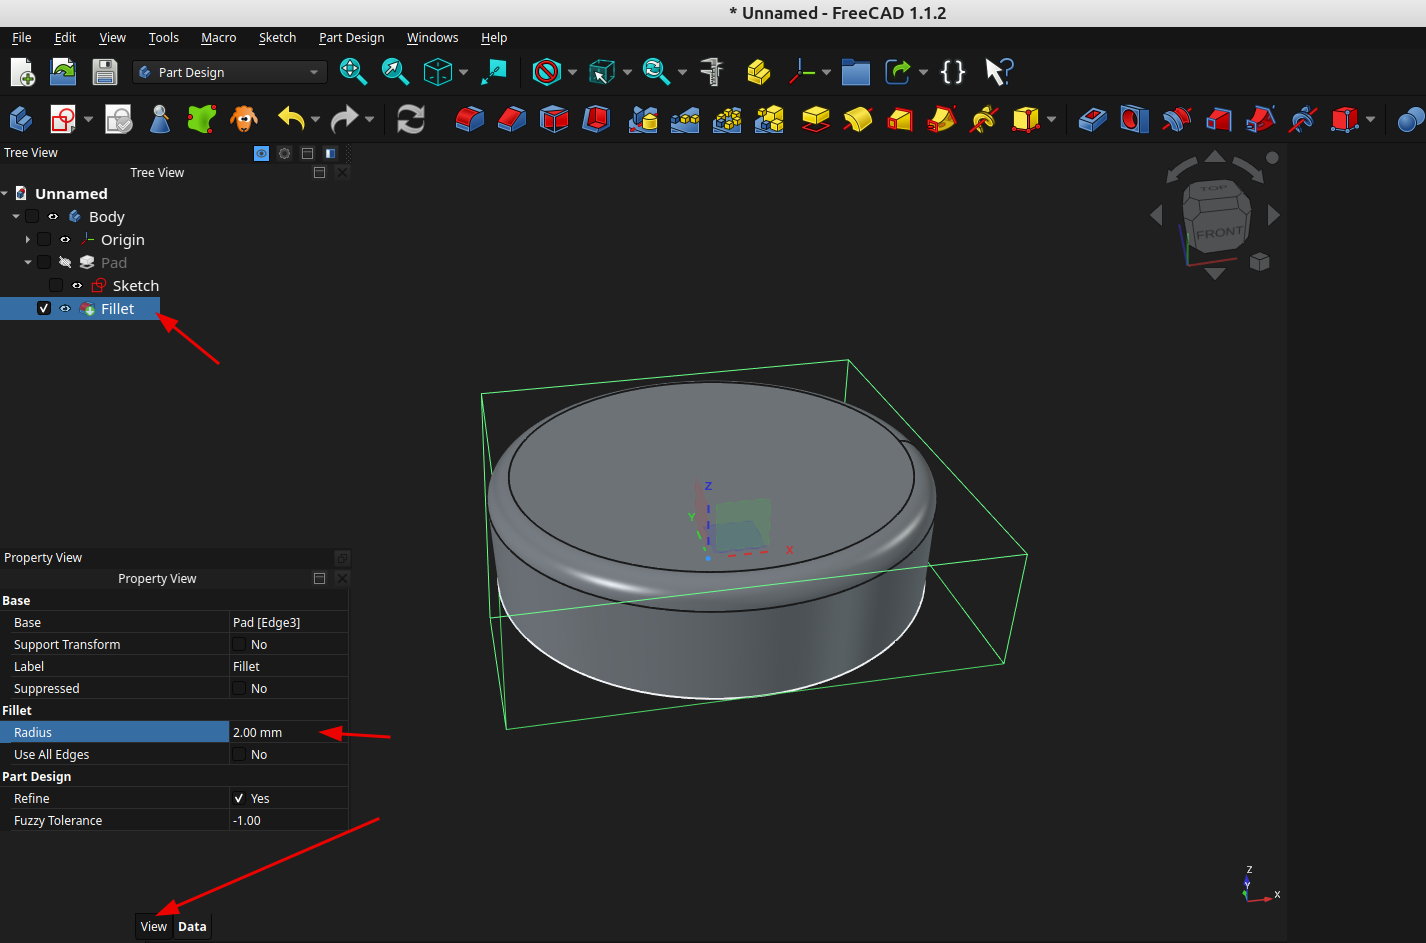
you can also specify if you want the fillet on all edges:
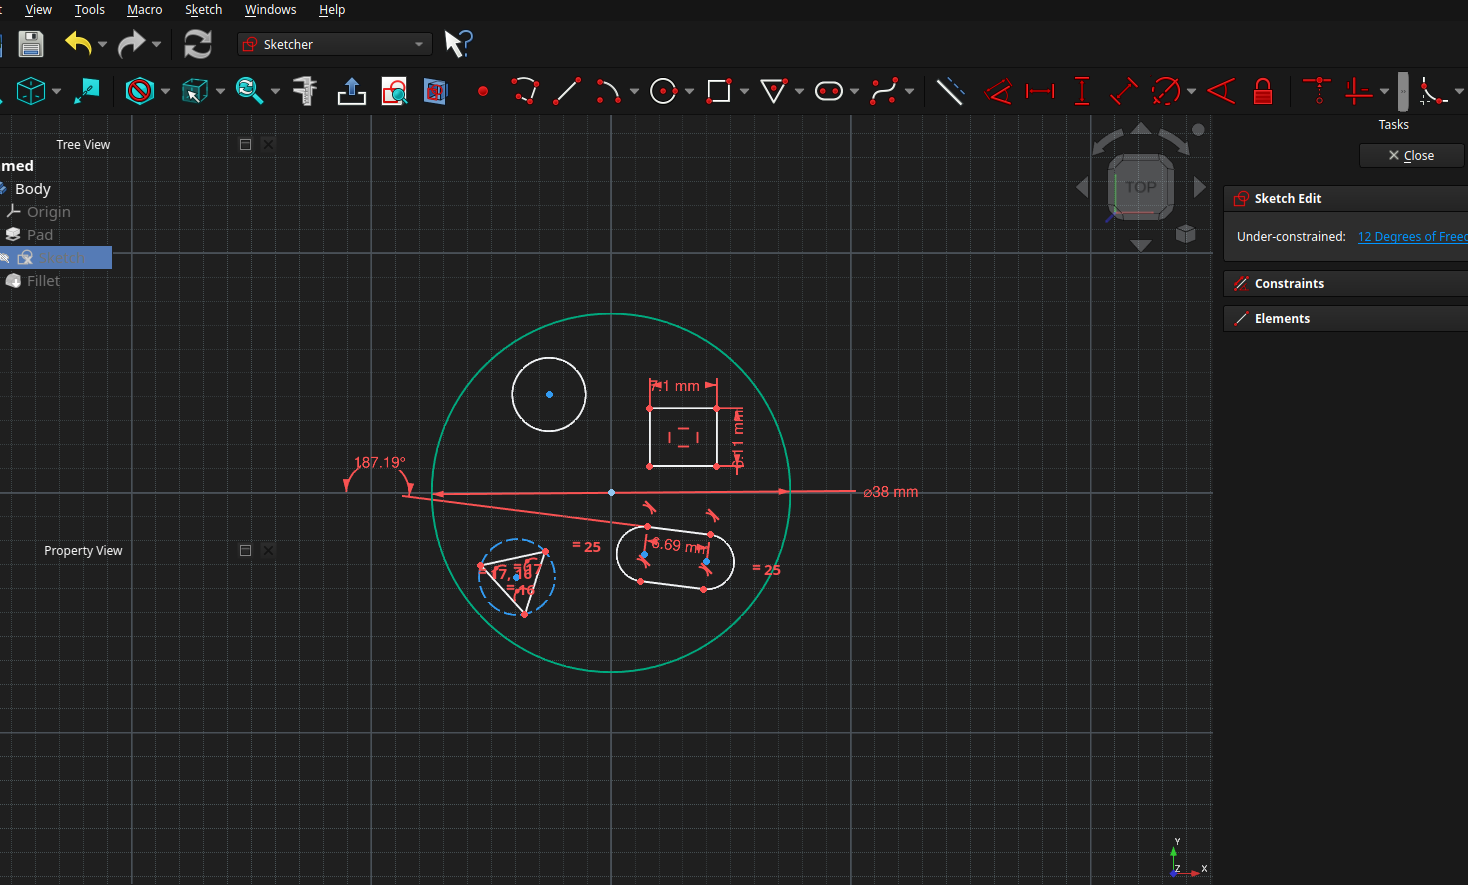
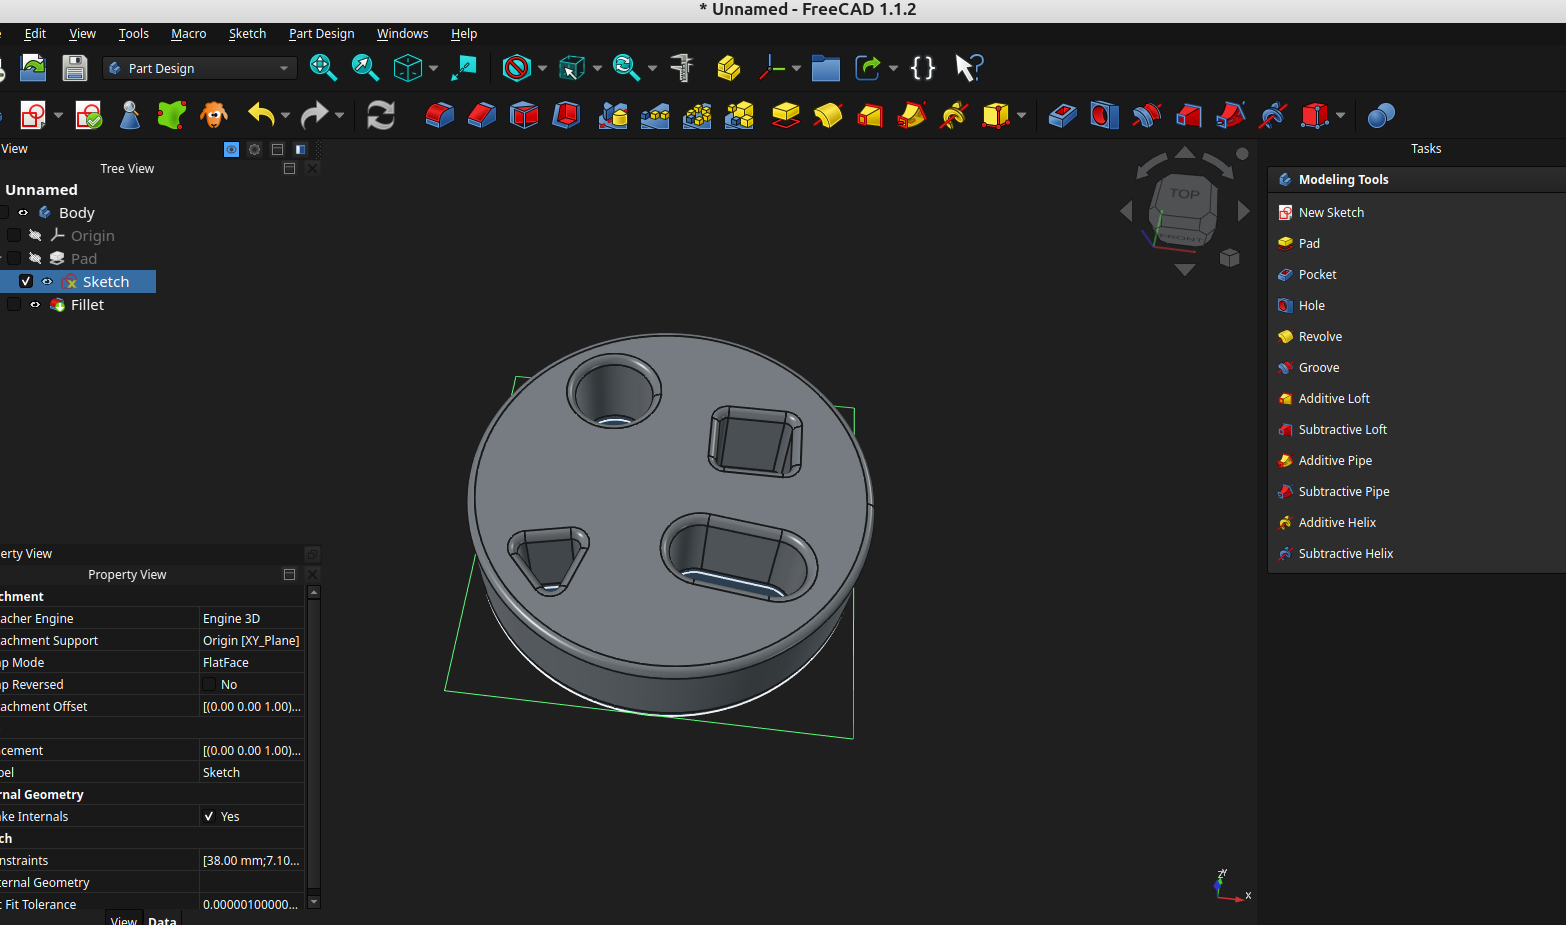
to add elements to a sketch just double click on the specific sketch in the tree and draw your new item, note if you add it your original sketch Freecad will automatically make it a hole, I am going to make another post on adding multiple sketches and attaching sketches to a certain face, pockets etc.
In summary some of the "hidden" features covered in this post that make workflow so much easier in Freecad are:
Selecting the dot in the middle of the plane or clicking on the center line in the X or Y axis of the sketcher opens and closes the properties dialog, double clicking on an item in the tree will either open the workbench so it can be edited or it will allow you to move the object if you are already in the workbench, using the space bar will allow you to show or hide items in the tree, using control you can select multiple items in the tree or specific faces or lines.
Hopefully this will help someone who is asking the question "where do I even start?"
In the next post I'm going to cover the basics of how to configure the GUI so it works the way you want it to and how to arrange things so they are easy to find.