3d Part design with Inkscape and OpenScad part 14: Picture to project case
In this next example I will use Inkscape and Openscad to make a case for a raspberry pi zero.
First I took a picture of the board, I printed out some graph paper and used cups to set my phone camera on so I could get a picture that was as straight as possible, it was still a little off but I was able to rotate it to fix that:
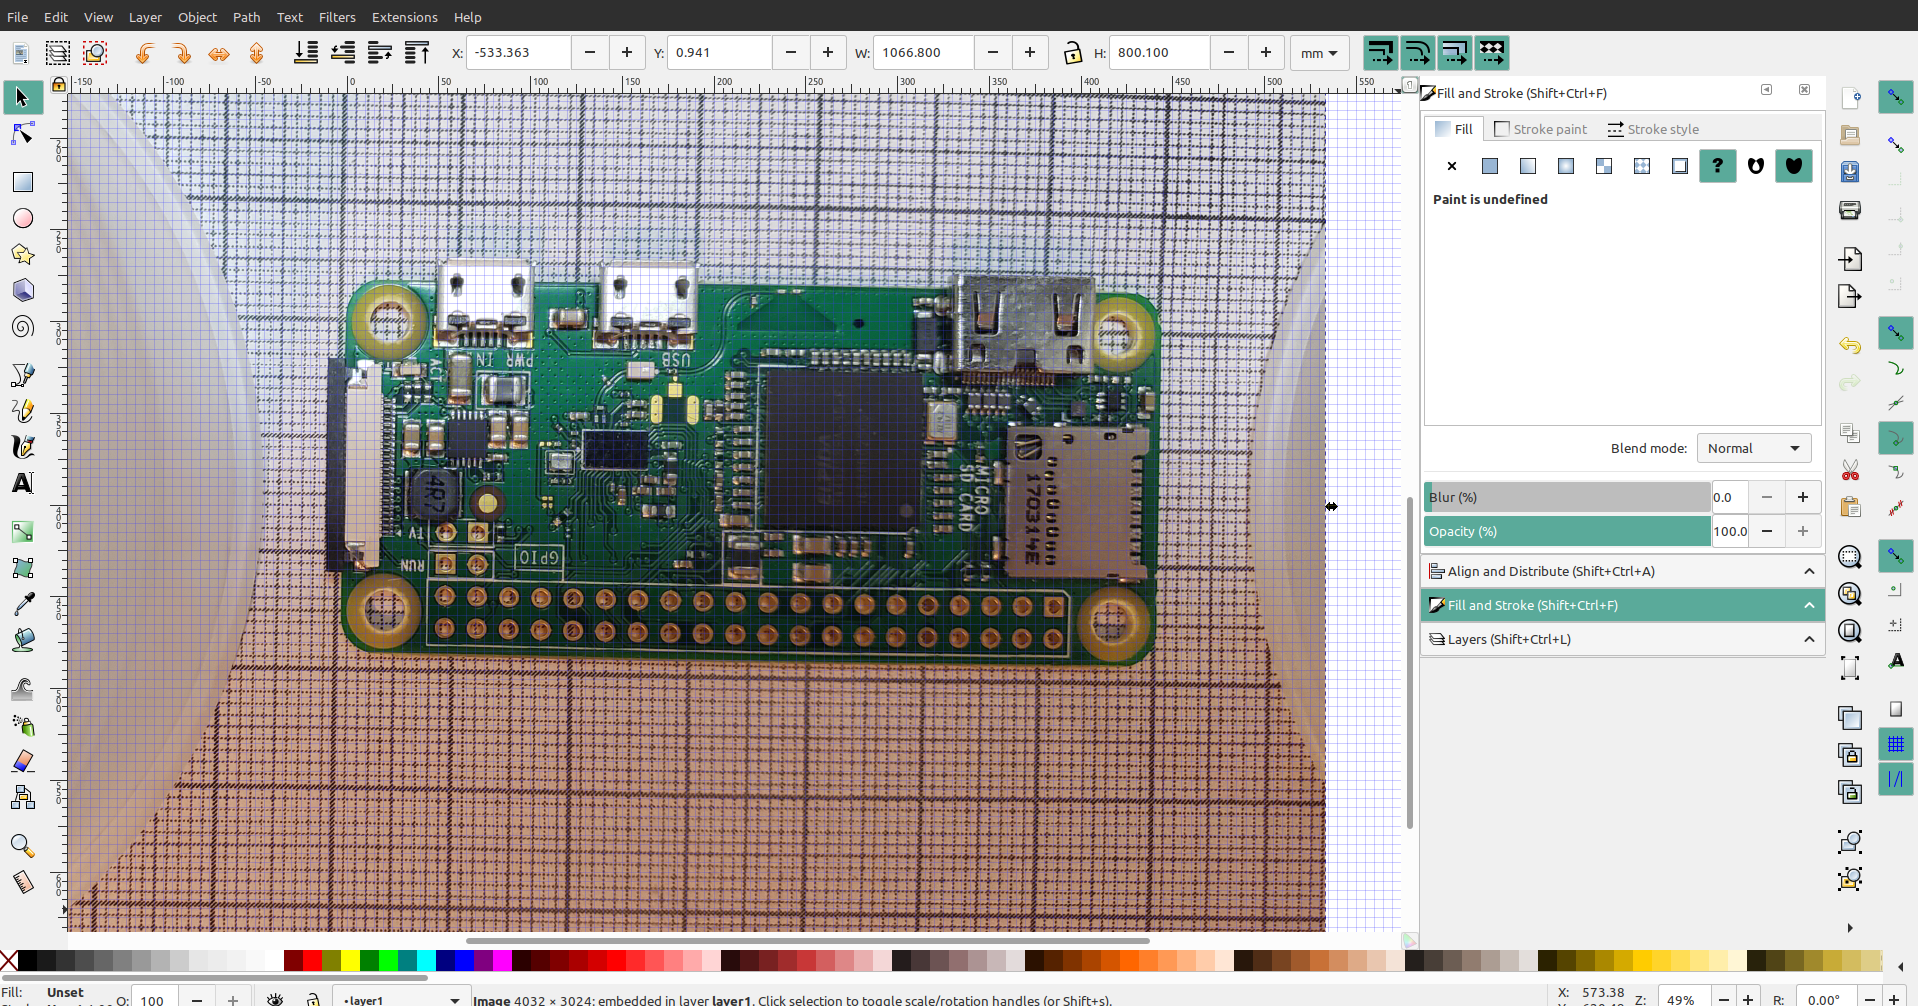
Next I imported the picture into Inkscape and cropped out everything but the board, to do this you make an outline around the object then go to Object>Clip>set:
I resized the image to the right dimensions. I used calipers but there is a spec sheet on the raspberry pi website: https://www.raspberrypi.org/documentation/hardware/raspberrypi/mechanical/README.md
Next I moved the image of the board to it's own layer and locked it so it wouldn't move around:
Then I started making the layers for the project starting with the base layer:
I set the opacity of the board layer so I could see where I was placing new objects and where to make holes better, if you are new to Inkscape you make holes in an object by selecting the object you want to make the hole with, hold down shift and click on the object you want to make a hole in, and then goto Path>Difference:

The next layer is going to be the walls of the case, I made a line and everywhere I needed an opening I made an object that size and then used Path>difference to make a gap:
You'll notice that I forgot to make an opening for the usb port, luckily it is easy to go back and fix. On the next layer I made a top for the case:

I'm using different colors for the different layers so it's easier to see each one, I added another layer to make rim on the top and four mounts for screws:
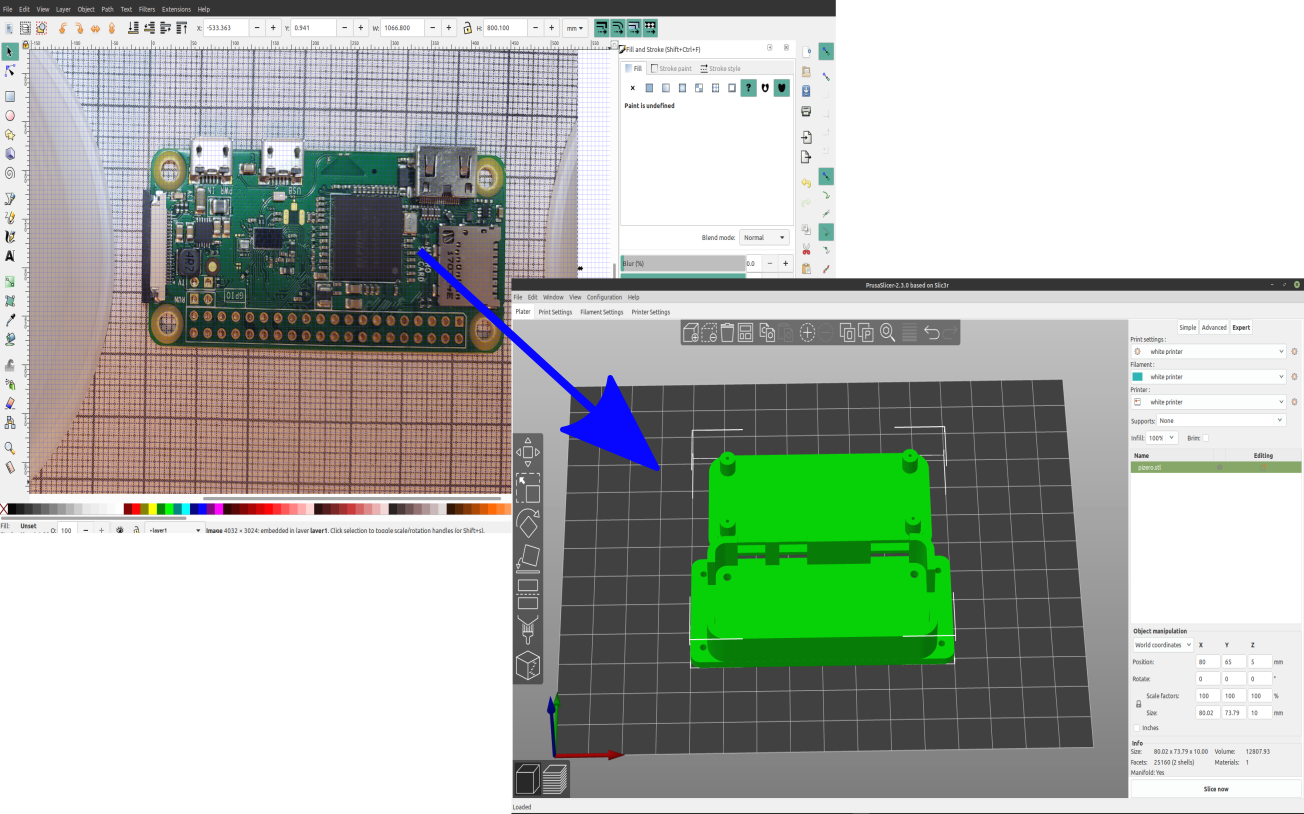
I moved layer 3,4 and five to the side and made sure that all of the layers were converted to paths and lines, exported to dxf, loaded it into openscad and extruded each layer to the height I wanted :
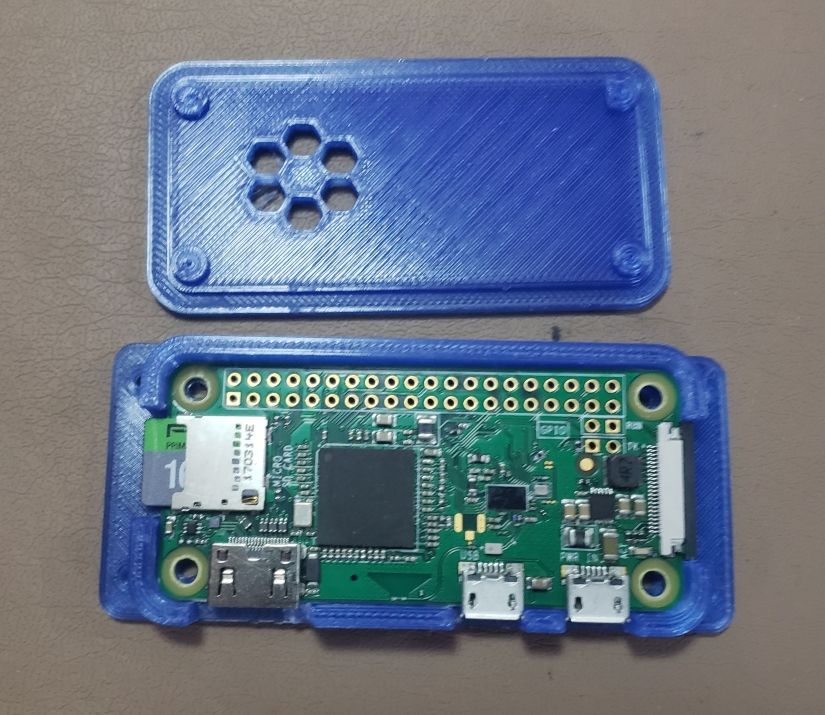
Now the case is ready to be sliced and printed.