Pvc 3D Printer Build guide part 1
Introduction:
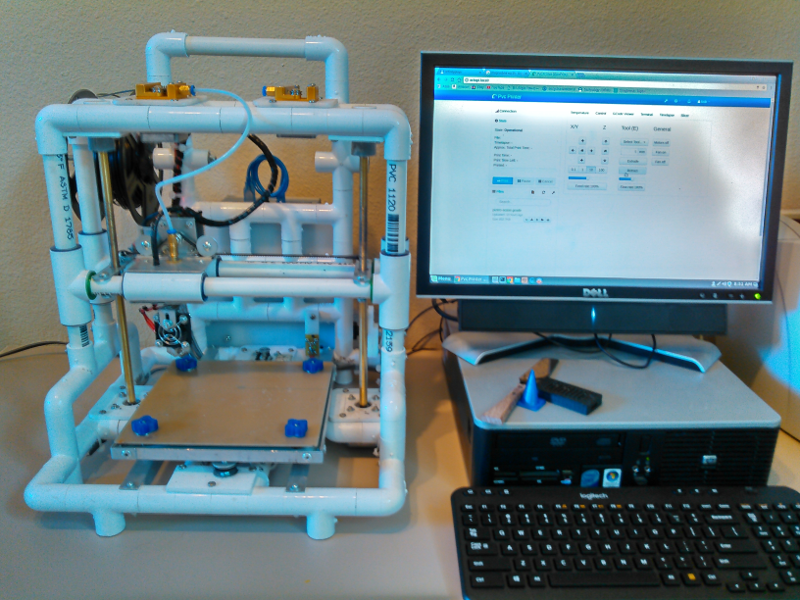
Welcome to the open source project page for an easy to build 3d printer that just about anyone with any skill level can make. My goal when I started this project was to build an inexpensive printer with parts that you can buy locally, are simple to assemble, and durable.
This project is for anyone that wants a 3d printer, or a second printer but can't afford the high cost of a commercial one. This design is low cost, expandable, wireless, open source, and very easy to build.
Frequently asked questions:
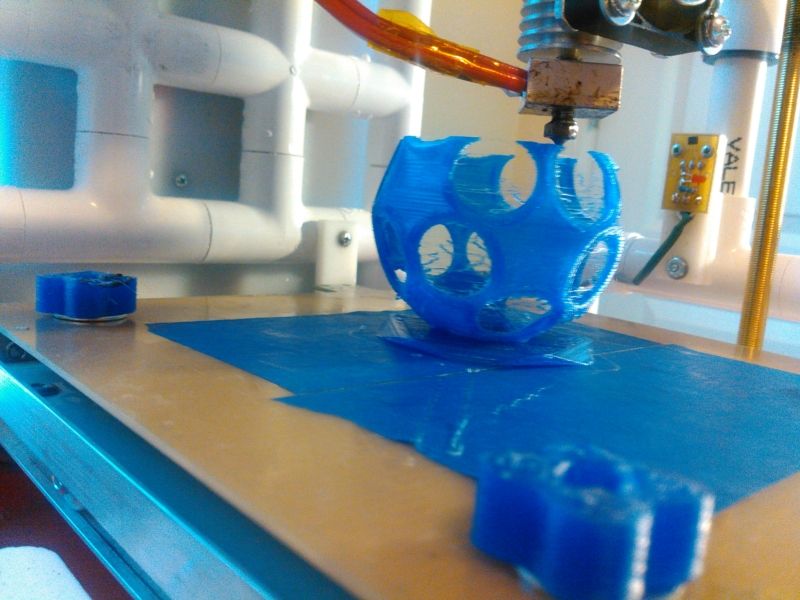
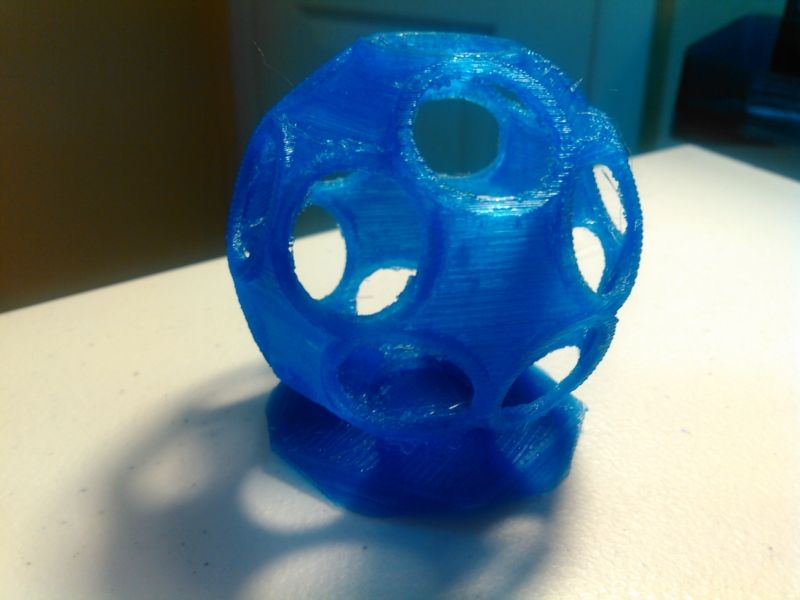
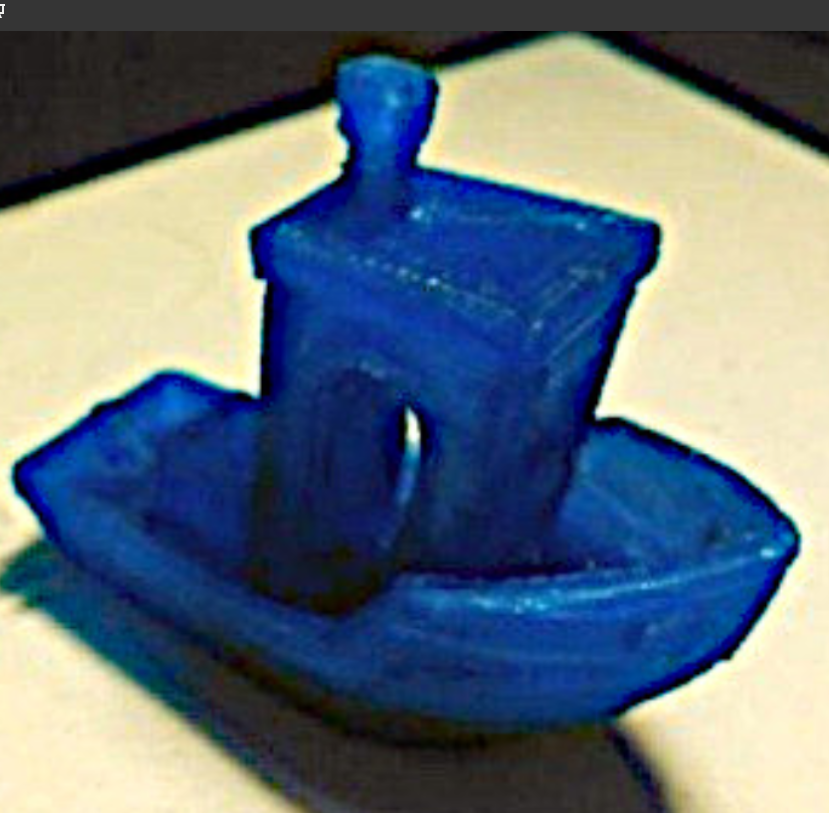
Q: How good is the print quality?
A: Surprisingly good, the frame is solid and the repeatability is excellent:
(Slic3r, .2mm layer height,no retraction)
Q: What is the build size?
A: I built this printer to fit on a cart I have and the build size is 6" x 6" x 6" by adding fittings I would suppose you could make it whatever size you wanted.
Q: How much does this cost?
A: Right at $150.00 including the raspberry pi which isn't necessary unless you want your printer to be wireless.
Q: Is the pvc strong enough? does it bend?
A: Yes it is plenty strong, bending is minimal and doesn't effect the print quality, it can be reinforced if necessary for longer lengths.
Q: What about the heat? Isn't pvc dangerous?
A: Pvc has flameproof properties and is actually far less flammable than wood, it is used all over the place in houses...like siding and plumbing. A careful design assures none of the heat producing parts of the printer are close to the pvc. A home made 3d printer should never be left unattended > use common sense
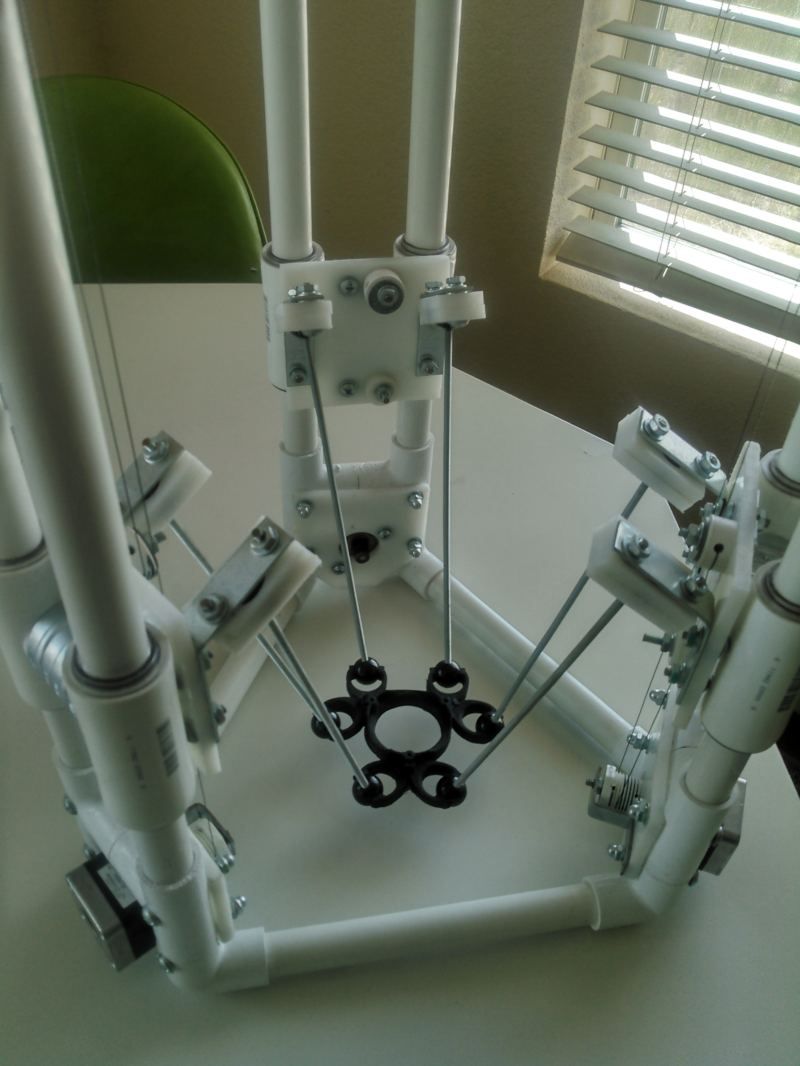
>> Step one: assembling the frame<<
Important:
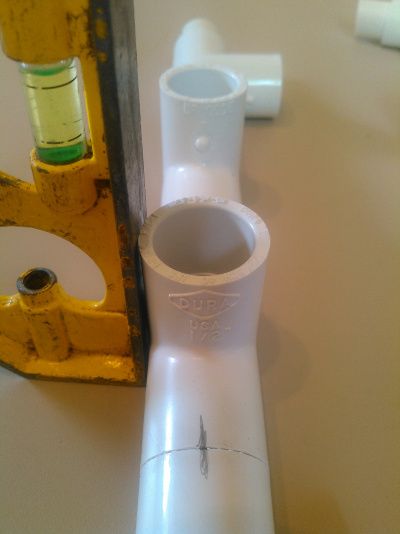
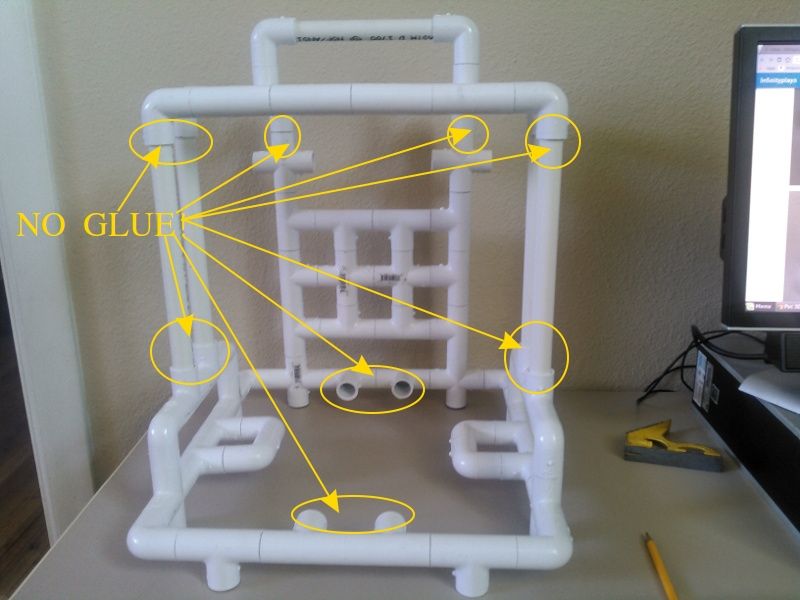
- Assemble the entire frame and Do not glue any of the parts together until you have dry fit them and made sure they are how you want them, once the glue is applied it will be too late to make any changes, it sets up in seconds.
- Use parts from the same manufacturer if possible, if not they won't line up properly
- Make sure parts are square with one another and lay flat, the more precise the frame is the easier it will be to calibrate.
- Use caution/ wear gloves when cutting the pipe,and work outside or in a well ventilated area when gluing the parts together.
- Have fun and feel free to make this design better in any way you feel fit, and we would appreciate it if you would share your ideas with the community :)
Parts you will need for the frame:
(32) 1/2" Pvc Tees
http://www.homedepot.com/p/Charlotte-Pipe-1-2-in-PVC-Sch-40-S-x-S-x-S-Tee-10-Pack-PVC024000610HD/204960534
(18) 1/2" Pvc 90s
http://www.homedepot.com/p/DURA-1-2-in-Schedule-40-PVC-90-Degree-Elbow-C406-005/100344810
(12) 1/2" Pvc crosses
http://www.homedepot.com/p/DURA-1-2-in-Schedule-40-PVC-Cross-C420-005/100347454
(8) 3/4" pvc tees
http://www.homedepot.com/p/DURA-3-4-in-Schedule-40-PVC-Tee-C401-007/100343610
(4) pieces of 1/2" pipe 10 3/8" long for the z axis slides
http://www.homedepot.com/p/VPC-1-2-in-x-2-ft-PVC-Sch-40-Pipe-22015/202300504 (note: the two foot lengths of pvc are straighter than the 10 foot pieces
(1) piece of 1/2" pipe 7 3/8" long for the top handle
(2) pieces of 1/2" pipe 12 1/2" long for the y axis slides
(2) pieces of 1/2" pipe 13" long for the x axis slides
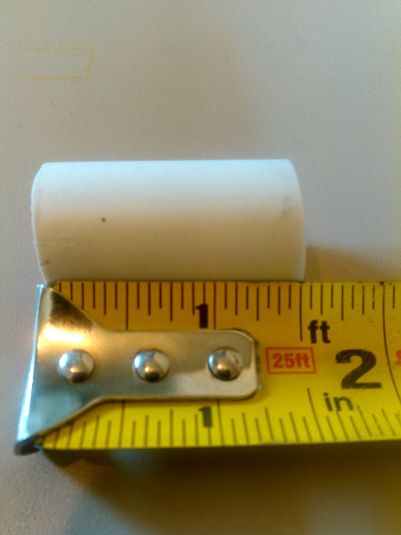
(72) pieces of 1/2" pipe 1 1/2" long:
Begin assembling the frame, an easy way to make sure everything lines up properly is to use a square and mark the fittings with a pencil, this way when you are ready to glue the parts together they will be easy to align:
Work on a solid flat surface, making sure all of the fittings lay flat:
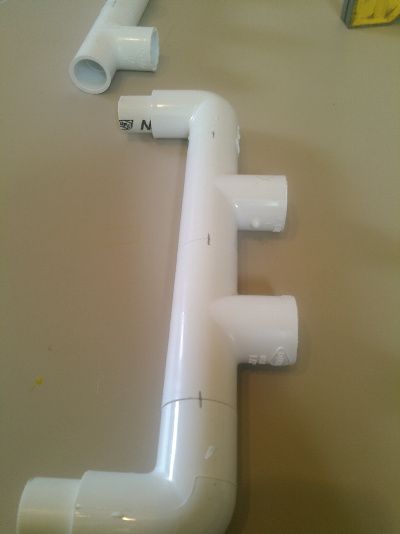
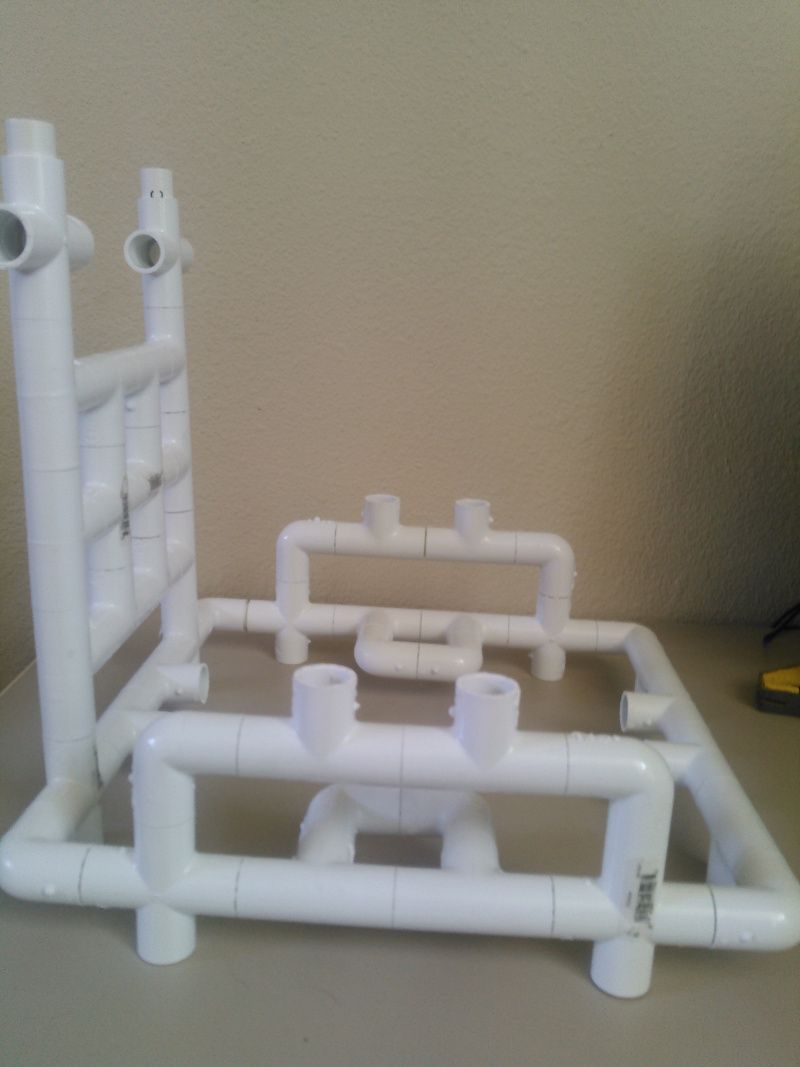
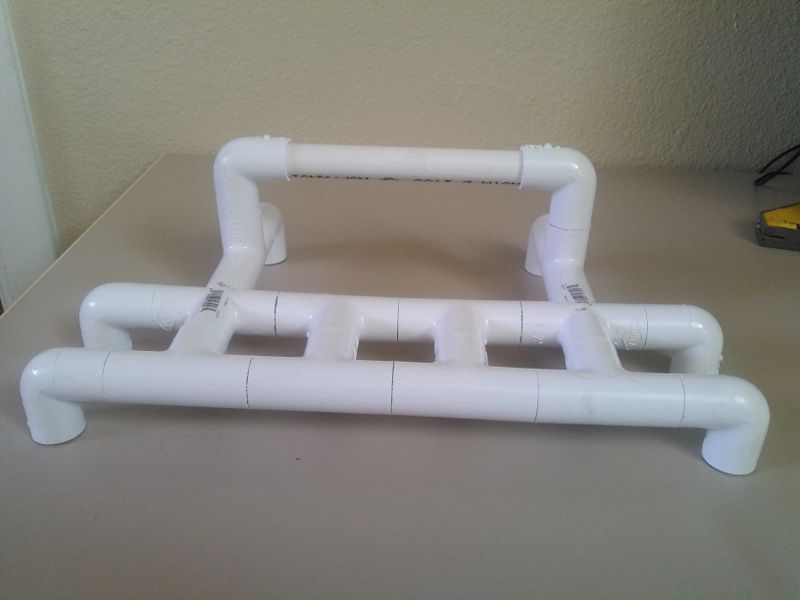
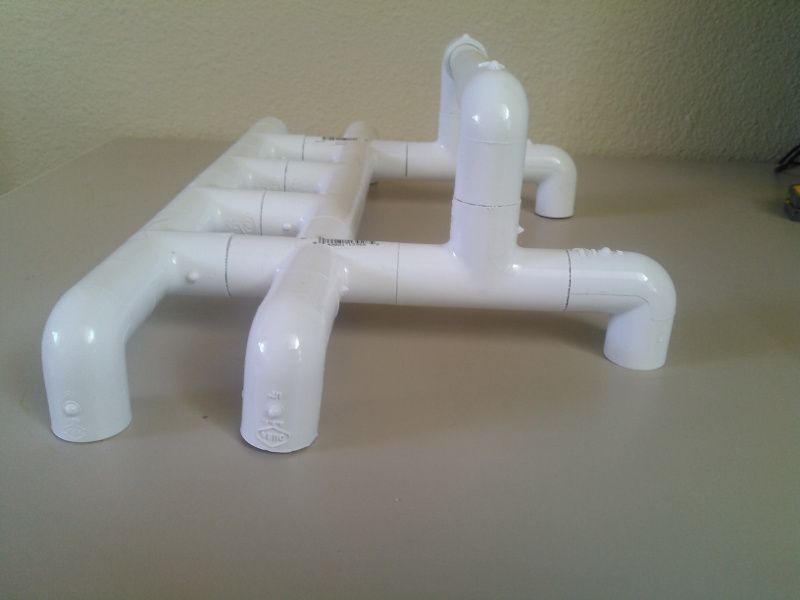
The bottom and top half of the frame are separate so you can disassemble the printer to replace any parts if they get worn, all of the bottom fittings are glued together to make one piece, here are pictures of the assembled bottom half dry fit and ready to glue together:
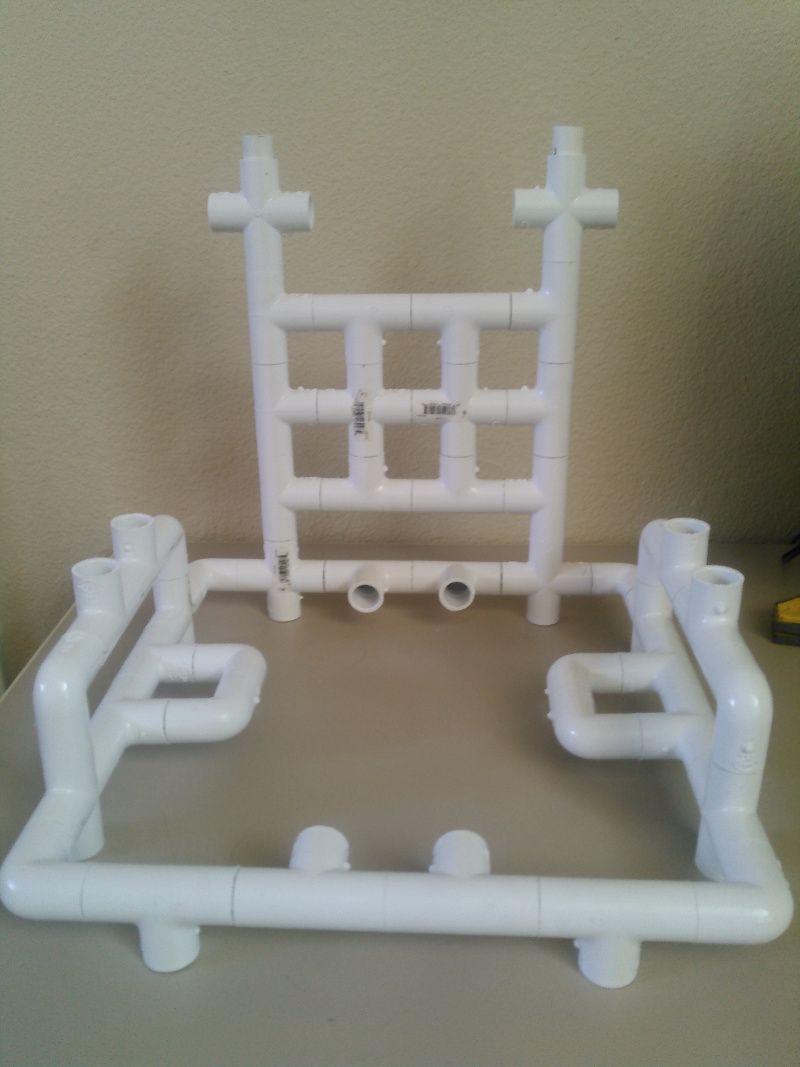
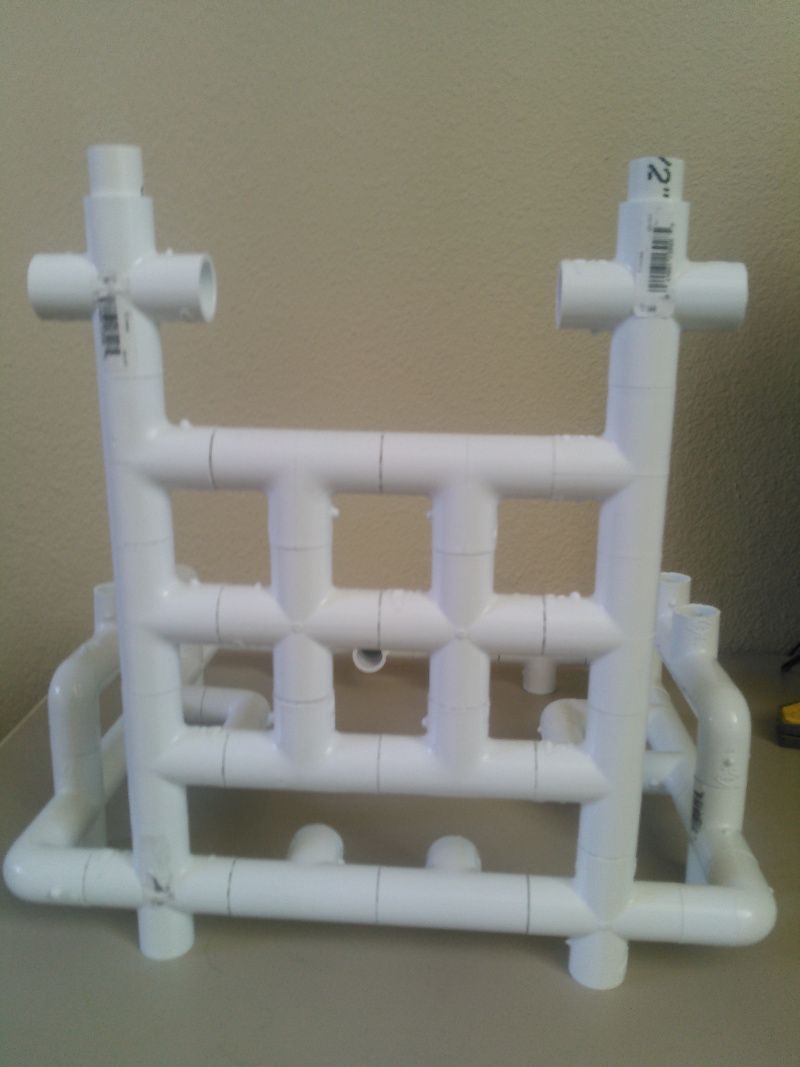
And the top section:
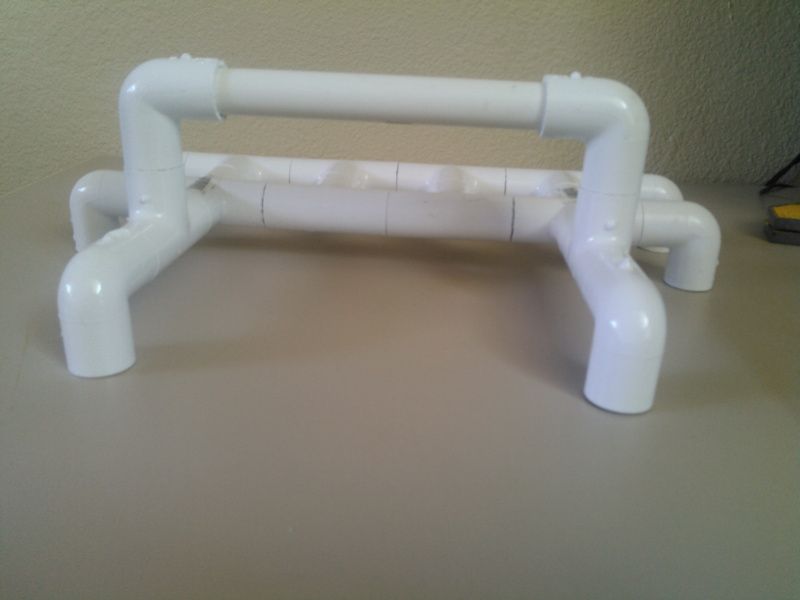
None of the pipes for the slides get glued, they are held in place with screws so the printer can be taken apart to replace them if they wear out, additionally the top section is held on to the bottom section with screws.
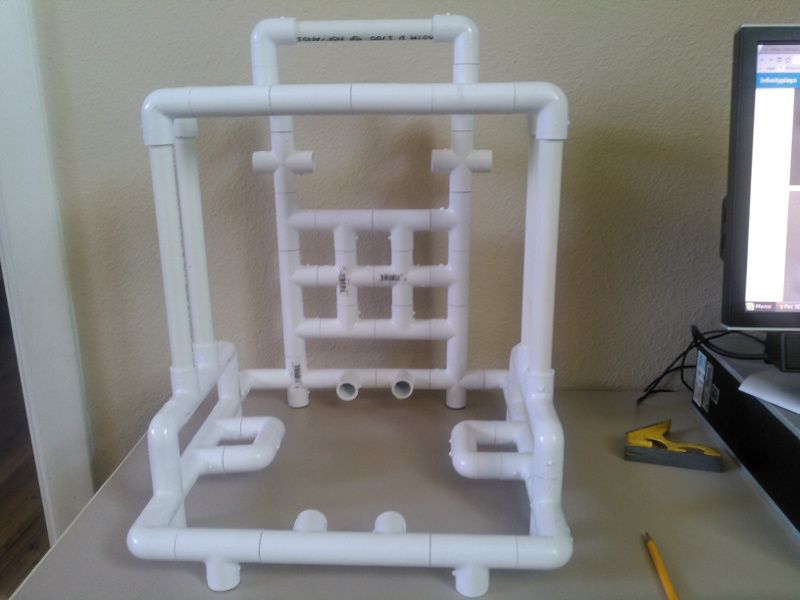
Full frame with all the pieces cut ready to be glued together:
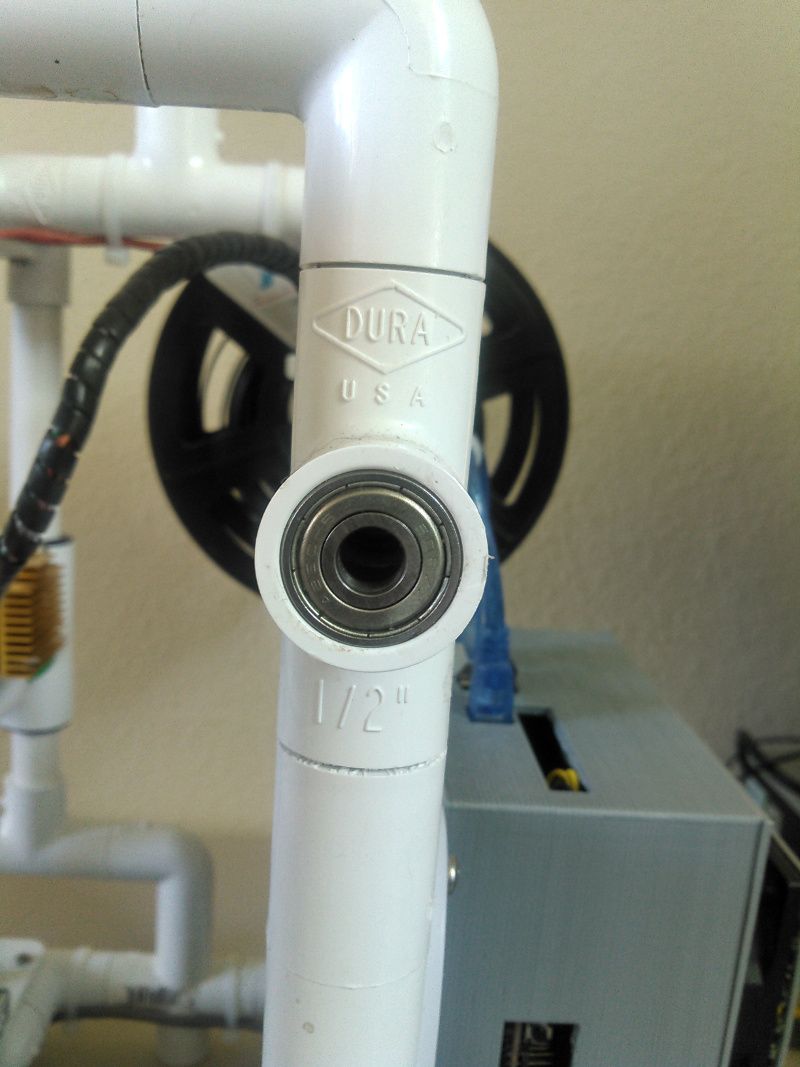
The spool holders have two 608xx bearings that are gently tapped into the crosses on the back of the frame, if they aren't going in very easily the crosses can be dipped in a pot of boiling water for about 30 seconds which will soften them and they should slip right in, I just used a rubber mallet and gently tapped them in with no problems.
and the zaxis lamp rods have a bearing at the top that is inside a 1/2" pvc male adapter:
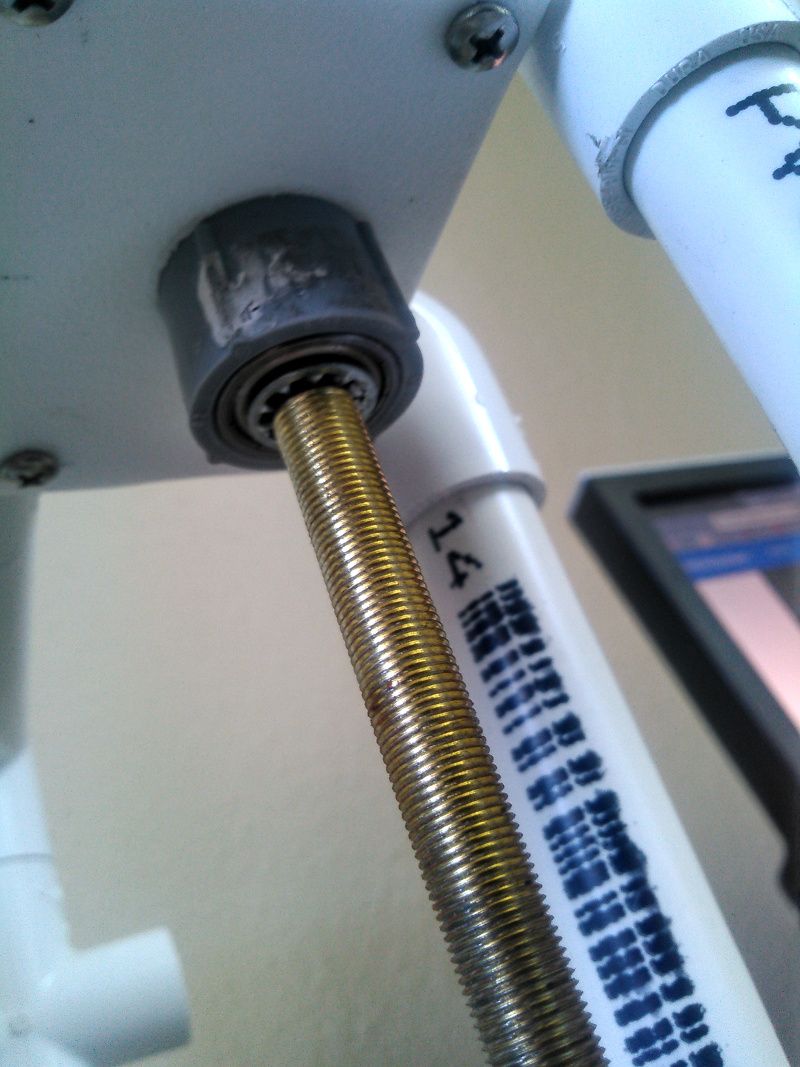
That black stuff on the lamp rod is actually grease not wear, I didn't realize that they are coated with zinc which is used as a lubricant, most likely the rods will not need any lubrication at all, it just makes them dirty.
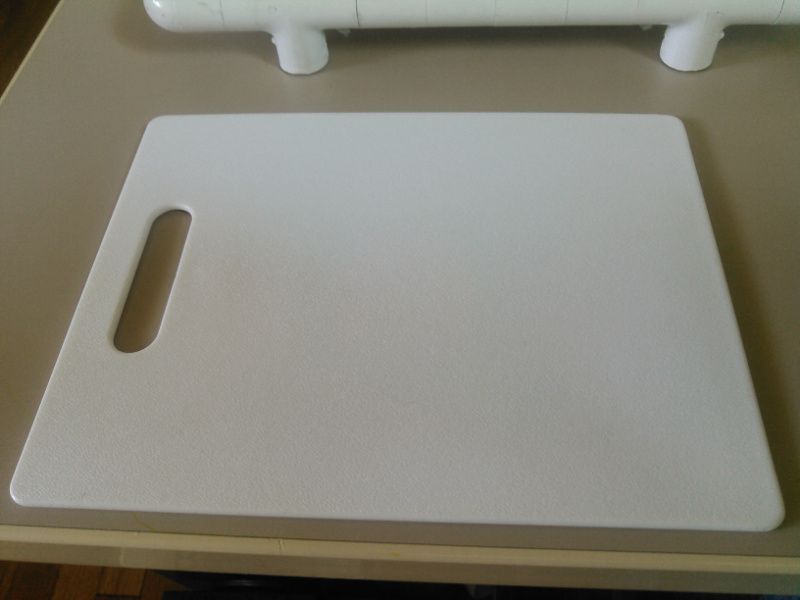
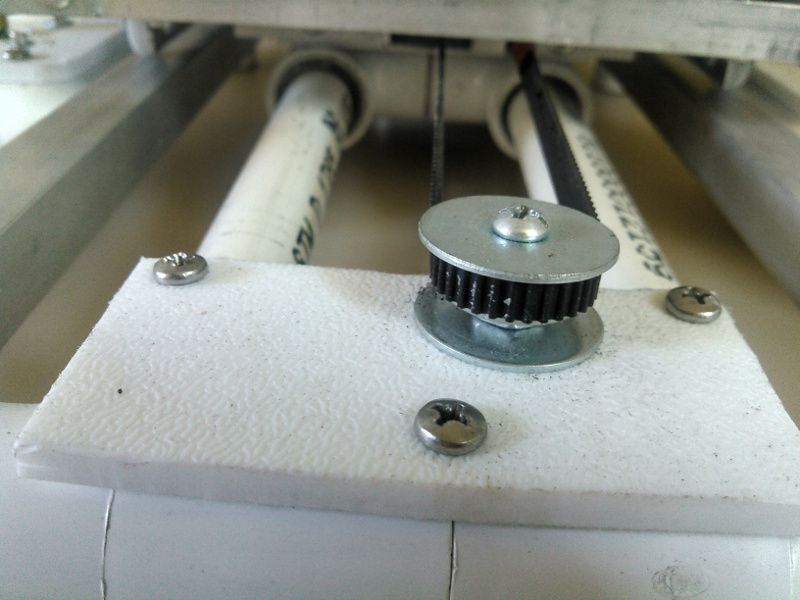
The motor mounts, back plate for the electronics and mounts for the idler and z axis bearings are made out of a dollar store cutting board (hdpe) cut to the right size and holes drilled for the screws and attached to the pvc frame with some #8 sheet metal screws
http://www.homedepot.com/p/Crown-Bolt-8-1-2-in-Phillips-Pan-Head-Sheet-Metal-Screws-100-Pack-24762/100349331

The idler is a shower door roller in between two washers and fastened to the mount with a 6-32 by 1 1/2" bolt
http://www.homedepot.com/p/Prime-Line-3-4-in-and-7-8-in-Round-Tub-Roller-Kit-M-6201/100237765
That's it for part 1 of the build tutorial, part 2 and 3 will be posted shortly and I will go through making the slides, the hot end and the electronics.